- Comments (0)
- Jan 13, 2013
How to Make Simple DIY Leather Cord Bracelet in 3 Steps by Your Own
Summary: Love leather cord bracelets? Wanna make one by your own? Here is a tutorial about making leather cord bracelet in only 3 steps. Everyone can do it! Enjoy!!

If you love leather cord jewelry pieces but never tried them before, this simple leather cord bracelet should be just wonderful for you beginners. In the following, I will show you the easiest but also most creative leather cord bracelet making steps and hope you will enjoy it!
Materials needed for making simple leather cord bracelet:
1mm nylon thread
Leather cord
Large hole bead (any shape)
Scissors

How to make DIY leather cord bracelet?

Step1: Prepare the leather cord and nylon threads
1st, get one 50~60cm long leather cord and fold it from half. Or you can adjust the length according to your personal wrist size;
2nd, you will need another two strands of 100cm long 1mm nylon thread;
3rd, tie the 1mm nylon thread around the leather cord with a knot to form a loop (the size may depends on the size of bead serviced as closure).
Step2: Wrap the leather cord bracelet
1st, wrap around both ends a few times. Do not forget to tuck the thread end tips;
2nd, wrap the two leather cord end alternately in a figure "8" pattern.
Step3: Finish the simple DIY leather cord bracelet
1st, when leather cord bracelet reaches an ideal length, stop wrapping the figure-8 pattern and repeat that procedure at beginning;
2nd, slid on the bead and fix it with a knot;
3rd, trim the extra thread and leather cord ends, and then your DIY leather cord bracelet has been done!
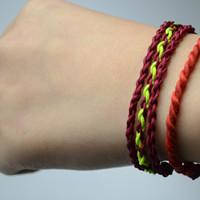
Found this leather cord bracelet neat but easy? Just move your hands and try more color collocations. Stack up all the bracelets for an extra effect! For more fancy tutorials on making leather cord bracelets, please stay tuned.