- Comments (1)
- Sep 03, 2013
Step by Step Instruction on How to Do an Adjustable Slip Knot Friendship Bracelet
Summary: Follow these step-by-step instructions below to create a super easy adjustable slip knot friendship bracelet. Only two basic knot tying techniques and 15 minutes are required!

As a symbol of loyalty and kindness between friends, easy friendship bracelets have been exchanged between young girls for decades. In today's tutorial, we will show you an adjustable slip knot friendship bracelet step by step. It's easy and only need two basic knots to process.
Supplies for making slip knot friendship bracelet:
1mm Nylon Thread
6mm Abacus Glass Bead
Lighter
Scissors

Instructions for making slip knot friendship bracelet:
Step1: cut 4 strands (Magenta*2, Purple *2) of 1mm nylon thread, each about 50cm long;
Step2: separate the two colors. Tie the first snake knot at 7cm from the starting to hold the two groups in a bunch;

Step3: tie 4-5 snake knots with the magenta and the purple cords. And then repeat the snake knot in step 2;

Step4: do steps 3 for another 4 times until you reach the ideal length for your friendship bracelet;

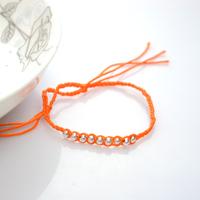
Step5: pick out two cords (in different colors) at the two ends and overlap them as picture shows. Take a 15cm long strand of the nylon thread and create a slip knot closure consisting of 6 square knots. Trim off the excess and melt the cuts slightly with lighter;

Step6: keep 3-4 cm at each end and cut off the excess. Slide one 6mm abacus bead on the cords two by two and finally secure with an overhand knot.

Done!

Just be creative and enjoy yourself while learning this silp knot friendship bracelet. The only key is to experiment with different easy friendship bracelet patterns until you master the skills with great ease. Any necessary supplies and knot tying techniques can be found in our web store at Pandahall.com! Nice try!

Comments (1)
-

-
Dec 22, 2013 at 06:21 PM Mary Chemin
sooo easy, love it!


