- Comments (0)
- Jul 07, 2013
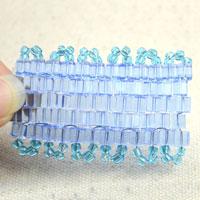
Straight fringes - basic bead fringe
Summary: A straight fringe can make your beadwork more beautiful. And with this fringe, it’ll never be boring!
Instructions:
Step 1: Create your beaded item.
1st, for your beadwork, use a basic peyote stitch;
2nd, if necessary, weave your wire through the stitches until your reach your desired starting point for the fringe.

Step 2: Start the fringe.
1st, create the first column of the fringe by sliding 10 beads onto the wire;
2nd, pass the wire back through the beads strung except the last one to create an anchor;
3rd, continue to pass through the adjacent bead in the original beadwork;
4th, pull the wire tightly.

Step 3: Continue the straight fringe.
1st, pass the wire through the next bead in the original beadwork and loop it through the next bead to its right;
2nd, repeat step 2;
3rd, continue repeating step 2 until the desired amount of the straight fringe has been created;
4th, pass the wire through the bead above in the second row.

Step 4: Make a second row of straight fringe.
1st, exit through the next bead over;
2nd, repeat steps 2 and 3 making sure that you weave the wire throught the second row when creating the fringe;
3rd , exit the wire through the next bead over.

Step 5: Weave the wire back through the beadwork until you reach an edge.

Step 6: Cut off the extra wire.

Now that you have mastered this technique, use it as decoration to any stitch!