- Comments (0)
- Jul 07, 2013
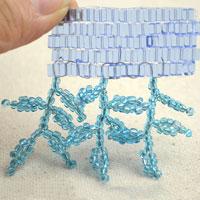
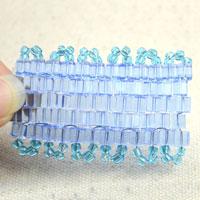
Looped fringe - add a decorative fringe to any stitch
Summary: A looped fringe is very special and useful because it makes your beaded articles more attractive.
Instructions:
Step 1: Pass a wire through the side of a section of beadwork where you like your fringe to start.

Step 2: Make the first looped fringe.
1st, slide the desired length of beads onto the wire;
2nd, pass the wire back through the next bead in the original beadwork;
3rd, continue to pass the wire through the adjacent bead;
4th, pull the wire tightly.

Step 3: Make other looped fringes.
1st, slide beads onto the wire;
2nd, pass the wire through the next bead in the original beadwork;
3rd, repeat the above two steps until you get the desired length of looped fringe;
4th, pass the wire back through the upper bead.

Step 4: Make another row of looped fringe.
1st, pass the wire through the next bead in the upper row;
2nd, slide desired length beads in the color you want;
3rd, pass the wire back through the next bead in the beadwork, staying in the second row;
4th, continue in the same manner until you get your desired amount of looped fringe.

Step 5: Weave the wire back through the beadwork to its edge.

Step 6: Cut off the extra wire.

This technique is simple and very easy to learn. We hope you find creative ways to integrate it into your jewelry making.