- Comments (0)
- Apr 28, 2013
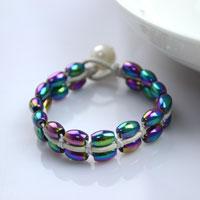
Bead Bracelets DIY- One Stunning Piece of Mother's Day Jewelry Gift Ideas
Summary: The simple yet elegant seed bead bracelets diy are a huge trendy all the year round. In this tutorial you’ll whip up amount of mothers day jewelry gift ideas with just chains and seed beads.
For a while now, I’ve explored some scrap chain segments and remaining seed beads lying around. Hence, i choose to make full use of the little stuffs for some fabulous mothers day jewelry gift ideas. In the following, it is a sample post about a concise bead bracelets diy guide.

Things you’ll need in bead bracelets diy:
3mm Round Seed Bead (2 main types)
Headpin
Jumpring
Crimp Bead
Tiger Tail Wire
Side Cutting Plier
Flat Nose Plier

Instructions for the bead bracelets diy:
Step1: preparations
Things you need to use in one bracelet:
Brass chain segment *2 (7cm & 10cm)
Tiger tail wire *1 (15cm)

Step2: connect the chain with wire
Fold the 15cm long wire in half, and then pass through the last ring of one chain strand. Next, Fix with a crimp bead and secure by squeezing.

Step3: thread on seed beads
Determine what pattern is desired and arrange the beads of your choice.

Step4: add on another chain
Attach on the other chain portion by a crimp bead.

After clamping the crimp bead, tuck the excess wire tail at the adjacent 1 or 2 seed beads and then trim off the extra parts.

Step5: design a closure
Hook the spring clasp at end of shorter chain by a jumpring. Then adorn the end of longer one with a seed bead charm.

So, that’s the entire bead bracelets diy process!

Had the processes shocked you so much? Just in my perspective, creating and practicing a bead bracelets diy project should be an enjoyment more than a work, and so does the mothers day jewelry gift ideas. Just observer the stuffs around and you can make them out of just about anything you may image!