- Comments (0)
- Dec 28, 2016
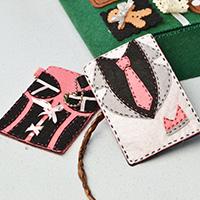
Pandahall Tutorial on How to Make Diamond Shaped Rings with Glass Beads
Summary: This tutorial will introduce a type of handmade crystal rings made of bicone glass beads. This ring type is perfect for couples. If you like to learn how to make handmade rings, do not miss this one.

These beaded diamond shaped handmade rings are made of 6 different types of glass beads. By using wires to combine them, they are crafted to a whole with perfect structures. Let’s follow this tutorial to see how to make them.
Supplies needed to make the blue glass bead ring:
4MM Blue Faceted Bicone Glass Beads
6MM Blue Faceted Bicone Glass Beads
2MM Blue Glass Seed Beads
5MM Blue Glass Bugle Beads
2MM Silver Glass Seed Beads
3MM Silver Glass Bugle Beads
Tiger Tail Wire
Scissor

How to make this blue glass bead ring:
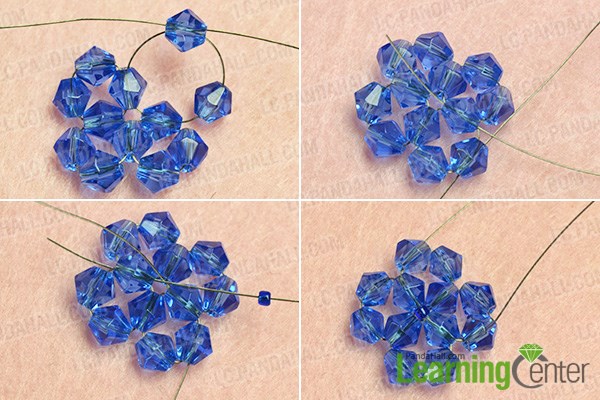
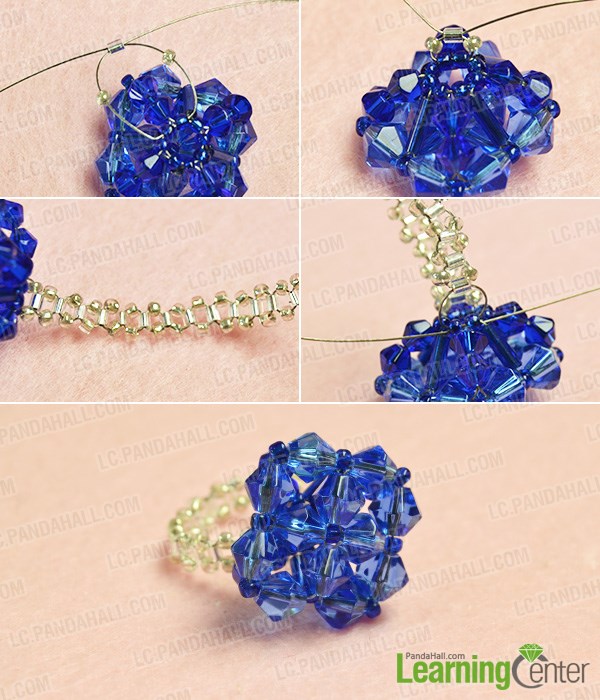
Step 1: Make some small units to form the upper part of the ring
1st, cut off a piece of tiger tail wire and cross it through 4 pieces of 6mm blue faceted bicone glass beads. Cross the wire through the last blue bead again to form a loop;
2nd, slide 3 pieces of 6mm blue bicone glass beads onto the wire from one end, and cross another end through the last bead to form the second loop.
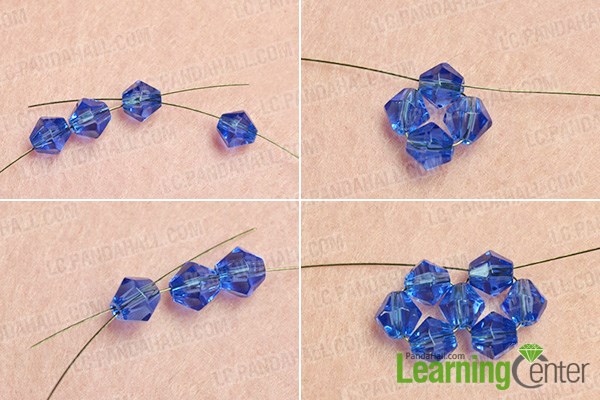
Step 2: Make more small units to form the upper part of the ring
1st, slide 3 pieces of 6mm blue bicone glass beads onto the wire from one end, and cross another end through the last bead to form the third loop;
2nd, cross one end of the wire through the bead next to the last one like the picture shows;
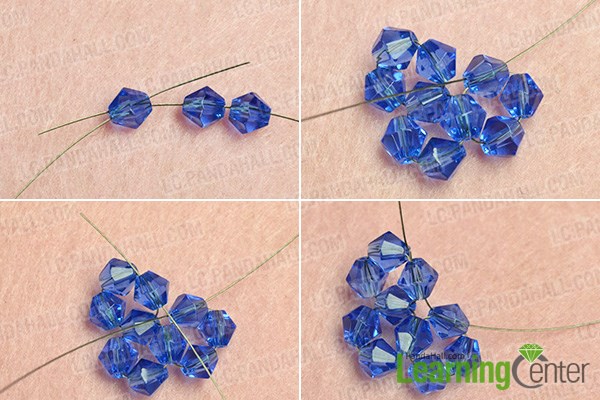
Step 3: Finish the main structure of the upper part
1st, slide 2 pieces of 6mm blue bicone beads onto the wire from one end, and cross another end through the last bead;
2nd, cross one end of the wire through a middle bead and slide a 2mm blue seed bead onto the wire;
3rd, cross this end through the opposite middle bead to fix the blue seed bead at the center.
Step 4: Finish the upper part of the ring
1st, cross the wire through one blue bicone bead in the corner, and slide a 2mm blue seed bead onto the wire. Cross the wire through next bead to fix the seed bead in the corner;
2nd, slide another seed bead onto the wire and cross the wire through next bead to fix the seed bead in the middle;
3rd, use the same method to fix more seed beads in every corner and between bicone beads.
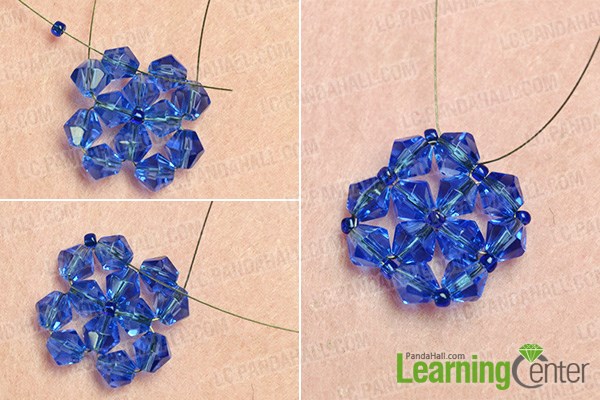
Step 5: Start to make the middle part of the ring
1st, slide a 5mm blue bugle bead, a 2mm blue seed bead, and two 4mm blue bicone beads orderly onto the wire from one end. Cross another end of the wire through the two 4mm blue bicone beads to form a small loop;
2nd, skip a blue seed bead and cross the first end through a 6mm blue bicone bead like the picture shows.
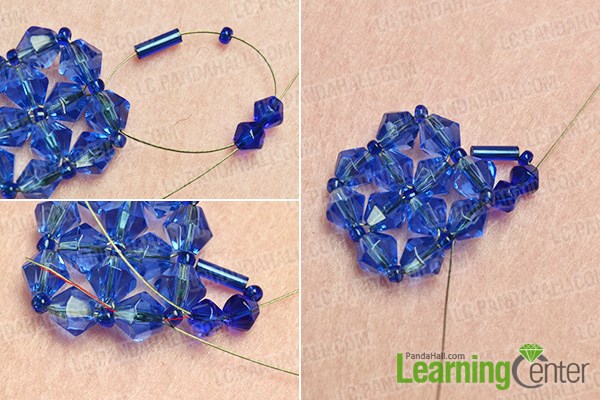
Step 6: Finish the middle part of the ring
1st, slide a 2mm blue seed bead and a 5mm blue bugle bead onto the wire from one end, and cross the other end though the bugle bead again;
2nd, repeat the process on other three corners;
3rd, cross one end of the wire through the 8 seed beads at the top and cross the other end through the last two seed beads to form a loop.
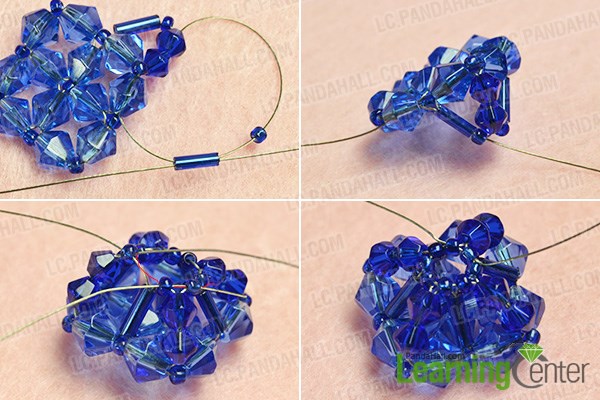
Step 7: Finish the bottom part of the ring
1st, slide a 2mm silver seed bead and a 3mm silver bugle bead onto the wire from one end, and slide another 2mm silver seed bead from the other end. Cross the later end through the silver bugle bead to form a loop;
2nd, form a chain in this way and lengthen it until it’s fit;
3rd, cross both ends of the wire through the opposite two blue seed beads and make a knot. Cut off extra wires.
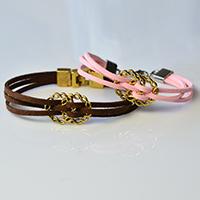
Then, use the same method to make another red ring.
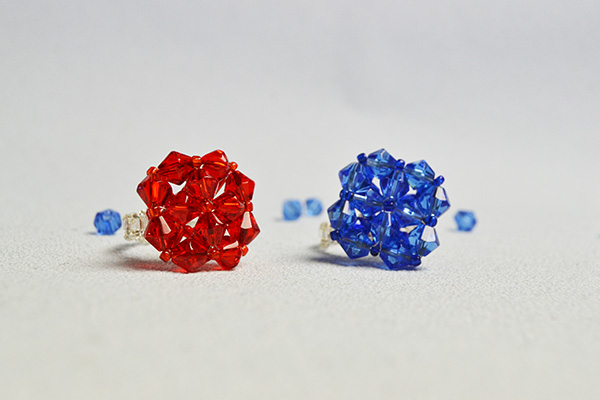
Now, we have finished the rings. Let's appreciate the final looks.
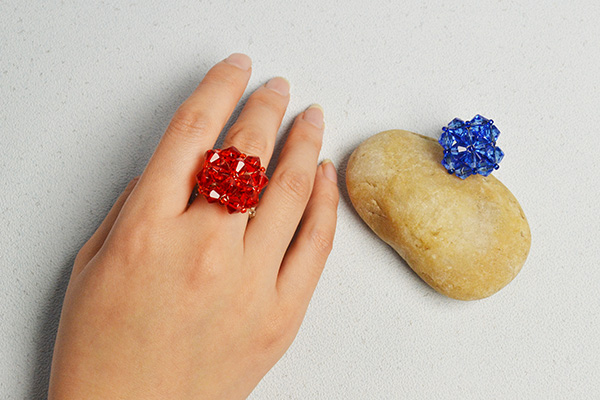
It takes us some time to make these glass bead diamond shaped rings, but it’s all worth it. You can choose your favorite colors to make the rings with the same technique. Also, if you have better designs with this ring type, you can put into practice. Hope you like this tutorial. Have a nice day!