- Comments (0)
- Dec 13, 2016
Pandahall Tutorial on How to Make Elegant Pearl Bracelet with Pink Glass Beads
Summary: Wanna an elegant pearl bracelet for yourself? Then you can see today’s Pandahall tutorial on how to make elegant pearl bracelet with pink glass beads.

Look at this chic pearl and glass beads bracelet, how do you think of it? You know that a combination of different beads is a fashionable trend to make jewelry, so let’s try to make this elegant pearl bracelet with pink glass beads with the steps below. And please let me know if there is any question about the processes you meet.
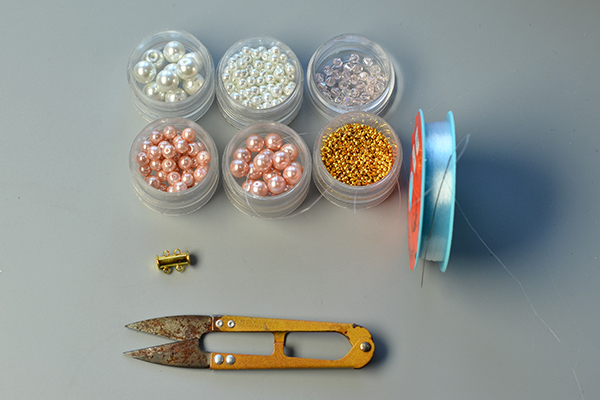
Supplies needed for this elegant pearl bracelet with pink glass beads:
4mm Pink Bicone Glass Beads
4mm White Glass Pearl Beads
10mm White Glass Pearl Beads
6mm LightSalmon Glass Pearl Beads
8mm LightSalmon Glass Pearl Beads
2mm Golden Brass Crimp Beads
2-strands Golden Slide Lock Clasps
0.2mm Transparent Fishing Wire
Scissors
Instruction on how to make elegant pearl bracelet with pink glass beads:
Step 1: make the first part of the elegant pearl bracelet
1st, slide two 4mm white pearl beads onto a piece of 0.2mm white pearl beads and cross the wires through one bead;
2nd, add many 4mm white pearl beads onto the wire;
3rd, continue to slide the 4mm pearl beads onto the other wire and cross the wires through the second pearl bead.
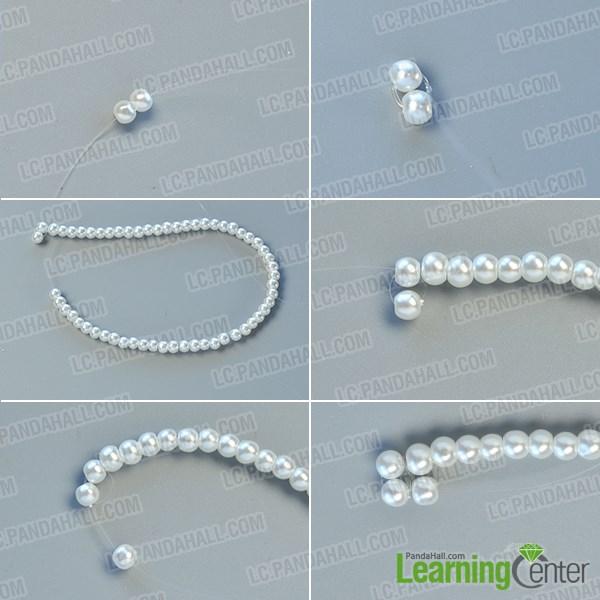
Step 2: make the second part of the elegant pearl bracelet
1st, continue to cross the wires and do the same pattern with the rest part (as shown in the picture);
2nd, slide the same 4mm white pearl beads onto one wire to make the third pearl strand;
3rd, fix the first three pearl beads together of the three pearl strand by crossing the wires through the beads.
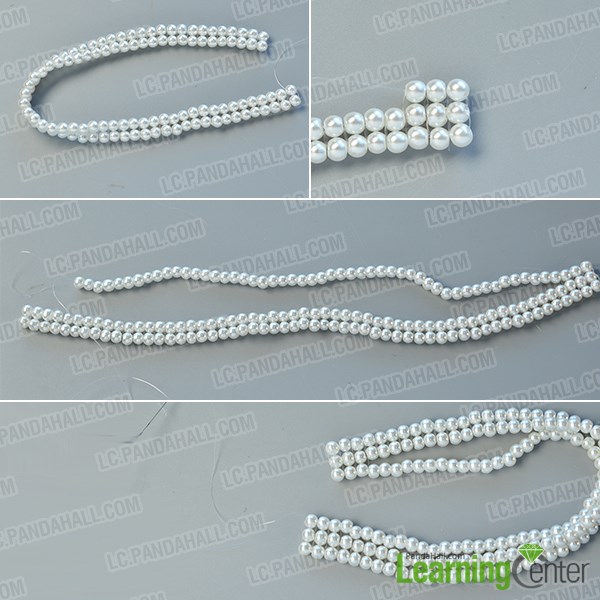
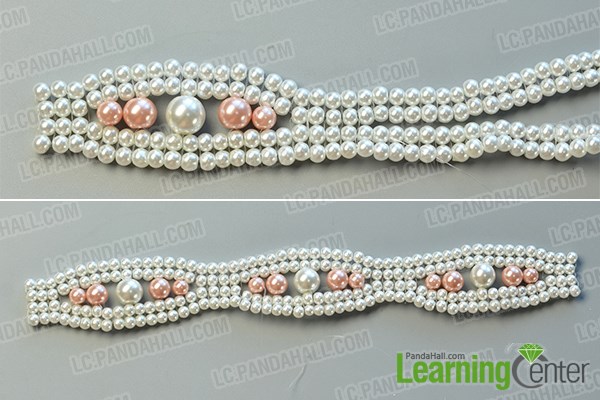
Step 3: make the third part of the elegant pearl bracelet
1st, add the 4mm pearl beads and make the fourth pearl strand, then fix the first three pearl beads and the three middle pearl beads by crossing the wires;
2nd, slide a 6mm lightsalmon pearl bead onto the wire and cross the wires through the two sides pearl beads;
3rd, continue to slide two 8mm lightsalmon pearl beads, a 10mm white pearl bead and a 6mm pearl bead onto the wire, then fix them by crossing the wires.
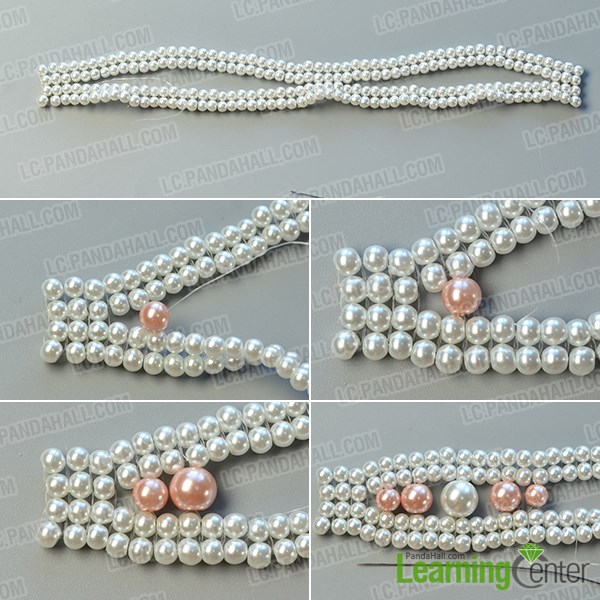
Step 4: make the fourth part of the elegant pearl bracelet
1st, cross the wires through the pearl beads to fix the four peal beads of the four strands;
2nd, continue to add lightsalmon and white pearl beads and do the same pattern (as shown in the picture).
Step 5: make the fifth part of the elegant pearl bracelet
1st, slide two 4mm pink glass beads and 2mm golden bead onto one wire, then cross the wire through the golden bead and add another pink glass bead onto it;
2nd, add the four glass bead and cross the wire through the golden bead to make a flower pattern and fix them;
3rd, make another same flower pattern with four pink glass beads and a golden bead;
4th, add more beads and make another two flower patterns on the correspondent position.

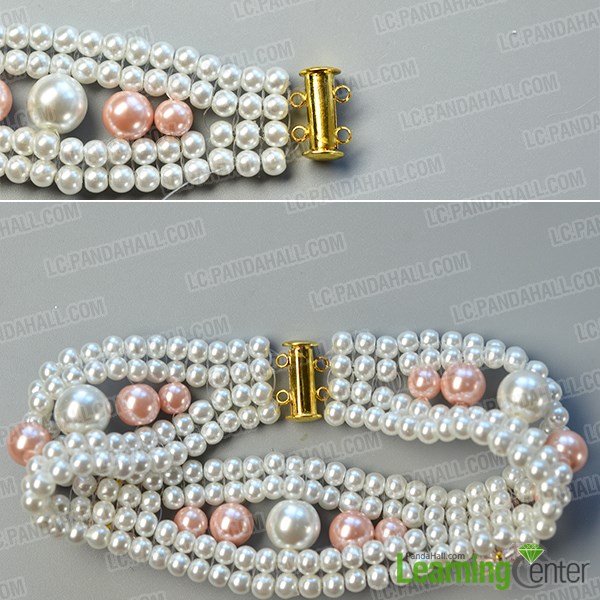
Step 6: finish the elegant pearl bracelet
1st, add a golden 2-strand slide lock clasp onto the end and slide the wire through it;
2nd, connect the clasp and the other end of the pearl strands together to finish this elegant pearl bracelet making.
Here is the final look of this elegant pearl bracelet with pink glass beads:
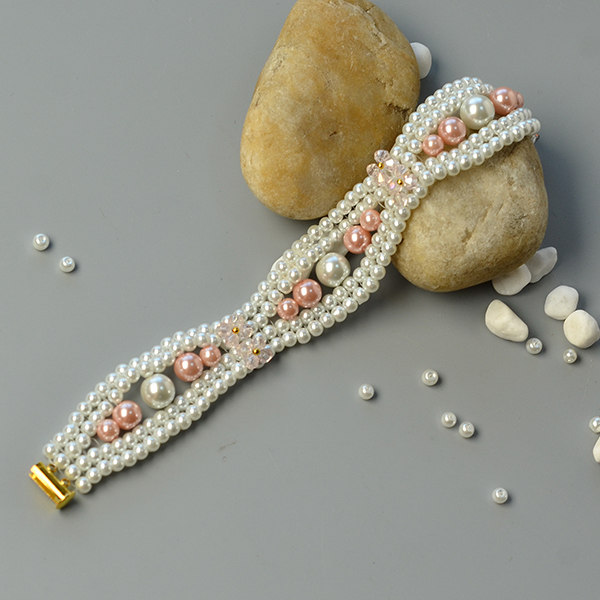
You can see this chic pearl beaded bracelet in detail right now. Do you want to try to make this one for yourself? You can add other colored pearl beads onto this bracelet pattern if you like and we need to try more to create our favorite jewelry. See you.
This project is inspired from http://lc.pandahall.com/craft-ideas/12355.html


