- Comments (0)
- Nov 09, 2016
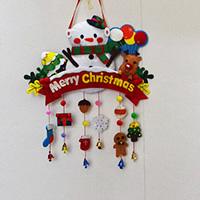
Easy Felt Craft – How to Make a Felt Hanging Decoration for Christmas
Summary: In this PandaHall tutorial, you will see how to make an easy DIY Christmas decoration, which is mainly made by felt and cotton.

Christmas is approaching soon, if you are searching for Christmas decorating ideas, you can take this felt hanging decoration into consideration. It could be a very nice house or Christmas tree decoration.
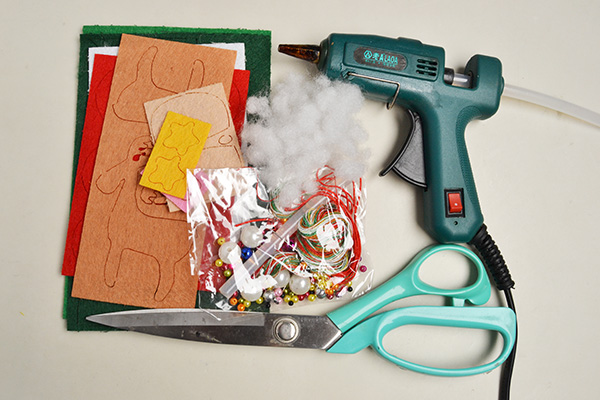
Materials needed to make this easy felt Christmas decoration:
Felt Christmas DIY Kits
Scissor
Glue Gun
How to make this felt hanging decoration:
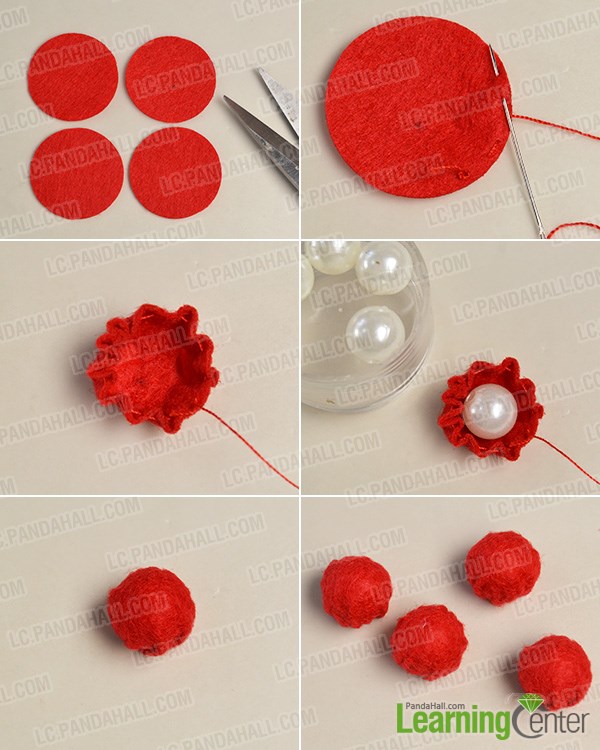
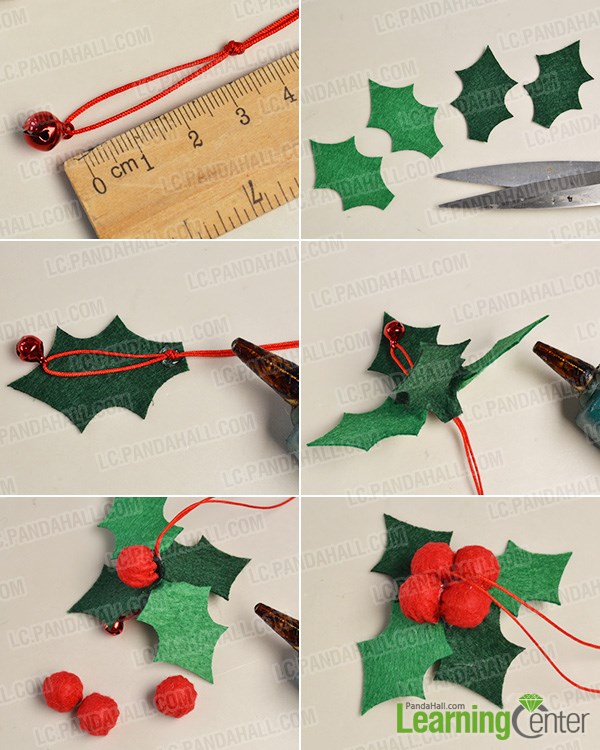
Step 1: Make the holly berries
1st, get four round red felts ready;
2nd, sew the red thread around the edge of the red felt, and then pull the thread to make the felt into a tiny bowl shape;
3rd, put a white pearl bead into the felt bowl, tighten the thread, make a knot and cut off extra thread;
4th, repeat these steps to make another three holly berries.
Step 2: Connect the berries to holly leaves
1st, cut a proper length of red nylon thread (here we cut 150cm), fold it in half and thread a red bell pendant to the bottom, then tie a knot about 3.5cm next to the bell;
2nd, get four holly leaves ready, glue the knot to any one of the leaves, and then glue all other three leaves together like picture shows;
3rd, glue the berries to the top of each holly leaf like picture shows.
Step 3: Make the felt elk
1st, tie a knot about 3cm to the holly berries, and then thread a silver bell pendant to one thread;
2nd, get two elk felts ready;
3rd, sew a black seed bead to work as the elk’s eye and sew a white snow flake to decorate its body.
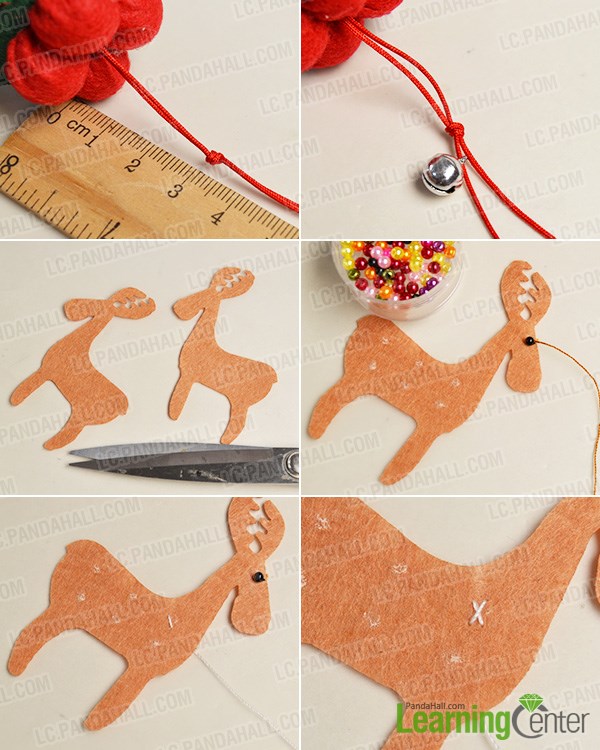
Step 4: Complete the felt elk
1st, finish all six snowflakes on one felt and repeat to make another elk felt;
2nd, sew two elk felts together through the red threads and fill it with cotton, just like the flowing picture shows;
3rd, tie a knot near the elk’s antler, add a fuchsia bell and tie another knot.

Step 5: Make the Christmas tree pattern
1st, get all 12 Christmas tree felts ready and sew each two together and fill all of them with cotton;
2nd, sew three colored acrylic pearl beads to each side of each Christmas tree pattern like picture show;
3rd, glue the Christmas tree patterns near the previous fuchsia bell on the red threads.

Step 6: Complete the Christmas three
1st, glue all six Christmas tree patterns onto the middle threads;
2nd, sew the star felts to the top of the Christmas three;
3rd, tie a knot near the star and add a blue bell to one thread.

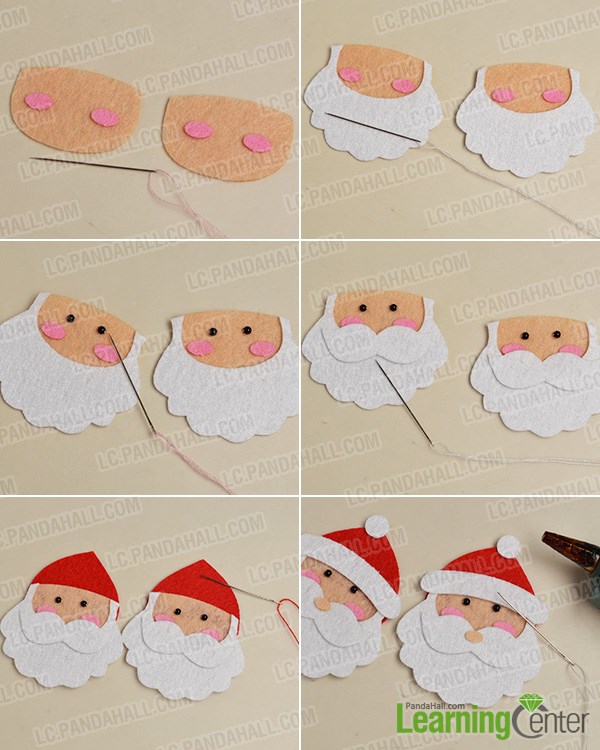
Step 7: Make the Santa Claus pattern
1st, sew the cheek felts onto the face felts;
2nd, sew the whiskers around the face felts;
3rd, sew two tiny black beads to work as Santa’s eyes;
4th, sew the handlebar felts to the cheek like picture shows;
5th, glue the face onto Christmas hat felt and complete the hat.
Step 8: Complete the Santa Claus
1st, get four small holly leaves ready and glue each two to each Christmas hat;
2nd, glue three red acrylic pearl beads to each holly leaves to work as holly berries;
3rd, sew the Santa Claus felts together to the middle threads and fill them with cotton.

Here is the final look of this felt Christmas hanging decoration:
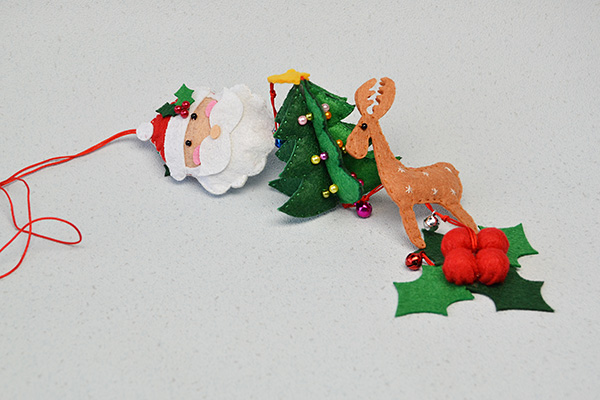
It’s really cute! It might take a while to sew all the felts together, but the sewing procedure is not difficult at all. If you want to make it, you can get a material kit on our website and make one at home!