- Comments (0)
- Sep 23, 2016
PandaHall Tutorial on How to Make a Dark Green Felt Stamp Haversack
Summary: In this PandaHall tutorial, you will learn how to make a felt diy haversack, it could be very practical as well as a lovely hanging accessory.

This lovely haversack is mainly made by felt and ribbon, and all materials are ready in a material set. If you want to make this haversack, you can just buy a material set from our website instead of hardly cutting the felts by yourself.
Supplies needed to make this diy haversack:
Haversack DIY Material Set
Scissors

Step 1: Make the green leaves stamp
1st, sew the leaves onto the brown felt with green thread, make sure the dark green leaf is in the middle and the lighter two leaves are at two sides;
2nd, sew three red beads onto the top of the leaves;
3rd, sew the brown felt onto the black felt with black thread.

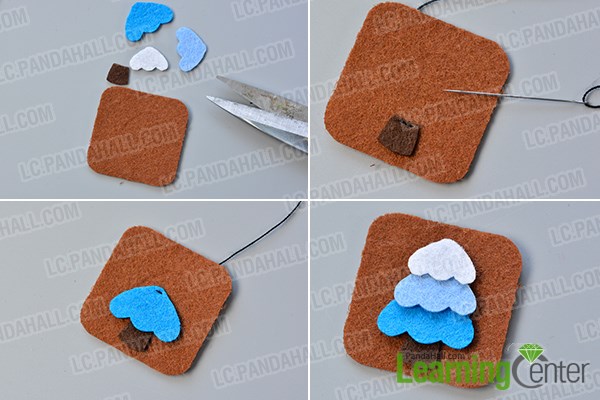
Step 2: Make the blue tree stamp
1st, sew the tree trunk at the bottom of the brown felt with black thread;
2nd, sew the blue tree layer right upon the tree trunk;
3rd, add the light blue and white layers to the felt.
Step 3: Make the cute kid stamp
1st, sew the kid felt onto the black felt with black thread;
2nd, sew two black knots on the face as kid’s eyes and two knots on the body as cloth buttons;
3rd, tie a bow knot with the silver ribbon and add the bow to beautify the kid.

Step 4: Make the Christmas hat and snowflakes stamps
1st, sew the Christmas hat onto the brown felt, the white patterns with white thread and red pattern with red thread;
2nd, sew two white pearl beads onto a black felt and embroider three snowflakes around the pearl beads.

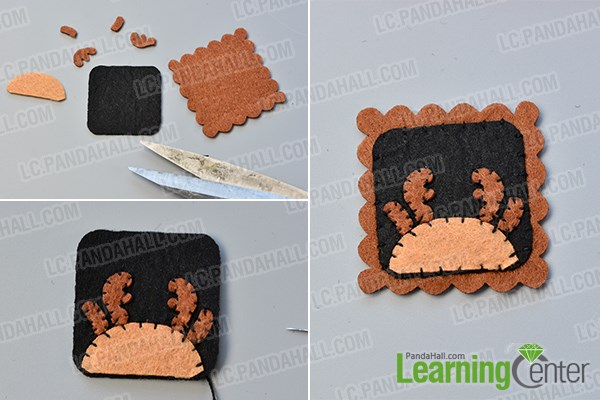
Step 5: Make the Christmas deer stamp
1st, sew all the dear felts onto the black felt like picture shows below;
2nd, sew the black felt onto the brown felt.
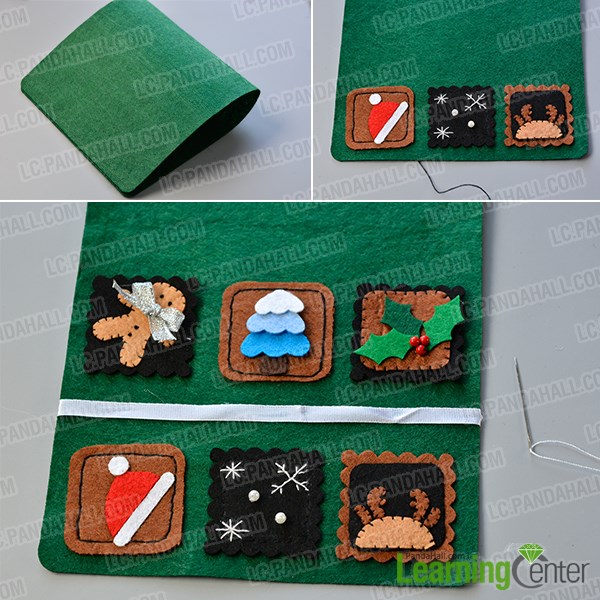
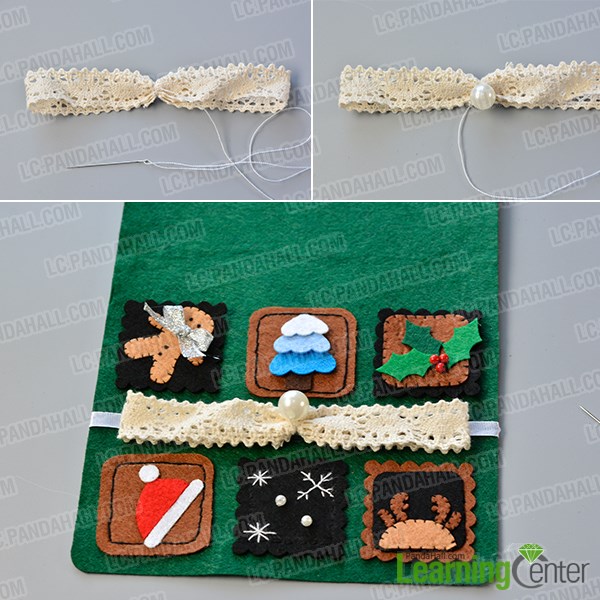
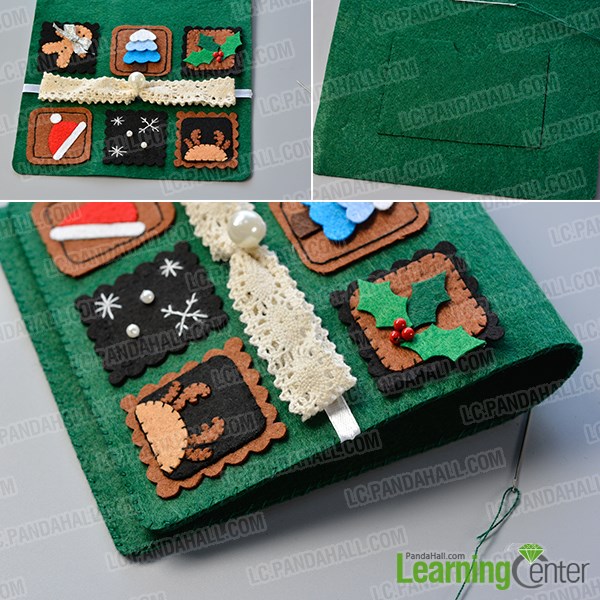
Step 6: Add the stamps onto the haversack’s outside cover
1st, fold the whole cover in half, chose one half as the working half;
2nd, sew the stamps onto the working half in two rows, three in each row and a white ribbon between two rows.
Step 7: Decorate the haversack cover with lace bow
1st, sew the lace in a circle and tie the middle with white thread to make the lace into a bow;
2nd, add a white pearl bead onto the middle to decorate the bow;
3rd, sew the lace bow right onto the middle of the white ribbon on the haversack cover.
Step 8: Make the inside part of the haversack
1st, fold the whole inside part felt into half;
2nd, sew the card bag at the lower half and sew two velcros onto the upper half.

Step 9: Make the forward part of the haversack
1st, there are two pieces of felts, chose one to add two velcros;
2nd, sew those two pieces of felts together.

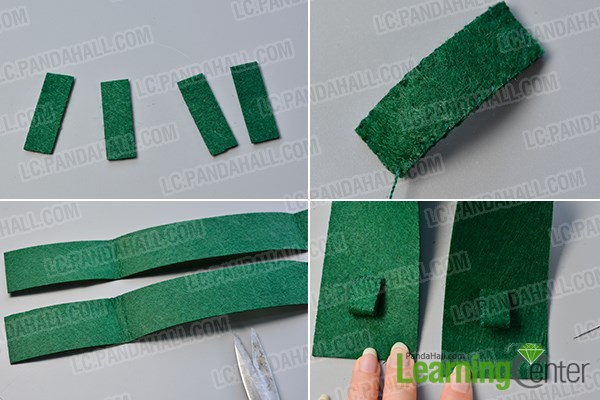
Step 10: Make the side and bottom connect pattern
1st, there are four small felts which will work as the strap hanger, sew each two together;
2nd, there are two connect felts, sew them together, they’ll work as the side and bottom of the haversack;
3rd, sew the strap hangers to each side of the connect felt.
Step 11: Connect the outside cover and inside cover together
1st, the outside cover is the one with stamps and the inside cover is the one with card bag;
2nd, sew them together with green thread.
Step 12: Make the body part of the haversack
1st, sew the forward part (we finished it in step 8) and connect part (we finished it in step 9) together;
2nd, add the cover to the previous pattern to finish the body pattern.

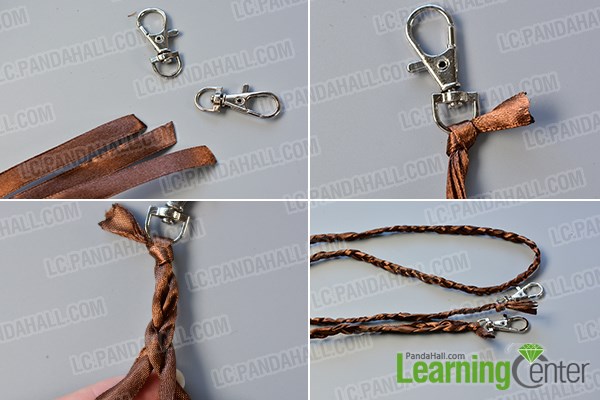
Step 13: Make the strap
1st, make a knot to tie all three brown ribbons to the big lobster claw clasp;
2nd, braid the ribbons together, once finished braiding, tie the ends to another clasp.
Here comes the finished felt hoversack:

I know you must be a little bit confused when you are reading this tutorial, but believe me, this haversack is very easy to make. Once you get the material package, you’ll figure out all the details quickly.