- Comments (0)
- Aug 29, 2016
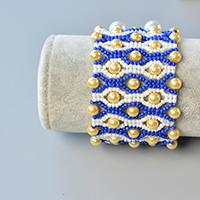
Pandahall Tutorial on How to Make Chic Pearl Bracelet with Acrylic Beads
Summary: Wanna a chic pearl bracelet? Then check this Pandahall tutorial on how to make chic pearl bracelet with acrylic beads.

You should look here if you are searching for an exquisite beading bracelet. Today, I am going to show you a tutorial on how to make chic pearl bracelet with acrylic beads. Do you have any interest? Then follow me to see the details below.
Supplies needed for the chic pearl bracelet with acrylic beads:
0.2mm Transparent Fishing Thread Nylon Wire
3mm Round Imitated Pearl Acrylic Beads
Silver Spring Clasps
Iron Jump Rings
4mm White Round Glass Pearl Beads Strands
9x5.5mm IndianRed Drop Cat Eye Beads
Needle
Scissor

Instruction on how to make chic pearl bracelet with acrylic beads
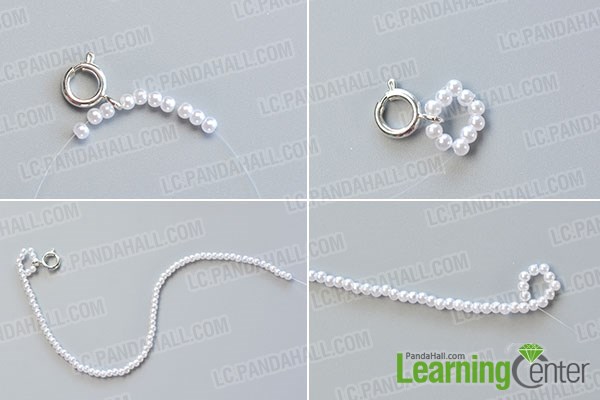
Step 1: Make the first part of the pearl bracelet
1st, cut off a long piece of fishing wire and slide seven 3mm acrylic beads, a sliver spring clasp and three 3mm acrylic beads onto it, then cross the two ends through the left acrylic bead;
2nd, cut off the extra wire and continue to slide many acrylic beads onto the wire, then cross back the wire through the tenth bead from the right side.
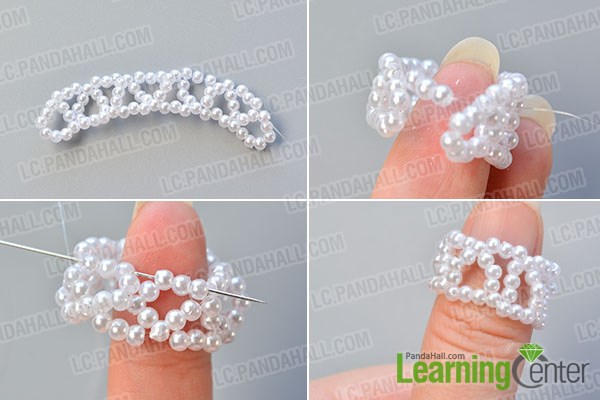
Step 2: Make the second part of the chic pearl bracelet
1st, add seven acrylic beads onto it and thread the wire through the fourth bead;
2nd, continue to add more beads patterns with the same steps until it is finished;
3rd, slide three acrylic beads onto the wire and thread it through the top bead of next beading pattern (as shown in the picture);
4th, continue to slide more 3 beads to it and connect all the beaded circle pattern together.

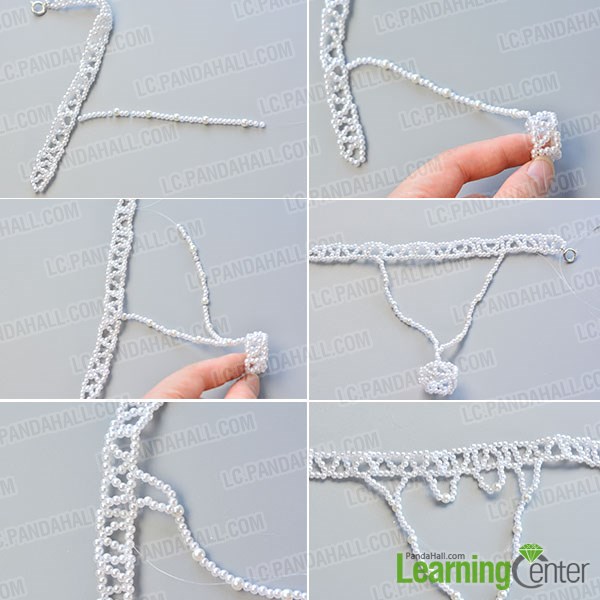
Step 3: Make the third part of the chic pearl bracelet
1st, make a short beading pattern with above steps and decide the length according to your finger;
2nd, add three acrylic beads onto the wire and stitch it with the other side bead;
3rd, continue to stitch three acrylic beads and connect the two ends together.
Step 4: Make the fourth part of the chic pearl bracelet
1st, slide some mixed 3mm acrylic beads and 4mm pearl beads onto a piece of fishing wire, then thread the wire through the bead of the ring beaded pattern;
2nd, make another piece of beading pattern with acrylic beads and pearl beads and connect it with the bracelet pattern and ring pattern (as shown in the picture);
3rd, stitch serval acrylic beads and attach it with pearl bead and the bracelet pattern;
4th, make another two circle beading pattern and add a pearl bead onto the middle part;
5th, make the corresponding pattern on the left part.
Step 5: Make the fifth part of the chic pearl bracelet
1st, slide acrylic beads and pearl beads to connect the several circle beading patterns;
2nd, continue to stitch the beads and make the same patterns like the below picture;
3rd, slide an acrylic bead, an Indianred drop cat eye bead and an acrylic bead onto the center part, then cut off the extra wire.

Step 6: Finish the chic pearl bracelet
1st, add a jump ring onto one end of the beaded pattern;
2nd, connect the two ends of the pattern.

Here is the final look of this chic pearl bracelet:
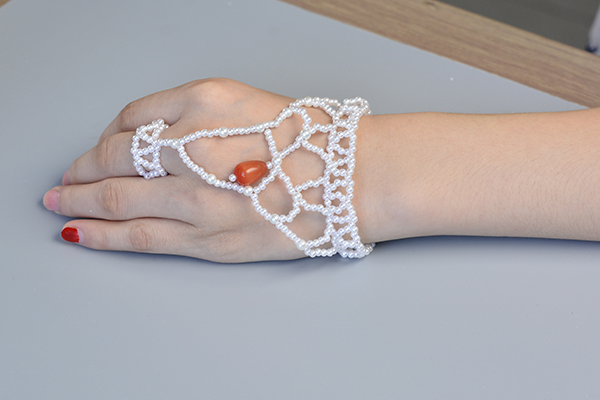
What a delicate beaded bracelet, do you like it? You can try to make one for yourself and you will know it is easier during the making process. This bracelet is suitable for wedding, do you also think so? Make it if you need it. See you!
The project is inspired from http://lc.pandahall.com/craft-ideas/10650.html.