- Comments (0)
- Aug 18, 2016
How to Make a Braided Cup Cover with Wool Cord and Acrylic Beads
Summary: Today’s PandaHall tutorial will show you how to make a braided cup cover with wool cord and acrylic beads, hope you’ll like the design and happy crafting!

Have you ever thought of making a cover for your cups? This pink braided cup cover could protect your cup from being broken when it’s falling down, and it could also keep the water inside warm. If you wanna make one, follow me to see how!
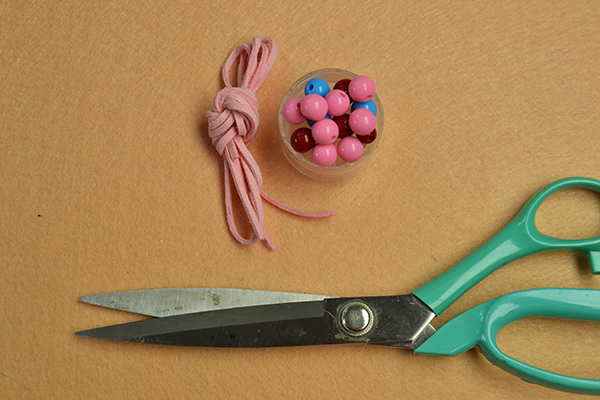
Materials and tools needed to make this pink cup cover:
Pink Acrylic Beads
Pink Wool Cord
Scissors
Instructions on how to make the braided cup cover:
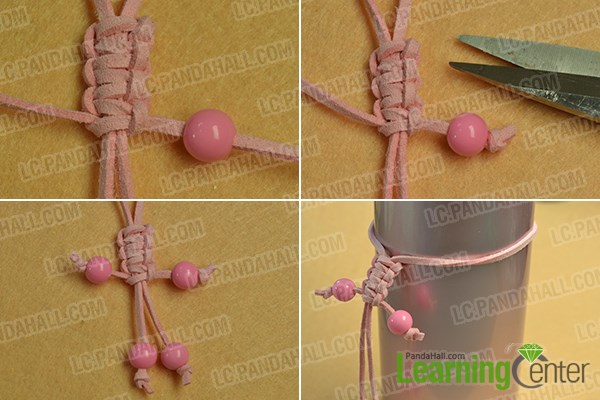
Step 1: Make the beginning dangle pattern of the cup cover
1st, cup two pieces of pink wool cords, fold one of them in half, and place them as picture shows;
2nd, make a square knot with the working wool cord;

3rd, make more square knots until you get your desired length of the dangle decoration pattern, here I knotted seven times in total;

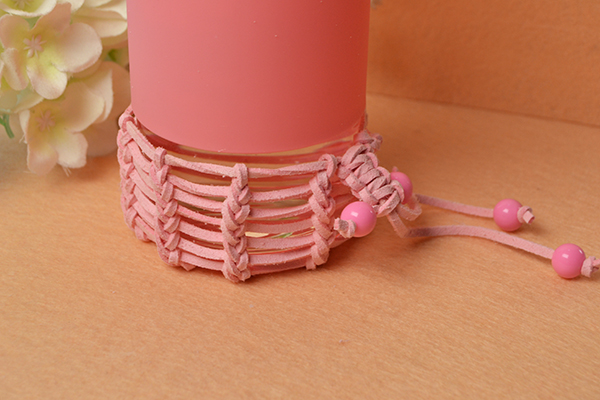
4th, add four pink acrylic beads to each end of the cords. Cut extra cords to finish the dangle pattern and put the pattern onto a cup to continue the following steps.
Step 2: Make the main pattern of the cup cover
1st, tie a long piece of wool cord (as working cord) next to the dangle pattern, just as picture shows;
2nd, thread the working cord through the one on the cup to braid a simple knot;
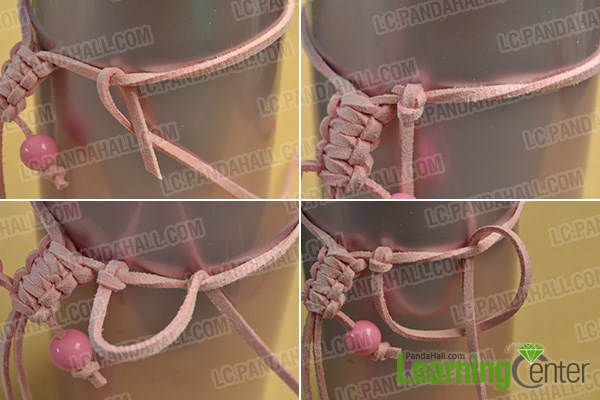
3rd, keep making more knots to finish the first layer;
4th, thread the working cord through the beginning knot of the first layer to start the second layer;
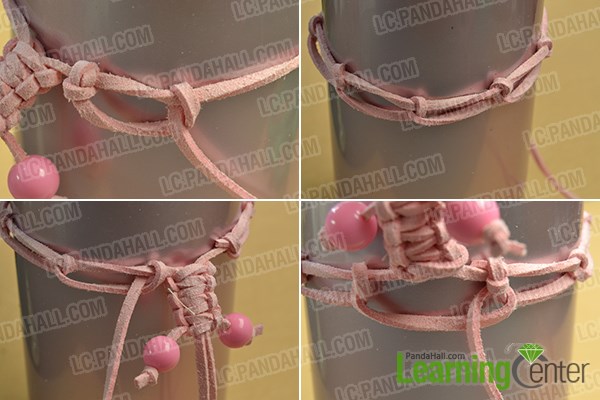
5th, keep braiding until you finished the pattern covers on the cup;
6th, start making more layers under the bottom of the cup, it is in the same way as braiding the previous layers, but the bottom layers will get closer and closer. The last layer will be a big knot, once you get there, you can fix the cord and finish the cup cover.

Done!
And here comes the final look of this pink wool cord cup cover:

Actually, apart from making a cover at the bottom of a cup, you can also DIY some cup sleeves in the same way, and they could be placed at the middle of a cup to keep your drinks warm.


