- Comments (0)
- Apr 10, 2013
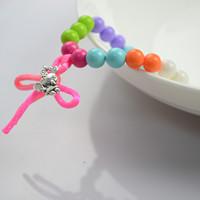
DIY Statement Bracelet Instructions - Friendship Bracelets with Chain
Summary: Detailed bracelet instructions for making a stylish and individual wrist bracelet; while practice the chain bracelet diy plan, make a minimalist design of a few focal beads, strings and chains.
As to diy statement bracelet, it means one can try collecting all trendy elements in one single piece, the string and floss, beads and chains and so on. All techniques for the woven chain bracelet tutorial are common and easy-to-master for most types of bracelets, except the selection of different materials.

Materials needed for chain bracelet diy
Synthetical Howlite Bead
2mm Nylon Thread
Lobster Claw Clasp
Jumpring
CCB Chains
Lighter
Bead Reamer (BK001)
Side Cutting Plier

Details for bracelet instructions
Step1: Braid a lanyard knots plait
1. Snip the two long nylon threads in half for 4 equal-length segments;
2. Tie an Overhand Knot to hold all in a bunch;
3. Start to work the Lanyard Knots with four working ends;
4. Stop when the length fit for your wrist circumference;
5. End with another overhand knot. Reserve 1 or 2cm long at tail and remove excess parts.

Step2: Tie up the CCB chain
1. Take proper CCB chain and an extra strand of navy nylon thread;
2. Pass the thread through the white stitch by using bead reamer;

3. Tie the chain links up to the every other white stitch;

Step3: Adornments in chain bracelet diy
1. Make bails for your beads firstly, with the 0.5mm brass wire;
2. Hook on the decorative pieces.

Step4: Add on clasp
At the first lanyard knot, attach on the clasp by a jumpring.

The size of beads and CCB chains can vary as the types of beads you’ve selected as well as the final effect you wanna your bracelet be. The supplies in friendship bracelets with chain such as chains, threads and vintage beads can be bought from our online shop directly with affordable prices. Hope you may love my woven chain bracelet tutorial.