- Comments (0)
- Aug 10, 2016
PandaHall Original DIY - How to Make a Wedding Headband with Pearl Beads and Rhinestones
Summary: Have you ever DIY any wedding accessories? Today I’d like to show you how to make a wedding headband at home. I bet you’ll like the beautiful design!

If you have a bride-to-be friend, you can make this elegant pearl bead headband as a wedding gift for her. It looks delicate yet it’s not so difficult to make. If you’d like to give it a try, just follow me!
Materials and tools needed to make this wire wrapped headband:
8mm Round White Pearl Beads
10mm Round White Pearl Beads
White Oval Pearl Beads
Mixed Acrylic Rhinestone Beads
Silver Hair Band Finding
Pearl Bead Flower Brooch Finding
0.5mm Gold Copper Wire
Golden Rhinestone Cup Chain
Side Cutting Pliers
Glue Gun

Instructions on making this pearl hair accessory for weddings:
Step 1: Wrap the basic pearl bead branches of the headband
1st, thread an oval pearl bead onto the copper wire, twist the wire several times to make a pearl bead branch, like image shows below;
2nd, keep adding pearl beads to make more tiny branches until you get your desired big branch;
3rd, once finished the big pearl branch, cut a piece of rhinestone cup chain and wrap it to the stem of the branch with copper wire;
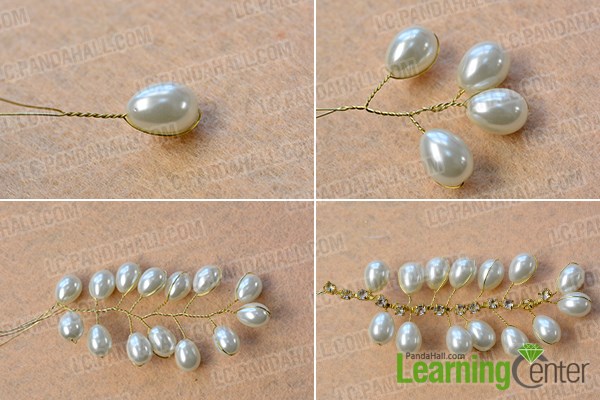
4th, repeat the previous three steps to make another five pearl bead branches, and they could be in different lengths.

Step 2: Make some pearl bead flowers to decorate the headband
1st, thread a round pearl bead onto a copper wire, twist the wires together to make the first pearl bead petal;
2nd, twist another four pearl beads onto the wire to make a pearl bead flower;
3rd, cut a short piece of copper wire, thread a rhinestone bead onto the wire and wrap the rhinestone to the center of the pearl flower;
4th, repeat to make three more pearl bead flowers.

Step 3: Finish the diy wedding headband
1st, wrap one pearl bead branch to each side of the headband like image shows below;
2nd, wrap three pearl bead branches to the upper side of the headband and one to the lower side, as image shows;

3rd, glue the flower brooch findings onto the filigree part of the headband;
4th, wrap the pearl bead flower around the brooch findings.
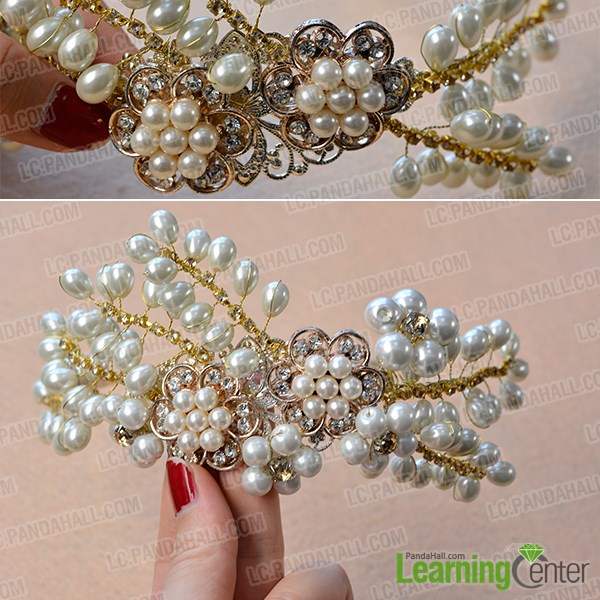
Here comes the final look of this delicate pearl bead wedding headband:

Wow! I have to say it looks really gorgeous! Don’t you want to have a try? It won’t take much of your time and the finished piece will definitely make you happy. Just make it!


