- Comments (0)
- Jun 23, 2016
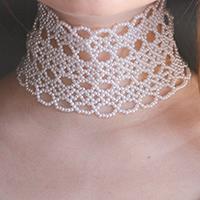
How to Make a Charming Pearl and Glass Bead Weaving Choker Necklace for Wedding
Summary: Are you seeking for inspirations on handmade necklace for wedding? If yes, I really hope that my diy bead weaving choker necklace for wedding could help.

With simple supplies – 3mm pearl beads, 6mm pink glass beads, satin ribbon and fishing wire you could actually make a charming choker necklace for wedding! I adopted weaving techniques in making this necklace, so if you follow me, you could learn weaving technique during this diy project.
Supplies in making the charming pearl and glass bead weaving choker necklace for wedding:
3mm White Glass Pearl Beads
6mm Pink Faceted Glass Beads
6mm Purple Satin Ribbons
0.2mm Fishing Wire
Needle
Scissors

Instructions on making the pearl and glass bead weaving choker necklace for wedding:
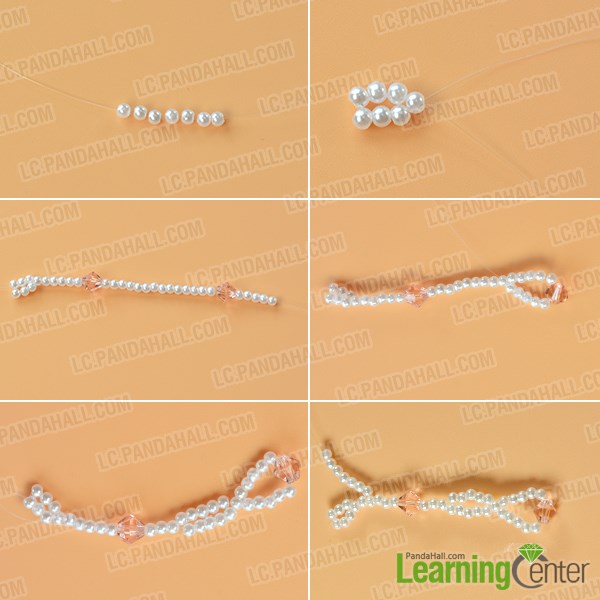
Step 1: Bead the basic pattern
1st, snip off a piece of 0.2mm fishing wire (about 110cm long), slide 7 pearl beads to the middle;
2nd, thread one end through the last pearl bead on the other side and tighten up;
3rd, slide 5 pearl beads, a pink glass bead, 14 pearl beads, a pink glass bead and 5 pearl beads in sequence;
4th, thread the wire through the 9th pearl bead that you just added;
5th, continue to thread that wire through 5 pearl beads, then thread along the beads to the 2nd pearl bead next to the primary ring pattern and slide 7 pearl beads to the wire.
Step 2: Start the weaving pattern
1st, thread the wire through the pearl bead on the ring pattern, add a pearl bead, then thread it through the 3rd pearl bead that you just added;
2nd, slide 5 pearl beads, a pink glass bead and 5 pearl beads to the wire, then thread the wire through the 3rd pearl bead on the oval pattern on the other side;
3rd, slide 5 pearl beads onto the wire, thread the wire through the 3rd pearl bead on the first ring pattern, then add 8 pearl beads to the wire;
4th, thread the wire through along the beads until to the pearl bead next the ring pattern on the other side.
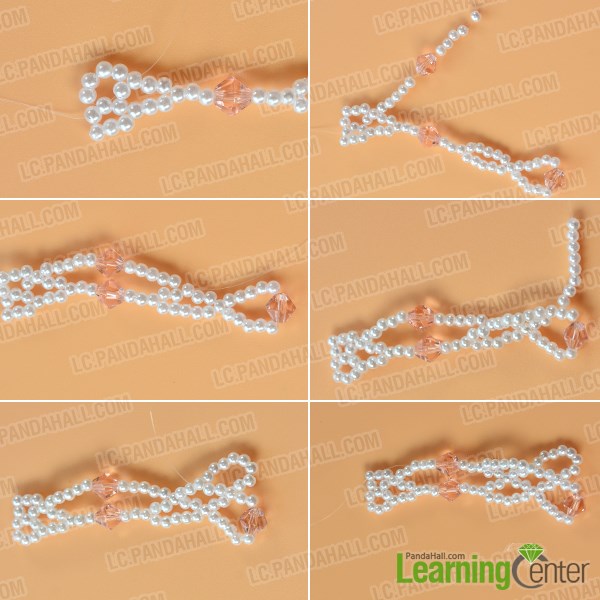
Step 3: Continue with the weaving pattern
1st, slide 5 pearl beads, a pink glass bead and 5 pearl beads in sequence onto the wire, thread the wire through the 3rd pearl bead on the nearest oval pattern;
2nd, continue to slide 5 pearl beads onto the wire, then thread the wire through the 3rd pearl bead on the next ring pattern;
3rd, slide 2 pearl beads, a glass bead and 5 pearl beads in sequence to the wire, then thread the wire along the beads to the other side in the same way;
4th, slide 5 pearl beads, a glass bead and 5 pearl beads to the wire, thread the wire through the 3rd pearl bead on the nearest ring pattern;
5th, slide 5 pearl beads onto the wire, then thread the wire through the 3rd pearl bead on the next ring pattern;
6th, slide 8 pearl beads to the wire this time, thread the wire through the 3rd pearl bead on the next ring pattern;
7th, slide 5 pearl beads onto the wire, and then thread the wire along the beads to the other side;

8th, repeat all above procedures to finish the weaving pattern.

Step 4: Make additional wave patterns
1st, Stop the weaving pattern when you bead a proper length, making sure the thread is on the pearl bead on the second ring pattern as shown;
2nd, slide 5 pearl beads, a glass bead and 5 pearl beads in sequence to the wire;
3rd, thread the wire through the pearl on next ring pattern without pink glass bead;
4th, continue to slide 5 pearl beads, a glass bead and 5 pearl beads to the wire, and thread the wire through the pearl bead on the next ring pattern;
5th, repeat the procedures to finish all the wave patterns.
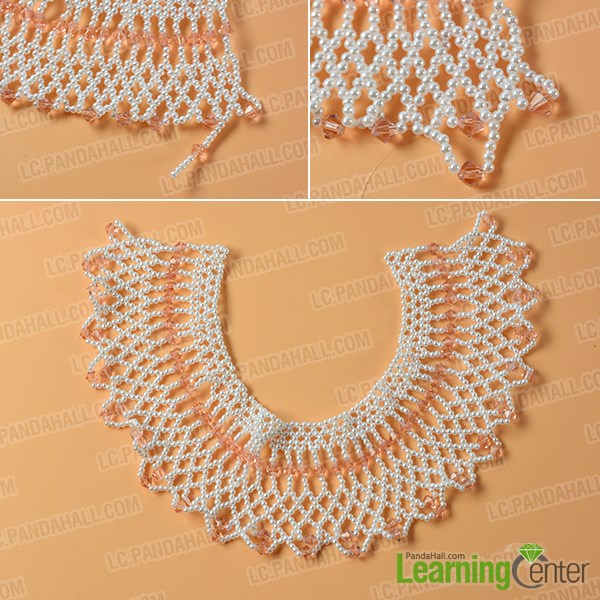
Step 5: Finish the weaving choker necklace
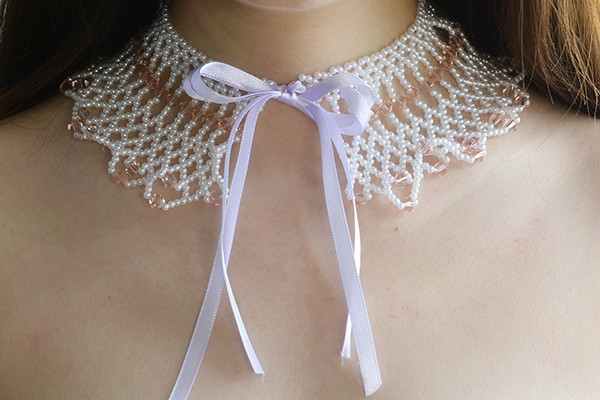
1st, cut 2 pieces of 6mm purple satin ribbon (about 60cm), tie each of them on the end of the necklace as pictured;
2nd, tie a lovely bow and finish the whole weaving choker necklace for wedding.

Look at the final look! I wore it immediately after I finished it! You could either wear the neat side on the front or the bow on the front. Up to you!
The main part of the bridal choker necklace is the weaving pattern. If you are quite familiar with weaving technique, then this weaving necklace is not difficult for you. If you happen to be a bride-to-be or if you have a friend who is a bride-to-be, then just have a try!
This tutorial is provided for Ifeoma Calista who asked for instructions on this craft idea :http://lc.pandahall.com/craft-ideas/10781.html.