- Comments (0)
- Dec 29, 2015
Pandahall Tutorial on How to Make a Simple Beaded Corsair Keychain
Summary: Have you got some good ideas in your mind for the approaching Valentine’s Day bunnies? If not, I will show you a Pandahall tutorial about how to make a keychain for your boyfriend.

As Valentine’s Day will come soon, here I’d like to share you an easy Pandahall tutorial about how to make a keychain which is pretty easy and funny to make, do you expect it? Anyway, hope you can get some inspiration from the tutorial and let’s start to see.
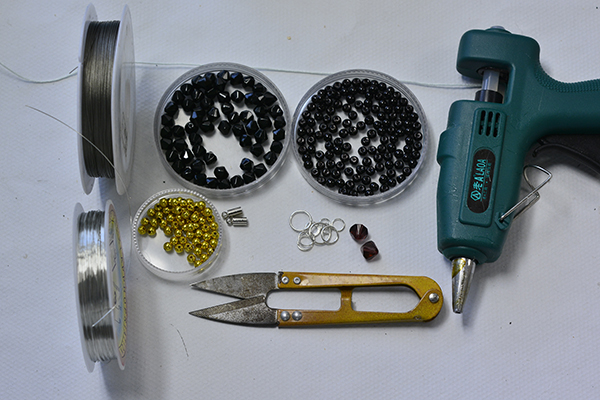
Materials needed for the DIY beaded keychain:
8mm black faceted glass beads
0.3mm light grey tiger wire (about 50cm long)
4mm black round glass pearl beads
Iron cord end
3x1.5mm faux suede cord
0.4mm copper wire
4mm brass round beads
Scissors
Glue Gun
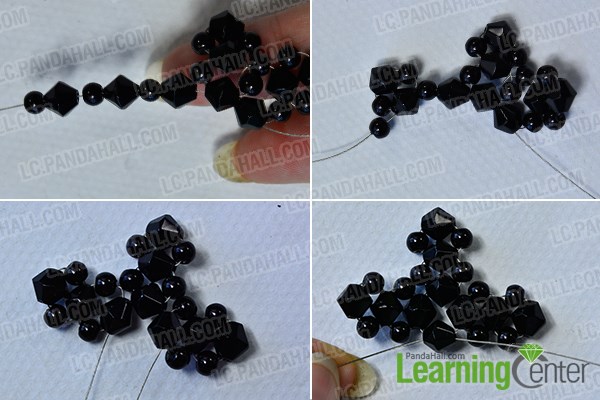
Step 1: Make the “head” of the corsair
1st, cut a length about 50cm of tiger wire and add 2 6mm black glass beads and 2 4mm black round glass pearl beads (as shown in the picture);
2nd, thread the tiger wire through the 6mm faceted glass bead;
3rd, add one round glass bead on the left side. Then, add one round glass bead and one 6mm faceted glass bead on the right side;
4th, thread the tiger wire through the faceted bead, showing as picture below.

Step 2: Make one side of the upper tier of the corsair
1st, slide 3 round glass beads and 2 faceted beads on the left tiger wire and then thread the right wire through the faceted glass bead (as shown in the picture);
2nd, add one round bead on the right wire and thread it through the faceted bead showing as the picture below.

Step 3: Finish the upper tier of the corsair
Make another side of the upper tier of the corsair in the same way mentioned in Step 2.
Step 4: Make the body of the corsair
1st, add a round glass bead on the left wire and a faceted glass bead on the right wire, then thread the left wire through the faceted glass bead;
2nd, repeat the steps mentioned in Step 4.

Step 5: Make the bottom tier of the corsair
1st, slide a certain amount of round glass beads and faceted glass beads on the right wire and thread the wire through the faceted bead;
2nd, repeat the same steps mentioned in Step 5, and please see the picture below.
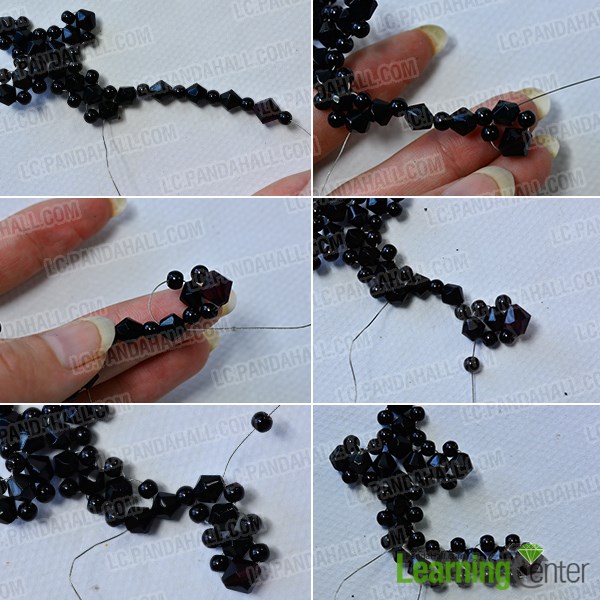
Step 6: Finish the bottom tier of the corsair
1st, make another side of the bottom tier of the corsair in the same way mentioned in Step 5;
2nd, hide the wire by cutting the excess part and make the keychain neater.
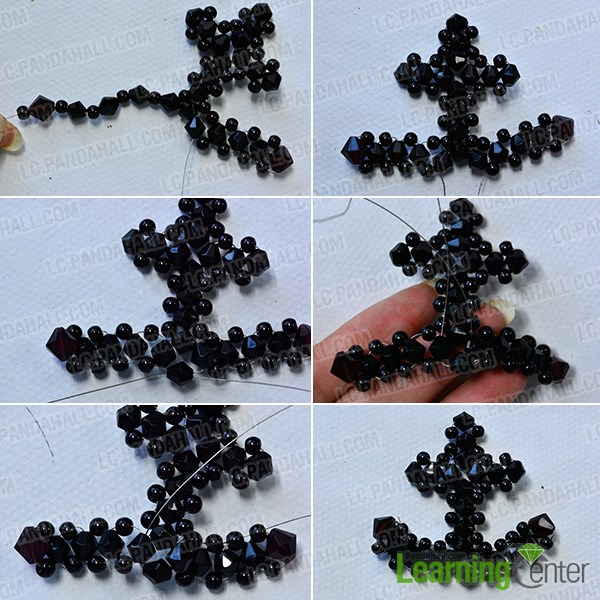
Step 7: Slide brass round beads
1st, cut a proper length of copper wire and thread it through the top faceted bead;
2nd, slide 13 brass round beads on the left wire, then thread it through the body of the corsair;
3rd, make a knot at the back and cut the excess copper wire, showing as the picture below.

Step 8: Finish the corsair keychain
1st, cut a proper length of copper wire and thread it through the top black faceted bead;
2nd, hang the iron cord end on the copper wire and make several loops to fix the cord end;
3rd , connect the faux suede cord with the cord end.

So far, we have got the final look of the DIY beaded corsair keychain.

Hey girls, how do you think about the corsair keychain? I believe if you make such a cool corsair keychain for your boyfriend, he must be pretty happy and touched! If you have any confusion, please feel free to ask me or leave a comment. Hope you like the Pandahall tutorial and wish you a good day!