- Comments (0)
- Dec 24, 2015
Pandahall Tutorial about How to Make Easy Christmas Cards
Summary: Do you love quilling tutorials? I guess yes! So in today's Pandahall tutorial, i will share you how to make easy Christmas cards with quilling paper. Hope you like it.

I am so happy to introduce the tutorial about how to make easy Christmas cards to you. I think this project suits kids pretty much. Hope you could get some DIY Christmas card ideas from it. Are you expecting it? If yes, let’s start to see HOW together.
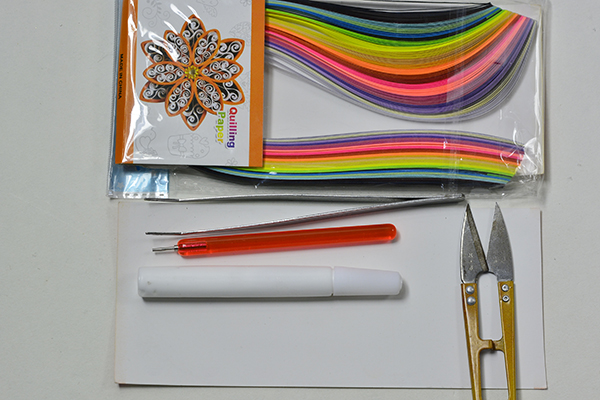
Supplies needed in DIY the easy Christmas cards:
380x3mm Green Quilling Paper Strips
380x3mm Quilling Paper Strips
Card
Scissors
Iron tweezers
White glue
Rolling pen
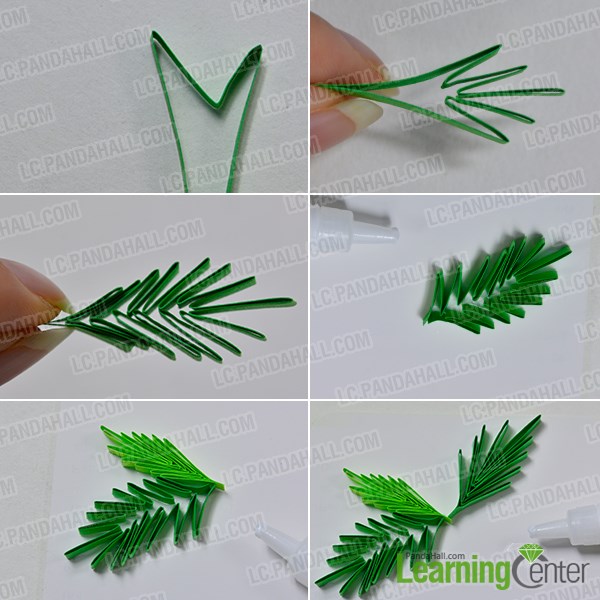
Step 1: Make the Christmas tree
1st, fold the heavy green quilling paper as the Christmas tree shape;
2nd, continue to make the “Christmas tree”;
3rd, make another Christmas tree with light green quilling paper, please see the picture below.
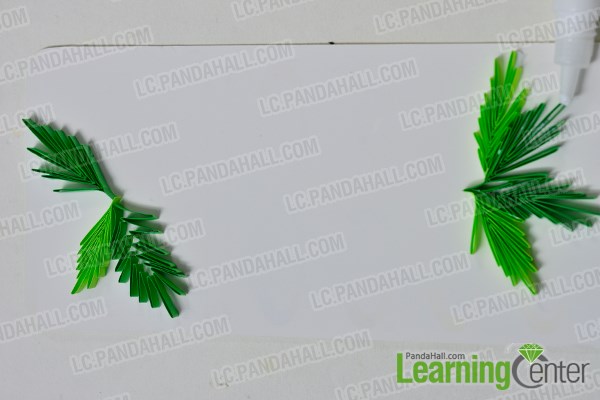
Step 2: Paste the “Christmas tree”
Paste the “Christmas tree” on the 2 sides of the card with white glue.
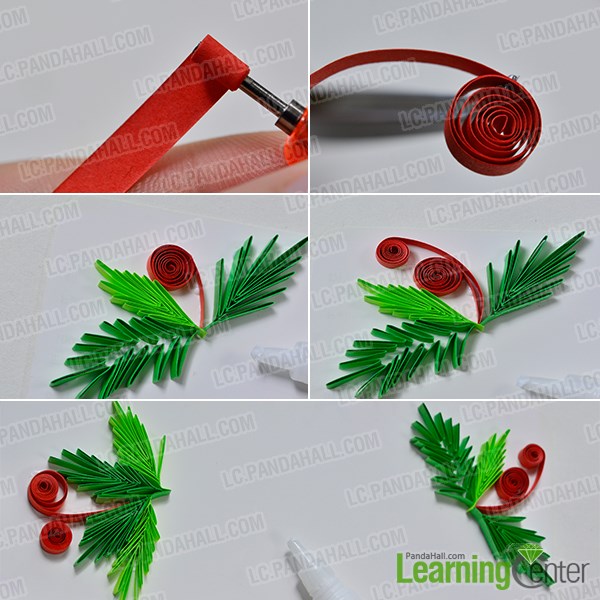
Step 3: Roll the ribbons
1st, roll two pieces of red quilling paper as ribbons with the rolling pen;
2nd, paste the ready red ribbons near the Christmas tree, showing as the picture below.
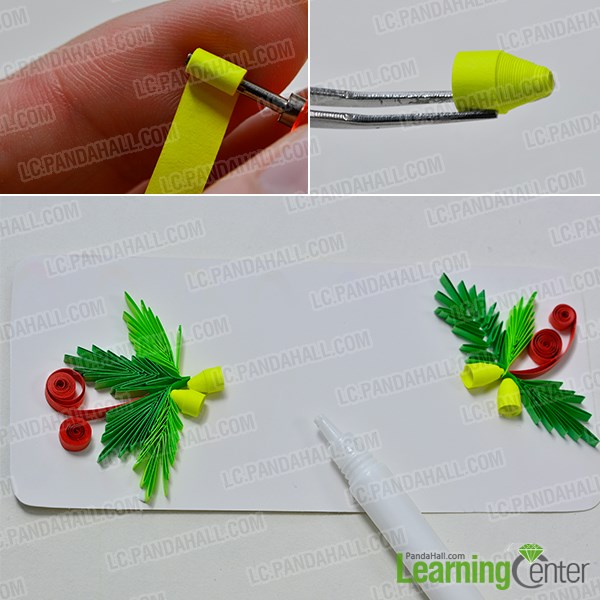
Step 4: Roll the yellow charms
1st, roll two pieces of yellow quilling paper as the pen shape with the rolling pen;
2nd, paste the “pen” under the Christmas tree, showing as the picture.
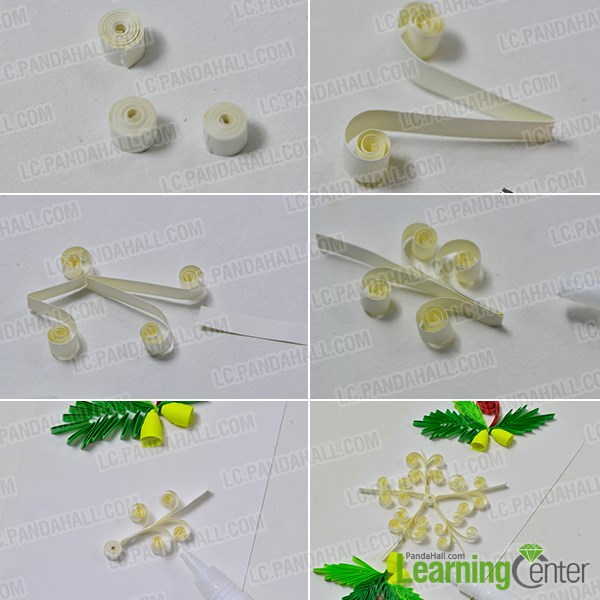
Step 5: Make the snowflakes
1st, roll 3 pieces of white quilling paper like the picture below shows;
2nd, roll the white quilling paper as the snowflake shape.
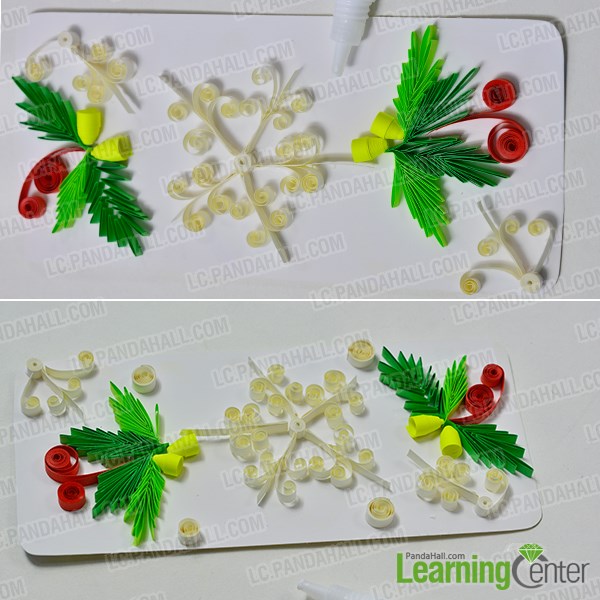
Step 6: Finish the Christmas card
Paste the “snowflakes” on the card, showing as the picture below.
Here is the final look of the easy DIY Christmas card.
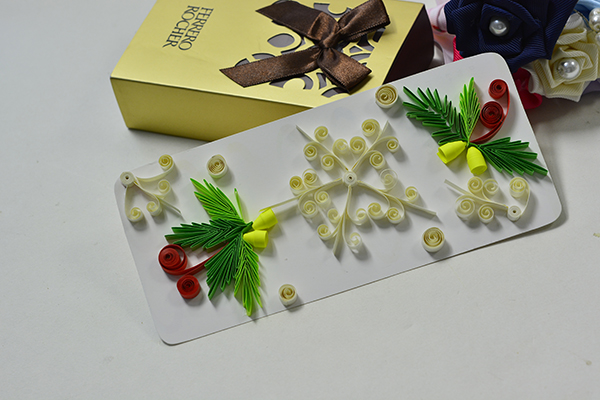
Hey guys, how do you think about the Christmas card? It looks pretty nice, right? Besides, it’s also quite funny and easy to make it, believe it or not. If you have an interest in DIY making, why don’t you have a try? Hope you like it and have a nice day.