- Comments (0)
- Dec 15, 2015
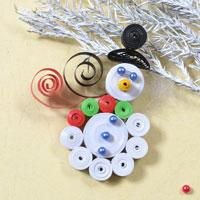
How to Make a Red Glass Beaded Christmas Ball Phone Chain with Green Bow
Summary: Do you want to make your own key chain for the Christmas? This is a free tutorial on how to make a red glass beaded Christmas ball phone chain with green bow. Hope you enjoy it.

As the Christmas Day is approaching, I come up with an idea on making a cute DIY beaded Christmas phone chain today. So I pick some 6mm red faceted glass beads, a 8mm green pearl bead and a piece of green ribbon to start my DIY project on a beaded Christmas ball phone chain. Now let's see how I made this glass beaded Christmas ball phone chain with green bows.
Supplies in making the red glass bead Christmas ball phone chain with green bow:
8MM Green Pearl Beads
6MM Red Faceted Glass Beads
0.3MM Tiger Wire
1.2CM Green Grosgrain Ribbons
Iron Headpins
Phone Chain
0.3MM Copper Wire
Scissors
Round Nose Plier

Instructions on making the red glass beaded Christmas ball phone chain with green bow:
Step 1: Make the starting patterns
1st, snip off a piece of 0.3mm tiger wire (about 50cm), thread one end through 5 6mm red glass beads;
2nd, thread the right wire through the first glass bead you just added;
3rd, add 4 red glass beads to the wire and then thread the left wire through the last red glass bead you just added and tighten;
4th, thread the left wire through the bead beside it, then add 3 red glass beads on the right wire;
5th, thread the left wire through the last red glass bead you just added and tighten.

Step 2: Make a half of the Christmas ball
1st, slide 3 red glass beads to the right wire, then thread the left wire through the last red glass bead and tighten;
2nd, thread the left wire through the glass bead beside the glass bead (that you thread the wire through it in 1st procedure ), and add 3 glass beads to the right wire again and finally thread the left wire through the last red glass bead and tighten;
3rd, thread the left wire through the glass bead in the line as shown, and add 2 glass beads on it;
4th, thread the left wire through the last glass bead and tighten up.
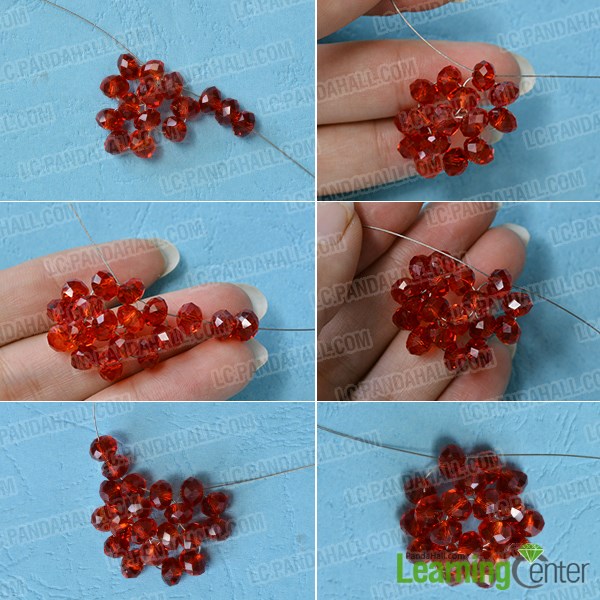
Step 3: Finish the red glass beaded Christmas ball
1st, thread one wire through a glass bead beside it, then add 3 glass beads on the other wire (the right wire in the picture);
2nd, thread the right wire through the last red glass bead and tighten;

3rd, thread both wires through the glass bead beside them, add another 2 red glass beads on the right wire, and then thread the right wire through the second glass bead you just added;
4th, thread both wires through the glass beads beside them again, then add 2 glass beads on the left wire, and thread it through the second red glass bead and tighten up to finish the red glass Christmas ball.

Step 4: Make a red glass beaded Christmas ball dangle
Trim off the extra wires, then thread a red glass bead and the Christmas ball through a headpin.

Step 5: Add green ribbon bow and finish the Christmas Phone chain
1st, cut a piece of 12cm green ribbon, then fold a ribbon as shown;
2nd, snip off a piece of 10cm copper wire, and tie to the center of the bow for several circles;
3rd, cross the copper wires through a 8mm green pearl bead, and continue to tie the wires;
4th, insert the headpin through the back of the bow and make a loop at the end of the headpin;
5th, hook the dangle to the hole of the key chain in the end.

Time for the final look!
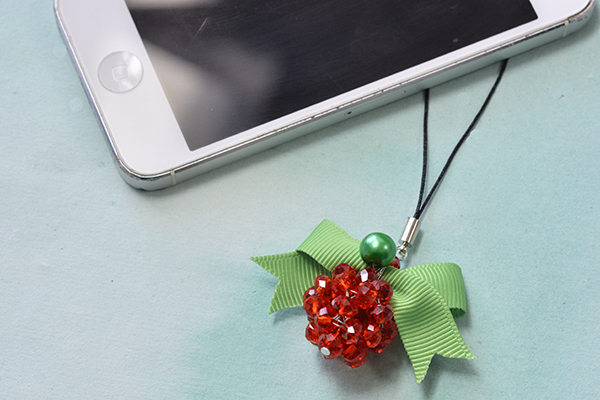
This red glass beaded Christmas ball with green bow could also be used as key chain. In making the red glass beaded Christmas ball; the key step is to stitch the patterns together. If you have acquired the beading and stitching skills in making this phone chain, then it would also be easy for you to make other 3D crafts! Why not take the challenge?