- Comments (0)
- Nov 25, 2015
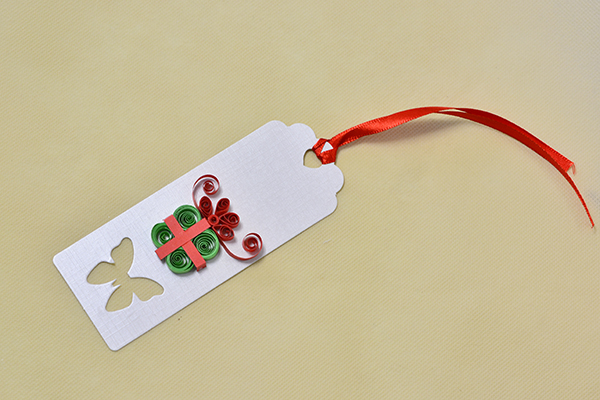
How to Make Quilling Paper New Year Greeting Card with Gift Box Design
Summary: Are you seeking for New Year quilling paper greeting card designs? Just check this tutorial on making a quilling paper card with gift box design. It won't let you down!

As the New Year festival is approaching, I started to make Christmas and New Year cards since last week. There are many handmade New Year cards designs on our site, and this one is designed with a quilling paper gift box on it. Hope you enjoy it and give it a try!
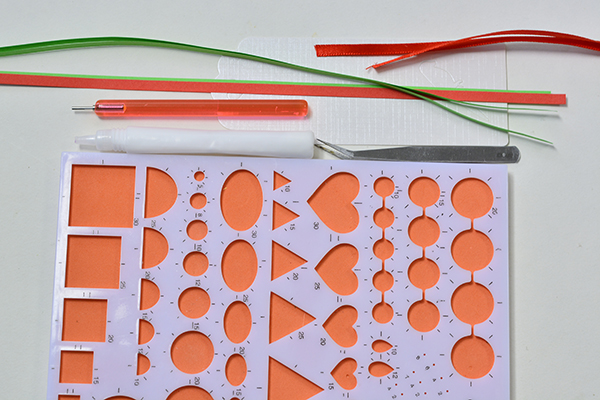
Supplies in making the quilling paper New Year greeting card:
Paper Card
5mm Red Ribbon
5mm Red Quilling Paper
5mm Green Quilling Paper
Tweezers
Glue
Quilling Model
Instructions on making the quilling paper New Year greeting card:
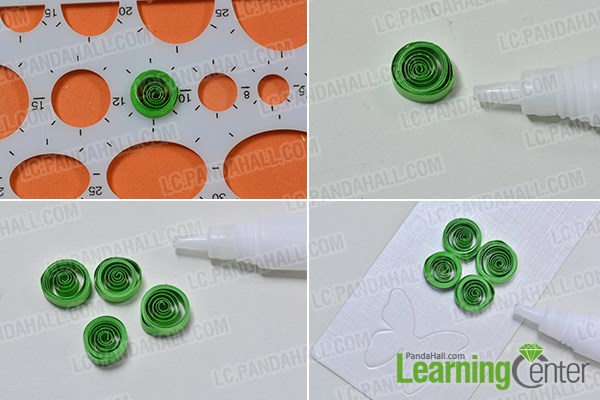
Step 1:Roll 4 green quilling paper beads
1st, cut a piece of 5mm green quilling paper (about 12cm), and roll it and adjust it into 10mm bead;
2nd, stick the tail of the green quilling paper;
3rd, repeat the process to make the rest 3 10mm quilling paper beads;
4th, stick the beads to the middle part of the card respectively as shown.
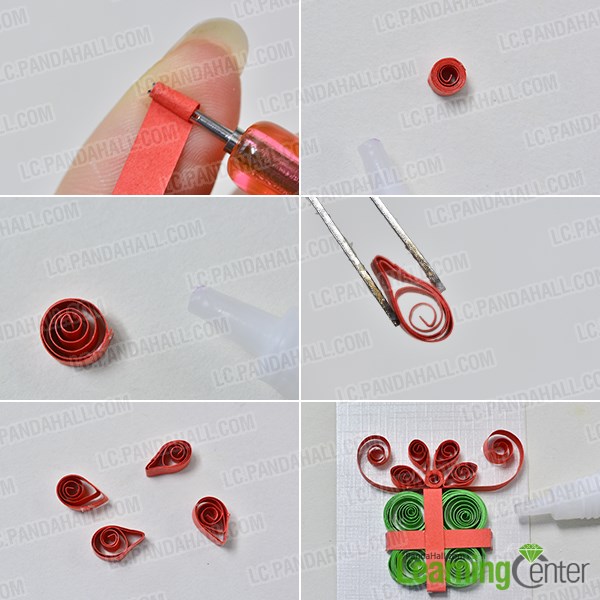
Step 2: Add red quilling paper ornaments
1st, cut 2 pieces of 5mm red quilling paper, fold up the both ends (about 5mm deep) and stick them to the green box and make a cross;
2nd, cut another piece of 5mm red quilling paper, and then roll the ends with a proper length and stick it on the top of the gift box.

Step 3: Add wrapping ornaments
1st, cut 5 pieces of 5mm red quilling papers and then roll them into beads one by one;
2nd, pick 4 beads and then press one end and make petal shape respectively;
3rd, stick the petals on the top of the gift box with the red quilling paper bead in the center.
Step 4: Finish the New Year card ornament
Cut a piece of 70cm 10mm red ribbon, and then tie a knot to the hole of the card.
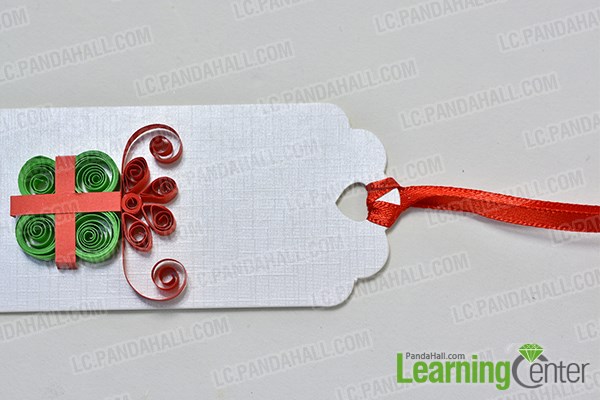
Done! Do you like this quilling paper New Year greeting card design?
I finished this quilling paper greeting card with gift design within 20 minutes and I believe that you could also make it out in a short time by following this tutorial. It would be much more interesting if you invite your kids to join this DIY project with you. Nice try!


