- Comments (0)
- Nov 23, 2015
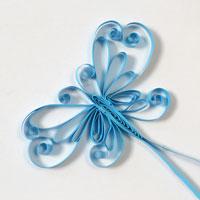
Handmade Home Decor Craft – Ribbon Photo Frame with Bow Ornament
Summary: This article shows the steps on making a handmade home decor craft – ribbon photo frame with bow ornament. Hope you enjoy it with me.

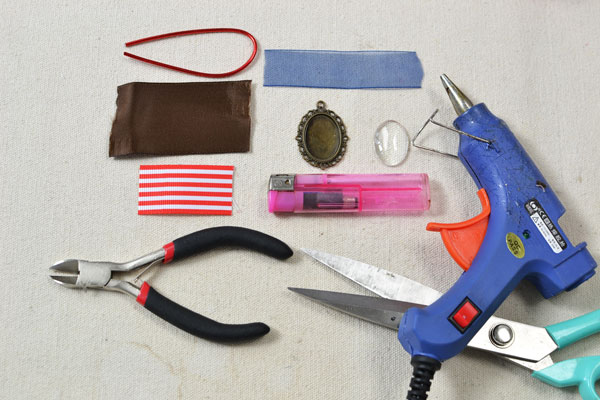
Do you want to make an easy photo frame for wall decoration? Today I will bring you a new tutorial on making a ribbon photo frame with bow ornament. As you can see from the picture, the basic materials are ribbons and cabochons. If you do not have the cabochons at hands, just use other ornaments to replace that.
Supplies in making the ribbon photo frame with bow ornament:
Tibetan Cabochon Settings
Oval Transparent Glass Cabochons
2.5cm Red and White Strip Ribbon
2cm Blue Lace Ribbon
4cm Coffee Satin Ribbon
2mm Red Aluminum Wire
Side Cutting Plier
Lighter
Scissors
Glue and Glue Gun
Instructions on making the ribbon photo frame with bow ornament:
Step 1: Make the basic photo frame
1st, snip off 2 pieces of 2mm red aluminum wires (one is about 58cm and the other is about 42cm long);
2nd, twist the wire and make 2 rectangles, measuring 16cmx13cm and 12cmx9cm respectively; 3rd, stick the angles with hot glue and let it dry;
4th, cut a long piece of 2cm lace ribbon, and then wrap it around the aluminum wire frame.

Step 2: Add ribbon bow ornament
1st, cut a piece of 20cm coffee satin ribbon, make a bow and stick it to frame;
2nd, cut another piece of 15cm blue lace ribbon, fold it in halves and stick on the surface of the coffee bow;
3rd, cut a piece of 18cm white and red strip ribbon, and wrap around the center of the bow leave a tail.

Step 3: Add cabochon drops
1st, snip off 2 pieces of copper wires, and then wrap and tie the cabochon settings to the frame as pictured;
2nd, stick the cabochon setting to the white and red strip ribbon.
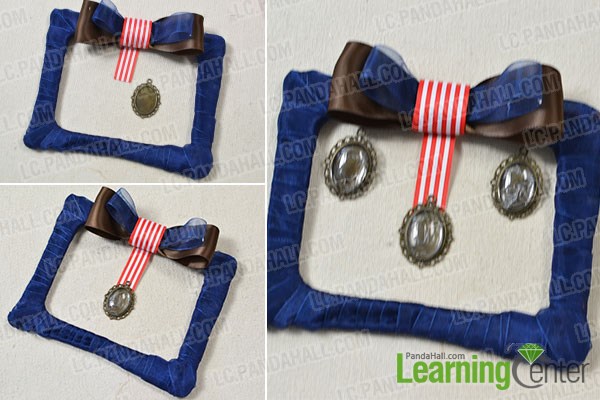
Done!

This ribbon photo frame DIY project is a very good choice for housewives to try! The supplies are simple and the steps are easy. Just give it a try by following my tutorial above.