- Comments (0)
- Nov 15, 2015
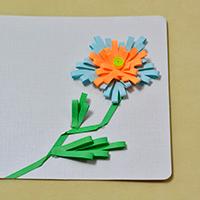
How to Make Lifelike Paper Quilling Plum Flowers Cards Step by Step
Summary: A homemade plum flowers card with quilling paper is meaningful for holiday or friends’ birthday. Follow me to learn how to make this quilling paper card and have a try!

This lifelike plum flowers card do not need some unusual materials, but quilling paper. Those flowers, twig, or petals are rolled with it. Plum flower bloom in winter, it always imply virtuous and superior. You will make a great gift for holiday or birthday party, I contend the receiver will be moved. Now, follow my tutorial and start your DIY journey.
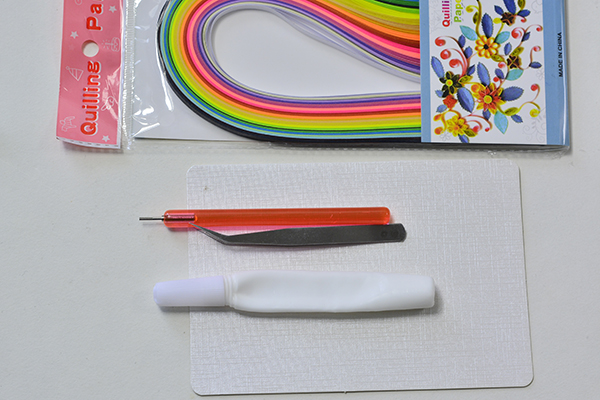
Supplies in making lifelike quilling paper plum flowers cards step by step:
Quilling paper
Rolling Pen
Tweezers
White Glue
Step 1:Stick twig on card
1st, roll a main big twig with a scroll, just like the picture below;
2nd, roll the other twigs, stick them to the card.

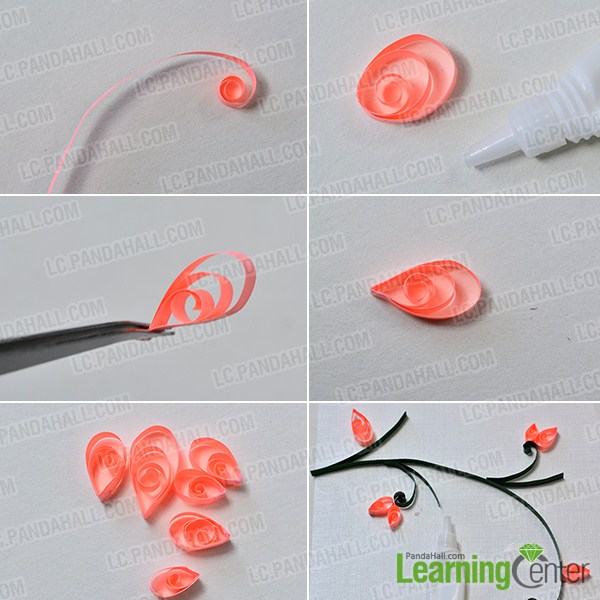
Step 2: Make paper flowers
1st, roll a big scroll with pink quilling paper, make it as a petal;
2nd, stick the superposition and pinch it;
3rd, make other 5 petals with different size, and stick them to card, near those twigs firmly.
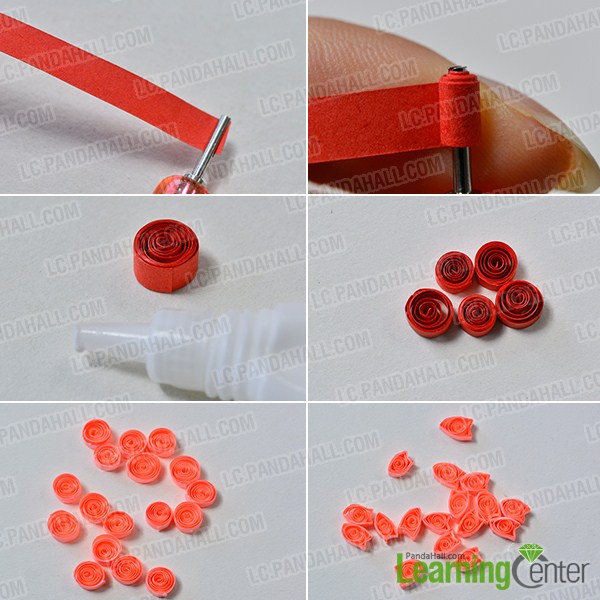
Step 3: Roll two kinds of petals
1st, take 20cm bright red quilling paper, roll it as a circle petals, and stick the end firmly;
2nd, make other 4 bright red circle petals, and 17 pink circle petals;
3rd, pinch the 17 pink circle petals with your thumbs and index fingers, make them like a fish.
Step 4: Stick petals to twigs
1st, roll 2 buff quilling paper petals, pinch them like a fish;
2nd, stick all the petals to the twigs, just like the picture below.
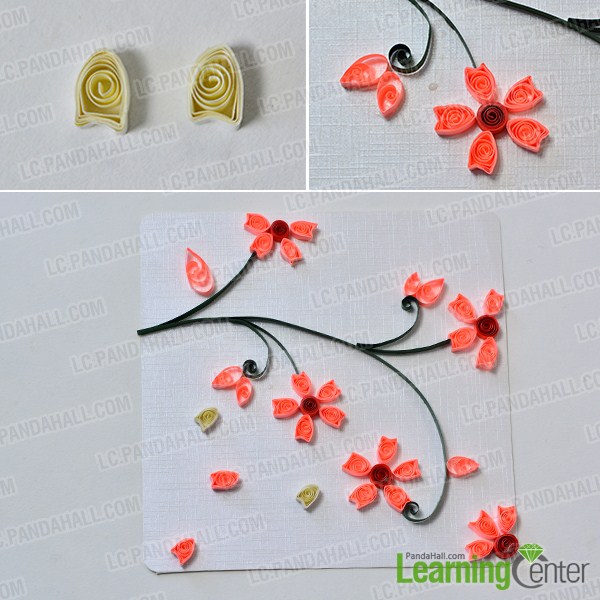
Now, this lifelike quilling paper plum flowers card is finished in a short time.

In making this quilling paper plum flowers card, you do not need other skills, you can choose other color that you like, or stick many more flowers on it. And you can also write a brief note on the back of this card, just as you like. That is the end of my tutorial, have a nice try!