- Comments (0)
- Oct 18, 2015
Pandahall's Free Tutorial on How to Make a Beaded Christmas Tree
Summary: This is Pandahall's new DIY project for the Christmas day – handmade mini beaded Christmas tree. Follow me to see how to make this cute and lovely Christmas craft.
Christmas tree will definitely appear in every house on Christmas day and kids all love it! With colorful beads available, I made this 3D mini Christmas tree craft. If you want to try this beaded Christmas tree crafts, just keep patient and you will grasp beading technique after finishing this DIY project!
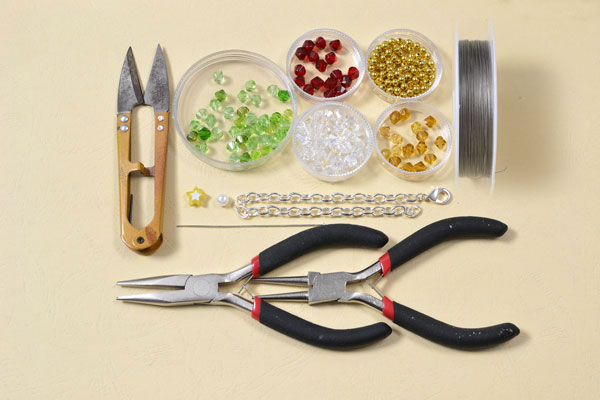
Supplies in making the beaded mini Christmas tree ornament craft:
4mm Deep Green Glass Beads
6m Brown Glass Beads
6mm Yellow Glass Beads
6mm Coffee Colored Glass Beads
6mm Transparent Glass Beads
6mm Red Glass Beads
6mm White Pearl Beads
Gold Bead Spacers
Chain Bracelet
Yellow Star Bead
0.3mm Tiger Wire
Iron Headpin
Scissors
Long Nose Plier
Round Nose Plier
Instructions in making the beaded mini Christmas tree ornament:
Step 1:Bead a basic pattern
1st, snip off a 30cm long tiger wire, slide 2 6mm transparent glass beads, and cross the ends through another transparent glass bead;
2nd, slide 2 transparent glass beads on one wire, and thread the wire backward through the first bead on this line and thread its way along to the first bead that you just slid;
3rd,slide 2 glass beads again to the right wire, and bead one more pattern in the same way;
4th, thread a transparent glass bead on the right wire, and thread the wire through the top bead and tighten.
Step 2: Bead 4 square patterns
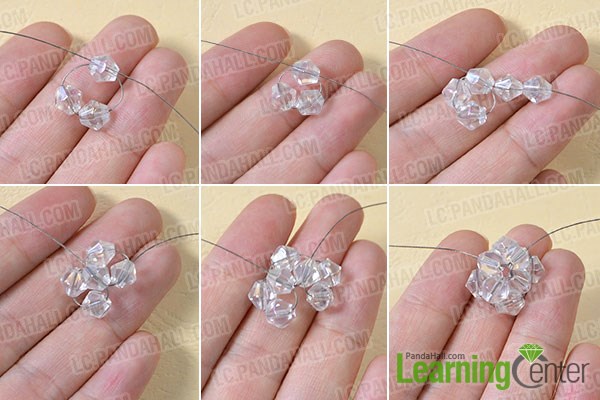
1st, slide 3 transparent beads on the right wire, and thread the wire back through the first bead in previous pattern to make the first square pattern;
2nd, add 3 beads on the other wire, wrap the wire and thread it through the bead in previous pattern and tighten to finish the second square pattern;
3rd, repeat above steps to bead the rest 2 square patterns.
Step 3: Add 6mm red glass beads
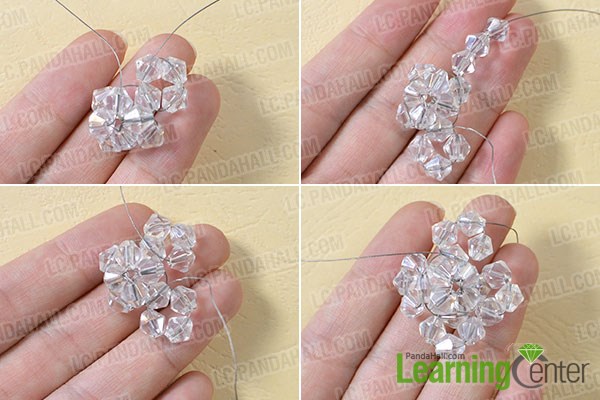
Slide a 6mm red glass bead to one wire, and thread the wire through the ytre bead in the square pattern, add a red glass bead, and thread the wire through the next ytre bead in square pattern and go ahead to add 2 more red glass beads in the same way and finally tighten up and trim off the wire.
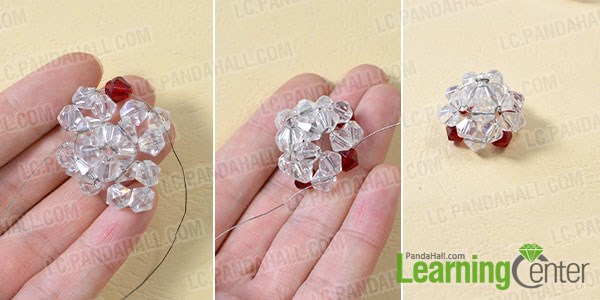
Step 4: Bead the middle body of the Christmas tree
1st, snip off a 40cm long tiger wire, and firstly bead the same basic pattern as you did in step 1;
2nd, make the 4 square patterns with green glass beads as shown in the picture;
3rd, add red glass beads in the same procedure as in the last step;
4th, add gold bead spacers one by one to the space between the green beads and the red beads.
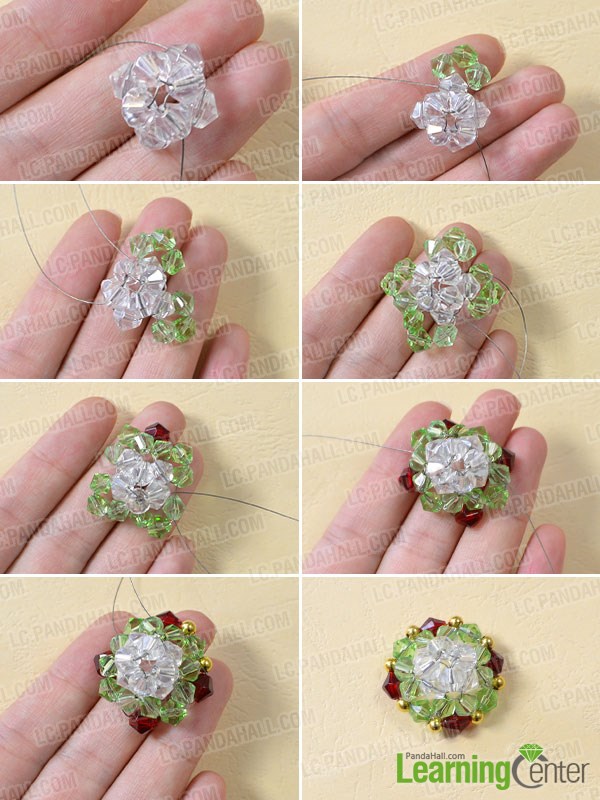
Step 5: Make the bottom part of the Christmas tree
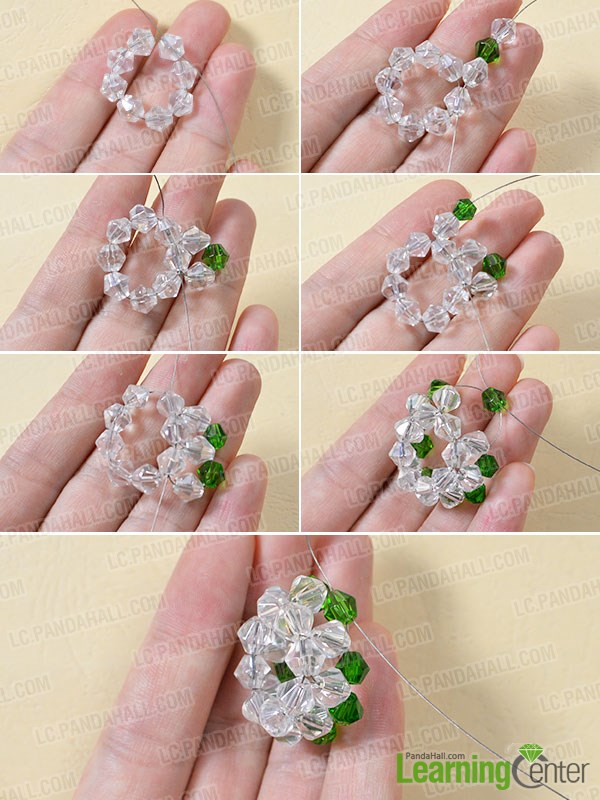
1st, snip off a 45cm long tiger wire, and then slide 7 6mm transparent beads and cross both ends through another transparent bead and tighten;
2nd, add a 6mm transparent bead, a 4mm green bead and another transparent bead to the right wire, and wrap and thread the wire through the 2 6mm transparent beads that are the nearest to the first bead you just added to make a square pattern;
3rd, slide a 6mm transparent bead and a 4mm green bead, and thread the wire through along the bead on the last square pattern and the bead on the first circle to make the second square pattern;
4th, go ahead to bead more square patterns in the same way;
5th, slide a 6mm red bead to each wire, and then thread the wires cross 2 6mm green beads to make a little circle;
6th, repeat above procedure to make more circle patterns and finally thread the wire through gold bead spacers to dot the spacer between the green beads and finish the lower body of the Christmas tree.
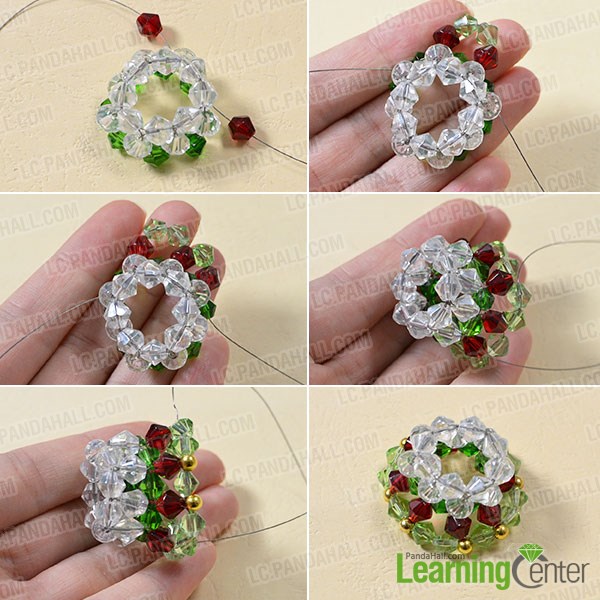
Step 6: Make the trunk
1st, snip off a 30cm long tiger wire, slide 3 6mm transparent glass beads and cross the ends through a new bead and tighten;
2nd, slide a 6mm brown glass bead to each wire, and cross wires through another brown bead and tighten;
3rd, bead another square pattern with the brown glass beads;
4th, wrap the wire and stitch the fringe and then add 2 coffee glass beads to each wire, and cross the wires through another coffee bead and tighten and trim off the wire.

Step 7: Finish the beaded Christmas tree
1st, thread a 6mm white pearl bead to a headpin, and then slide place the component part of the Christmas tree to the headpin in sequences as shown in the picture;
2nd, thread a yellow star bead, and make a loop on the top;
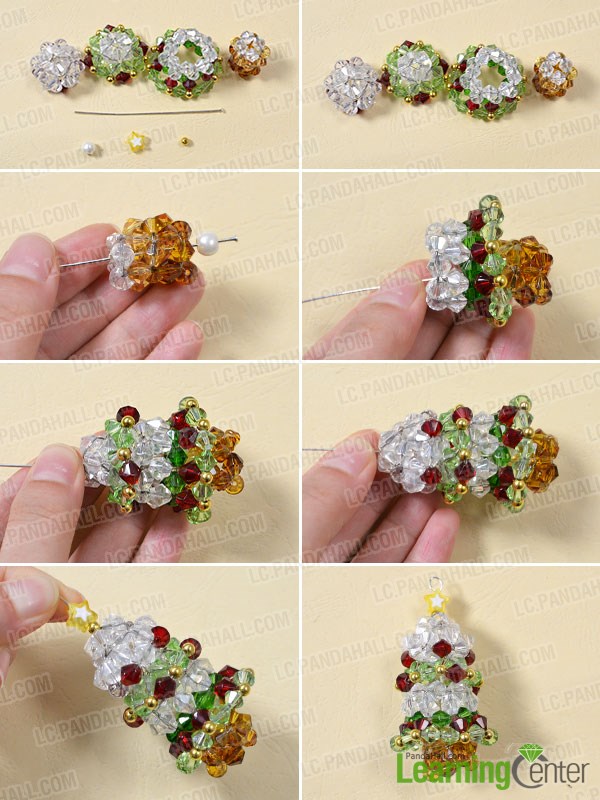
3rd, attach the silver chain bracelet to the hook of the Christmas tree on the top and finish the whole Christmas tree craft.
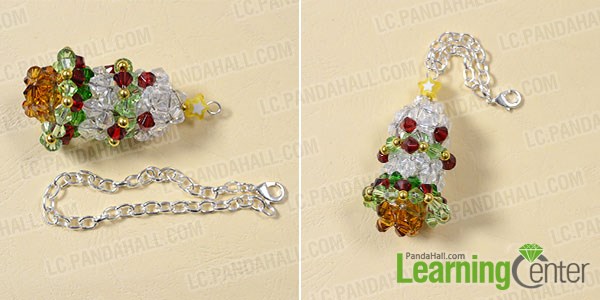
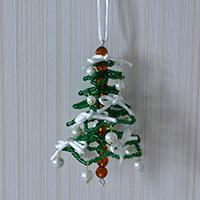
Now I share the final look of the mini colorful beaded Christmas with you! Have you been attracted by this cute 3D craft?
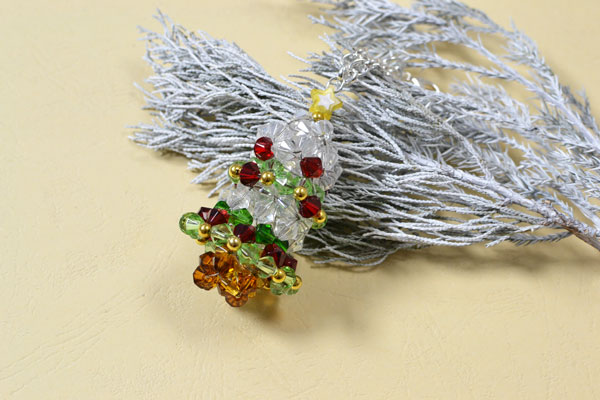
This DIY beaded mini Christmas tree is a little difficult for jewelry makers who are not so familiar with beading patterns or stitching technique. But it is OK if you want to make a challenge and try yourself! Just be patient and follow my tutorial, you can also make this colorful beaded Christmas tree.


