- Comments (0)
- Sep 29, 2015
Pandahall's Free Tutorial on Making a Pink and White Bridal Pearl Statement Necklace with Pendent
Summary: There are many pearl jewelry on our website. In this tutorial, I will show you how to make a bridal pink and white pearl bead statement necklace.

Having a romantic wedding is every girl's dream. She would be the most beautiful on the wedding day. Bridal jewelry is important and necessary on that day. Today I will share you how to make bridal jewelry on a pink and white pearl statement necklace with pendent. If you have friend who is a bride-to-be or if you are seeking for bridal jewelry for your wedding, then you can try this one to make one for your fiend or for yourself.
Supplies in making the pink and white pearl statement necklace:
2mm White Pearl Seed Beads
2mm Pink Pearl Seed Beads
4mm Pink Electroplate Glass Beads
10mm Transparent Crystal Beads
10nn White Pearl Beads
6mm White Pearl Beads
Transparent Glass Drop Beads
Heart Clasp
0.3mm Tiger Wire
Round Nose Plier
Scissors

Instructions in making the white and pink pearl statement necklace:
Step 1:Bead the starting cord
1st, snip off a long tiger wire and tie one end to the bronze heart clasp. Slide 8 white seed beads to each wire, and then add a 10mm transparent glass bead;
2nd, continue to slide 5 seed beads plus 3 pink seed beads to both wires;
3rd, thread the wire backward through the first pink seed bead and tighten. Do the same on the other wire.
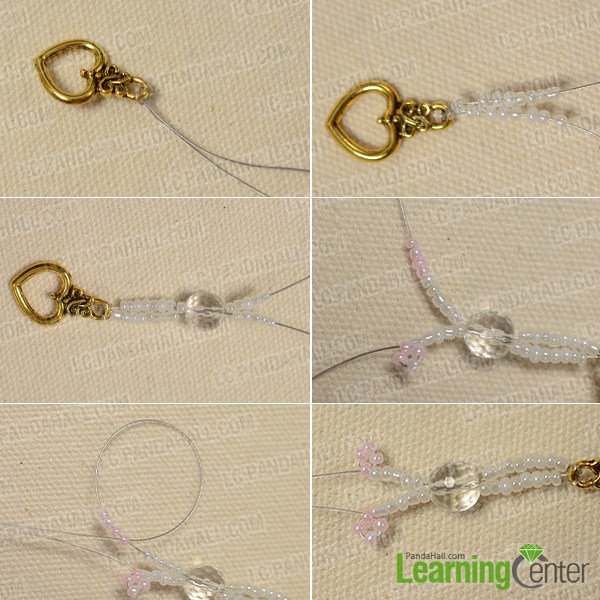
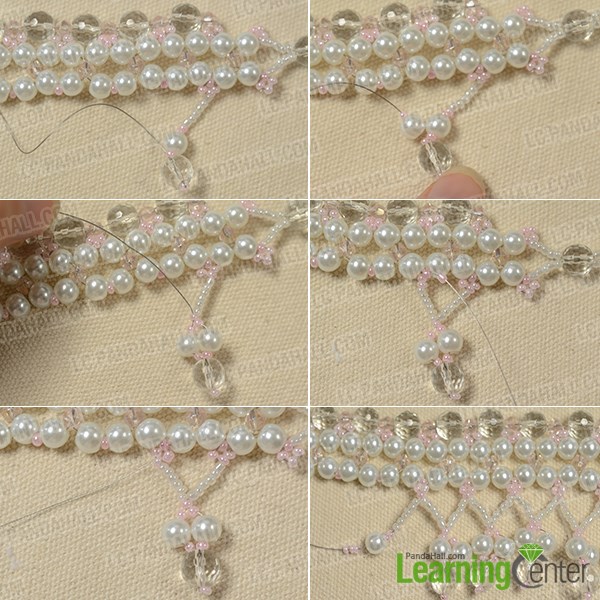
Step 2: Bead the necklace pattern
1st, slide a 6mm white pearl bead to each wire, and then cross the wires through a 4mm pink glass bead;
2nd, slide a 6mm white pearl bead, a pink seed bead, a white 6mm pearl bead and a 4mm pink glass bead in sequence on the upper wire;
3rd, slide a 6mm white pearl bead, 2 pink seed beads, a 4mm pink glass bead plus a pink seed bead on the lower wire. Cross the wire backward through the first pink seed back beside the pearl bead and tighten;
4th, slide a 6mm pearl bead on the lower wire, and then cross the wires through the pink glass bead on the upper wire and tighten;
5th, repeat the process to bead more patterns until you finish the necklace.
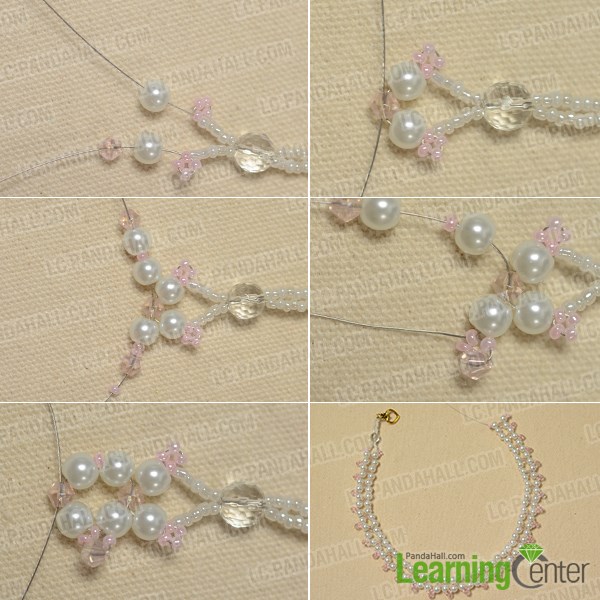
Step 3: Attach ending clasp
1st, when you have beaded a proper length, slide 5 seed beads on each wire and plus a transparent glass bead as what you did in making the starting cord;
2nd, cross the wire and tie to the clasp and trim off the excess.
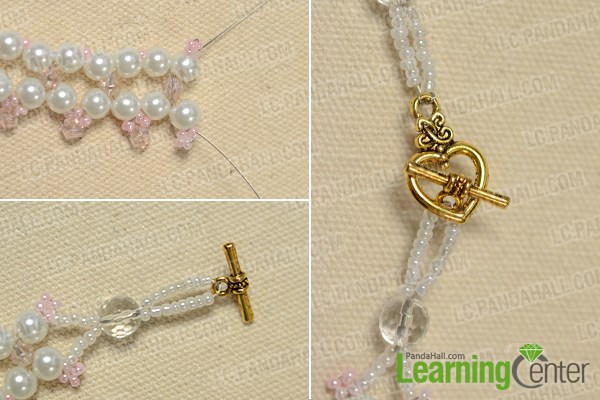
Step 4: Bead additional upper layer
1st, snip off a very long tiger wire, and thread it trough a 6mm white pearl, a 4mm pink glass bead, a pearl bead, a pink seed bead and a pink glass bead in sequence through the second line from the starting;
2nd, slide a 10mm transparent glass bead on the right wire, and thread again through the next pink glass bead in the line. Add a transparent glass bead again and thread the wire through the next pink glass bead;
3nd, repeat above process and finish the upper layer and trim off the excess.
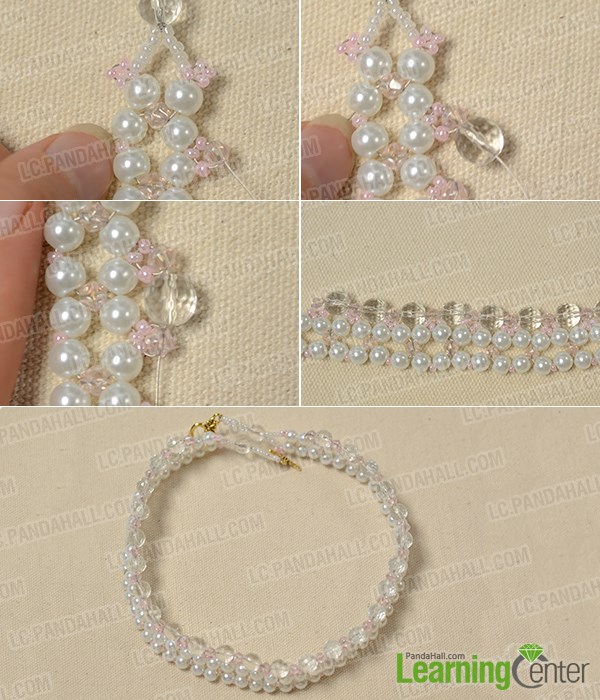
Step 5: Bead the lower layer
1st, slide 3 pink seed beads, and cross the wire through the last bead and tighten. Slide 6 white seed beads, 2 pink seed beads, a white pearl bead, a transparent glass bead and finally a pink seed bead on one wire;
2nd, thread the wire backward through the transparent bead, and then add a pink seed bead, a 6mm white pearl bead, a pink seed bead and then thread the wire through the pink seed bead as shown in the picture;
3rd, slide 6 white seed beads and 2 pink seed beads, thread the wire through the pink seed bead on the primary line, add a pink seed bead and finally thread the wire through the pink seed bead and tighten;
4th, repeat the procedure to bead more patterns until you reach the right middle;
5th, make the same pattern but replace the 10mm transparent glass bead with 2 pink seed beads as shown in the picture, and thread the wire through the first pink bead;
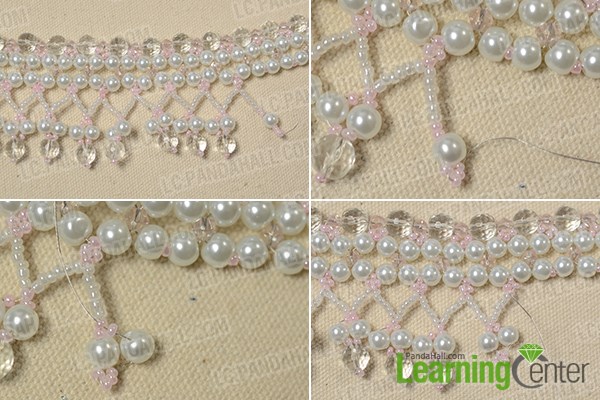
6th, make the rest of the pattern as what you did in 1st, 2nd and 3rd process and finish the lower layer.
Step 6: Make the necklace pendent core
1st, snip off a tiger wire and slide a 10mm white pearl bead, then cross each wire through the hole as shown in the picture;
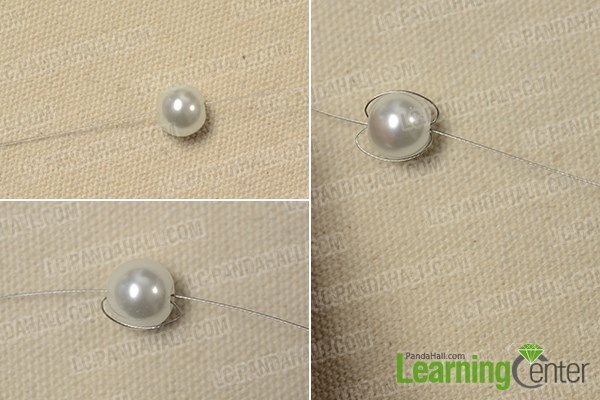
2nd, slide 2 4mm pink glass beads, then cross the wire upward from the tiger wire on the surface of the 10mm pearl bead and then thread the wire back through the 4mm glass bead and tighten;
3rd, slide anther pink bead on the wire, and repeat the process until you finish beading the layer for the 10mm pearl bead.
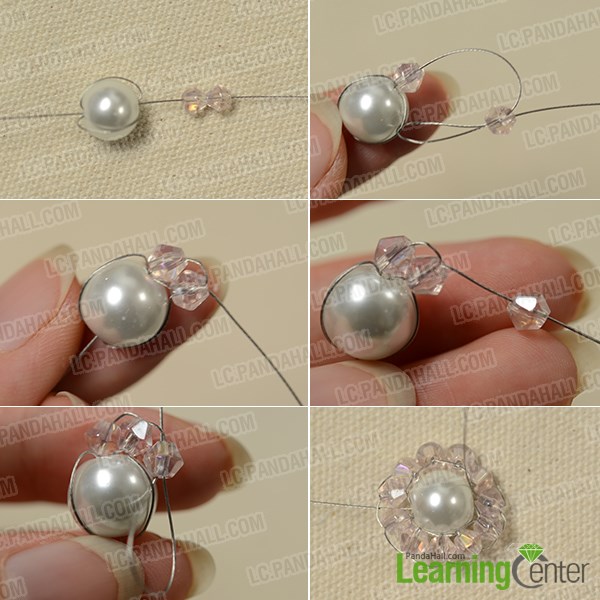
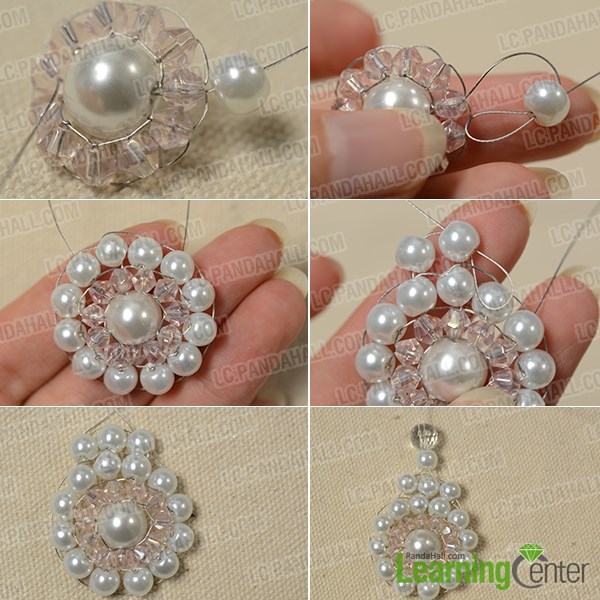
Step 7: Finish the drop pendent
1st, slide a 6mm white pearl bead, and cross the upward from the wire on the first layer. Make the second layer in the same way as the last step;
2nd, bead 3 pearl beads on the top in the same way, and then thread both wires through a 6mm white pearl bead and a 10mm transparent glass bead.
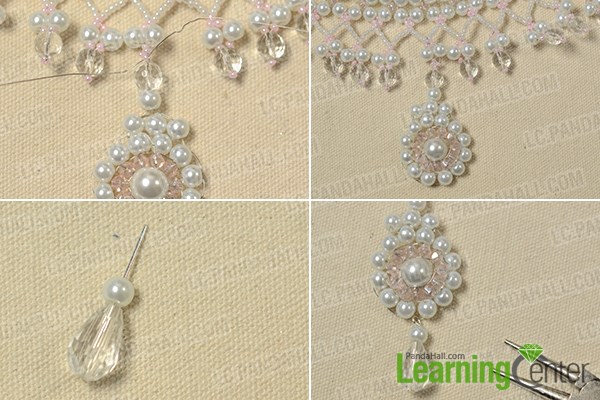
Step 8: Attach the pendent to the necklace
1st, attach the pendent to the middle of the necklace by crossing the wire through the pink seed bead on the drop as shown in the picture;
2nd, thread a transparent glass drop bead and a 6mm white pearl bead to a headpin and make a loop at the end, then hook it to the pendent drop and tighten it.
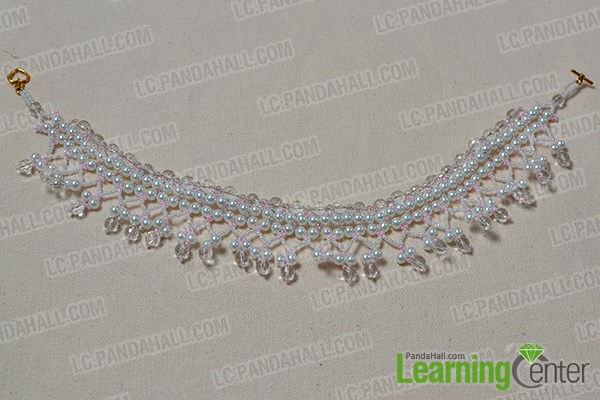
I made it! This beautiful pearl necklace is finally finished! I just can't say any word to describe it!
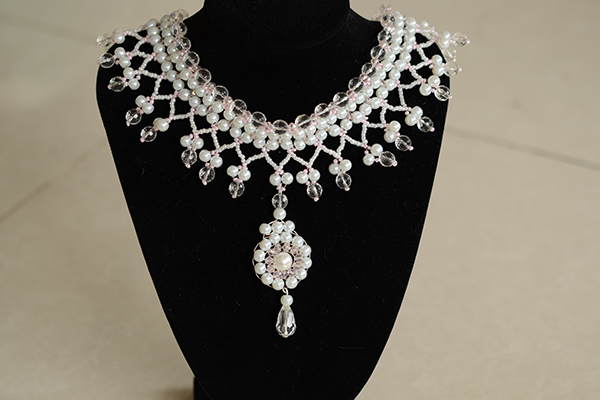
Although it took me much time to make it, I felt it worthwhile to do it when I saw the final piece, just so elegant and marvelous! I suggest you to make your own bridal necklace instead of buying one at a high price. Have a try, for yourself or for your best friend!


