- Comments (0)
- Jul 17, 2015
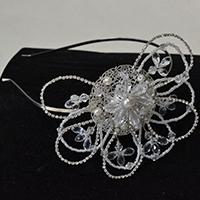
How to Make a Vintage Gold Wire Wrapped Hairpin with Beads Decorated
Summary: This article tutors a vintage gold wire wrapped hairpin DIY project. All you need is some wires, some beads and 2 jewelry pliers. Follow the steps to learn how to make a hair pin.

Hairpins are mostly used in weddings, parties and ceremonies. Among various types of headpins, the vintage hairpin usually brings more aura of mystery than others. In today’s DIY project, I made a vintage wire wrapped hairpin with beads decorated.
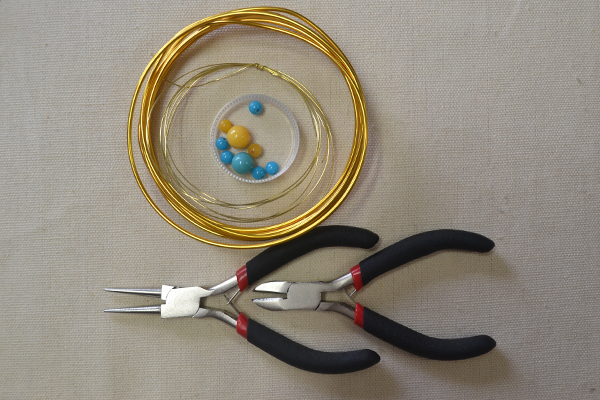
Supplies in making the gold wire wrapped hairpin:
Gold Copper Wire
Aluminium Wire
6mm Yellow Glass Beads
6mm Blue Glass Beads
10mm Beads
Side Cutting Plier
Round Nose Plier
How to make the gold wire wrapped hairpin?
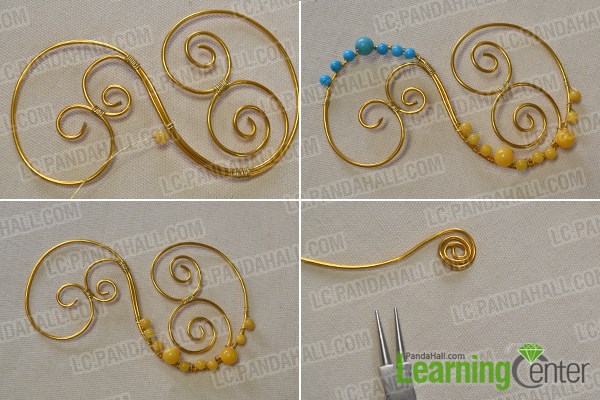
Step 1: Shape the hairpin
1st, snip off 2 Aluminum wires, and twist it into the shape as pictured respectively;
2nd, joint them with copper wire to finish the refined shape.

Step 2: Decorate the hairpin with beads
1st, snip off a long copper wire, tie one end to the hairpin and thread yellow beads to the other end;
2nd, keep threading yellow beads in sequences as pictured;
3rd, add blue bead decorations in the same way;
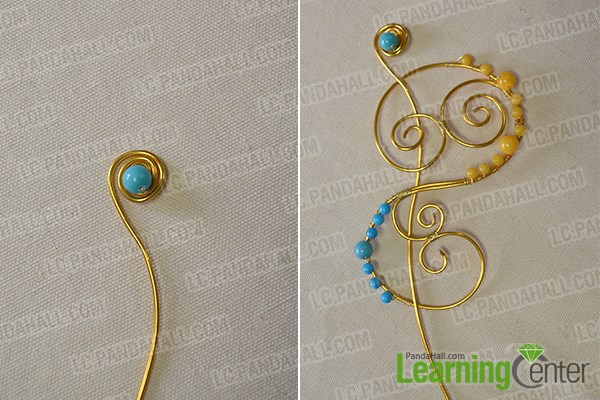
4th, twist an Aluminum wire with a snail peak, and wrap a blue bead in the center.
Done my vintage hairpin is! It's just so elegant and noble!

With blue and yellow colored beads matching and gold wire shape, this gold hair pin gives a simple and decent sense of view. You can also change the pattern and beads colors on it. Anyway, it is a good easy craft for you to have a nice try at home! Just follow my tutorial, you can make it!