- Comments (0)
- Jul 07, 2015
How to Make a Green Chenille Stick Spider Craft for Halloween Decoration
Summary: In this article, you can see an easy tutorial on how to make a green chenille stick spider craft for Halloween decoration.

DIY a spider is a great themed project for Halloween. Today's DIY project is a green chenille stick spider craft. This easy DIY Halloween spider project requires only a little bit of time and preparation. Now, let's see how to make this green chenille stick spider craft for Halloween decoration.
Materials and tools needed in DIY the green Halloween spider craft:
Green Chenille Stick
Yellow Chenille Stick
24mm Red Round Beads
10mm Evil Eye Beads
Glue Gun
Diagonal Plier
Iron Scissor

Instructions on how to make the green Halloween spider craft:
Step 1: Make the middle body for the green Halloween spider
1st, cut a piece of yellow chenille stick and thread a 24mm red round bead;
2nd, make a knot with one end of the yellow chenille stick (as shown in the picture).

Step 2: Make legs for the green Halloween spider and add eyes
1st, cut 4 pieces of green chenille stick. Then, twist the 4 green chenille sticks (as shown in the picture);
2nd, use glue gun to attach the 4 twisted green chenille sticks onto the yellow chenille stick one by one;
3rd, attach two 10mm evil eye beads onto the top green chenille stick(as shown in the picture).

Here is the final look of the green Halloween spider.
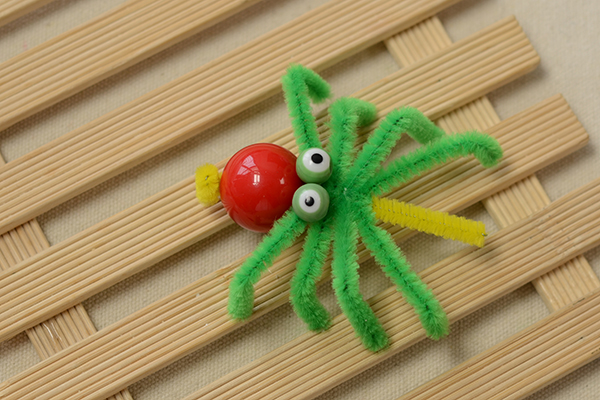
This green spider for Halloween looks very cute, right? After DIY the Halloween spider, you can display it in your house, hang it outside on your porch or place it in a fake spider web. Each spider has its own personality and DIY a Halloween spider is sure to spook you this Halloween season. You can also make creepy crawly spiders from everyday household materials. Have a try.