- Comments (0)
- May 06, 2015
Bridal Headpiece Tutorial-How to Make a Beaded Wedding Hair Accessory for Bride
Summary: In today's article, I'll share a bridal headpiece tutorial on how to make a beaded wedding hair accessory for bride with you.

Wedding hair accessories can add sparkle to bridal beauty. Every bride hopes to be the most beautiful princess on her wedding day or at her wedding party. In the following headpiece tutorial, you will see how to make a unique beaded wedding headpiece for bride. This DIY wedding decoration is easy to make and is a relatively inexpensive craft project.
Materials and tools needed in DIY the wedding decoration:
6mm Transparent Glass Beads
Silver Brass Chain
6mm White Pearl Beads
4mm White glass Pearl Beads
0.3mm Golden Copper Wire
Stainless-Steel Scissor

Instructions on how to make the headpiece:
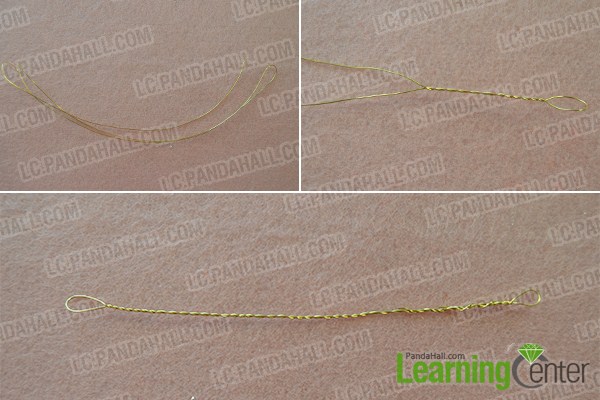
Step 1: Make a stem for the headpiece
1st, cut a piece of golden copper wire and fold it into half. Then, make a hoop and braid the two pieces of copper wire to a desired length (as shown in the picture);
2nd, make another loop and wrap the excess copper wire onto the braided part as shown in the picture. In this way, the stem of the headpiece is formed.
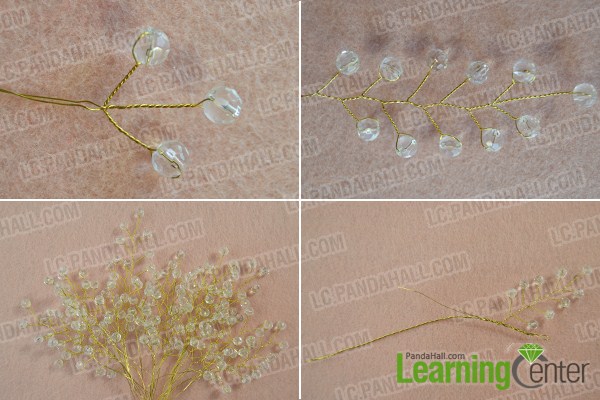
Step 2: Make branches for the headpiece
1st, cut another piece of copper wire. Then, fold the copper wire and string a 6mm transparent glass bead to the folded position;
2nd, braid the two pieces of copper wire below the transparent glass bead to a desired length (as shown in the picture);

3rd, fold a part of the left copper wire and string a glass bead to the folded position. Then, braid the two pieces of the left copper wire below the transparent glass bead. Do the same with the right copper wire;
4th, repeat the above step to make 4 more such patterns. In this way, a branch comes into being;
5th, continue to make more such branches. To make the headpiece look layered, please make these branches in different length.
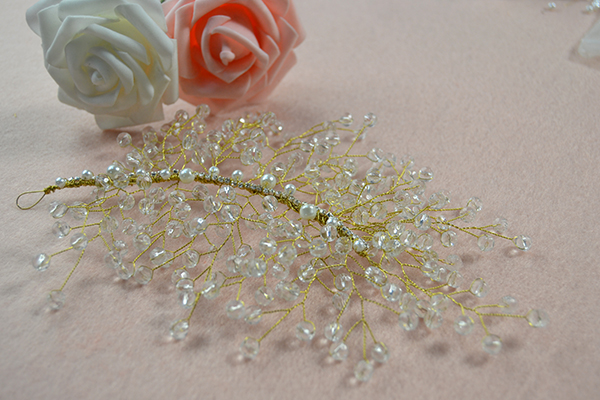
Step 3:Combine the stem with branches and add brass chain
1st, combine the stem made in Step 1 with the branches made in Step 2 one by one by wrapping the excess braided part of the branches onto the stem (as shown in the picture);
2nd, cut another copper wire and attach a silver brass chain onto the headpiece stem with the copper wire.

Step 4:Add white pearl beads
1st, cut another copper wire and wrap one end of the copper wire onto the stem;
2nd, string a 6mm white pearl bead and fix it onto the stem by wrapping the copper wire onto the stem. Then, string a 4mm white pearl bead and fix it onto the stem in the same way. Please note that there should be a space between the 6mm white pearl bead and the 4mm white pearl bead;
3rd, repeat the above step to fix more 6mm white pearl beads and 4mm white pearl beads onto the stem (as shown in the picture).

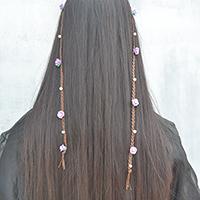
Here is the final look of the headpiece.
You can make the wedding hair accessory as fancy as you like. This DIY wedding decoration is also great for many other occasions. You can make this headpiece for a dress-up accessory or for an adult's birthday. What's more, you can also follow the above headpiece tutorial and make a small headpiece for your little fairy princess.