- Comments (0)
- Apr 24, 2015
How to Make a Lovely Photo Clip with Recycled Ribbons, Wood Clips and Buttons
Summary: This tutorial is going to show you how to make a lovely photo clip with recycled ribbons, wood clips and buttons.

Have a lot of unused buttons, ribbons, wood clips at home? In fact, you can make full use of these unused items and DIY a photo clip. This article will share a tutorial on how to make a lovely photo clip with these recycled ribbons, wood clips and buttons.
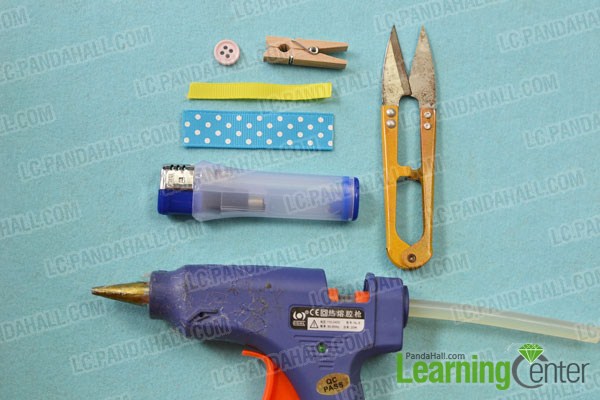
Materials and tools needed in DIY the photo clip:
Pink Buttons
Yellow Ribbon
Blue Ribbon
Wooden Craft Pegs Clips
Glue Gun
Stainless-Steel Scissor
Lighter
Instructions on how to make the photo clip:
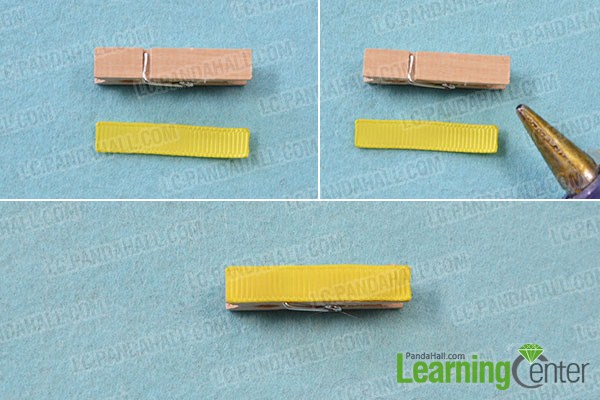
Step 1: Combine wooden clip with yellow ribbon
1st, select a wooden craft pegs clip. Then, cut a piece of yellow ribbon about the length of the wooden clip;
2nd, attach the yellow ribbon onto the wooden clip with the glue gun;
Step 2:Add blue ribbon and pink button
1st, cut two pieces of blue ribbon and combine the two ends of the blue ribbon together with the glue gun;
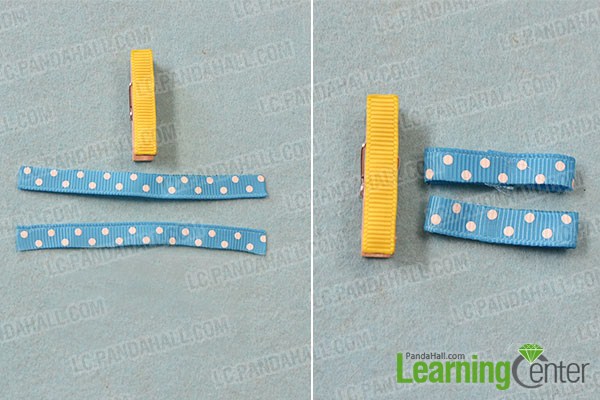
2nd, attach the two blue ribbons onto the yellow ribbon clip made in Step 1 one by one(as shown in the picture);
3rd, select a pink ribbon and attach it onto the blue ribbon.

Repeat the above steps to make a pink photo clip and a blue photo clip.
The following picture shows the final look of the three photo clips.
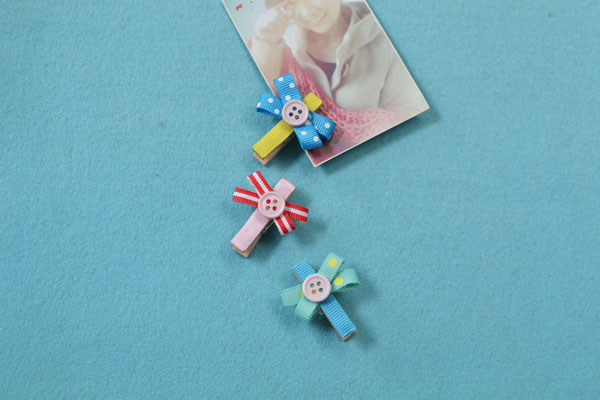
These photo clips looks lovely and attractive, right? You have captured a great smile, the first step of a child and the great family vacation in photos. Now, give those pictures a place in the spotlight with a DIY photo clip that match your decoration.