- Comments (2)
- Apr 19, 2015
Beaded Bracelet Tutorial-How Do You Make a Crystal Beaded Stitch Bracelet
Summary: This article will share a beaded bracelet tutorial on how do you make a crystal beaded bracelet with you.

The perfect combination of white glass beads, blue glass beads and seed beads make this bead bracelet elegant, stunning and eye-catching. DIY this bead weaving bracelet is not as difficult or costly as you might think. With a few materials and the beaded bracelet tutorial on how to make this crystal beaded bracelet, you can make a crystal beaded bracelet for your wardrobe.
Materials and tools needed in DIY the crystal beaded weaving bracelet:
6mm Clear Glass Beads
6mm Blue Glass Beads
2mm Seed Beads
Iron Jump Rings
Brass Magnetic Slide Lock Clasp
0.3mm Tiger Tail
Stainless-Steel Scissor
Needle Nose Plier

Instructions on how do you make the crystal beaded bracelet:
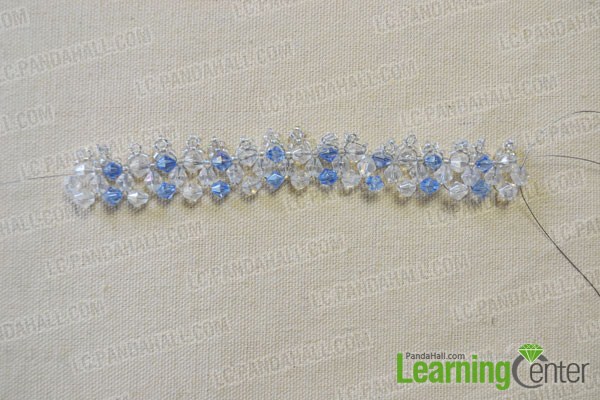
Step 1: Make the first strand
1st, cut off a piece of tiger wire with a length that fits your wrist. Then, string a seed bead, a white glass bead and 5 seed beads in sequence;
2nd, cross the tiger wire through the second seed bead next to the white glass bead;
3rd, wrap and cross the tiger wire through the white glass bead (as shown in the picture);
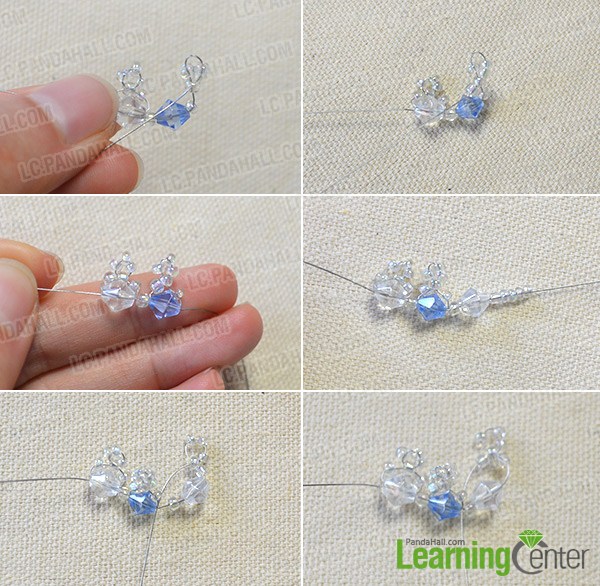
4th, string a seed bead, a blue glass bead and 5 seed beads in sequence;
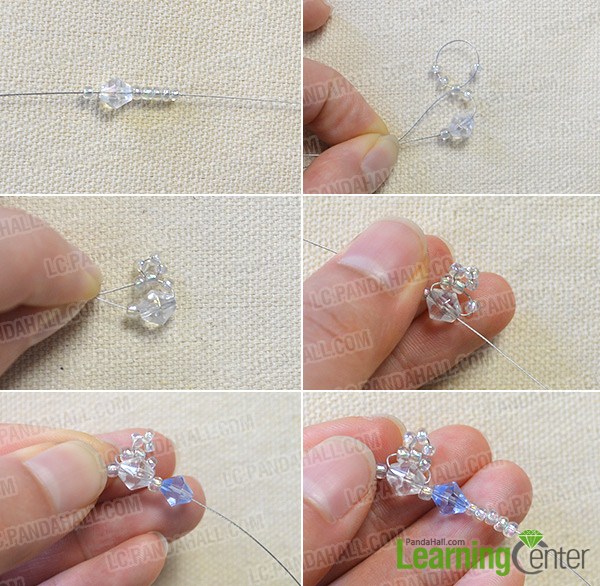
5th, cross the tiger wire through the second seed bead next to the blue glass bead. Then, cross the tiger wire through the blue glass bead;
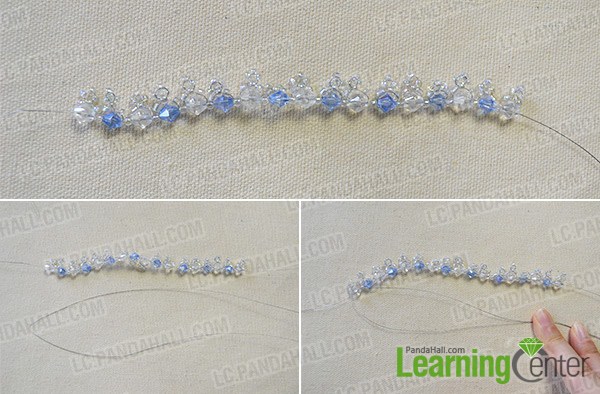
6th, repeat the above steps to make more such patterns until the length is long enough to fit around your wrist.
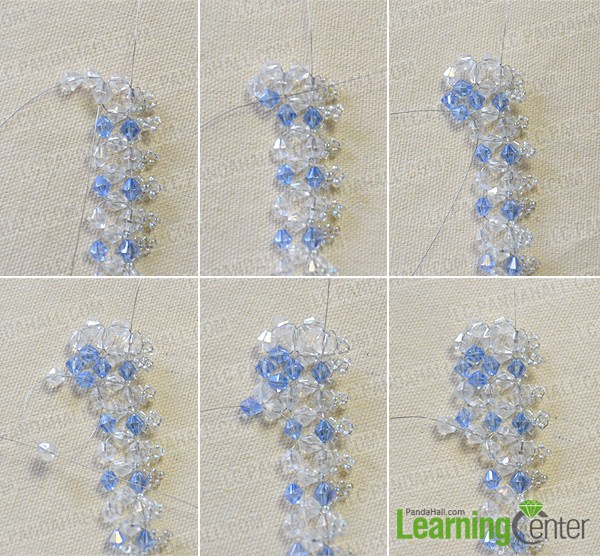
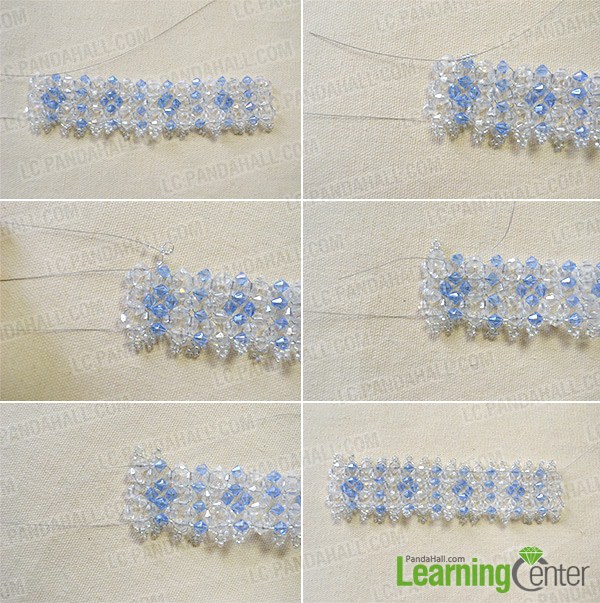
Step 2: Make the second strand
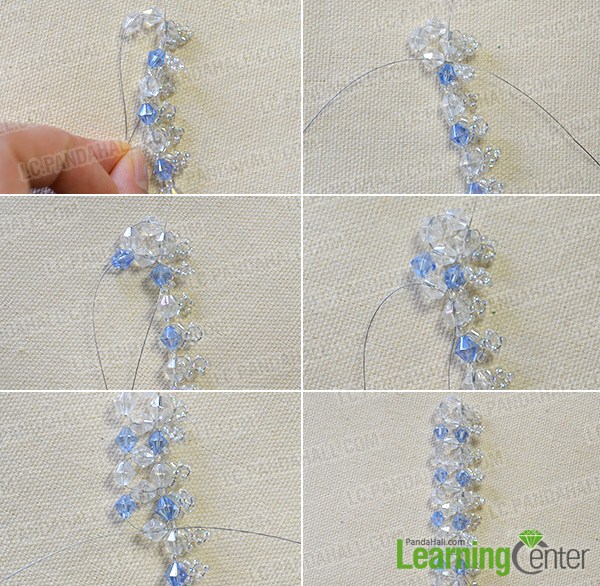
1st, cut another piece of tiger wire and cross it through the leftmost white glass bead (as shown in the picture);
2nd, string 2 white glass beads to the two sides of the added tiger wire. Then, string a white glass bead and cross the two sides of the added tiger wire through the white glass bead (as shown in the picture);
3rd, string a blue glass bead to the two sides of the tiger wire respectively;
4th, string a white glass bead and cross the two sides of the tiger wire (as shown in the picture);
5th, repeat the above steps to make more such patterns until it is the same length as the first strand;
6th, cut off the excess part of the added tiger wire.
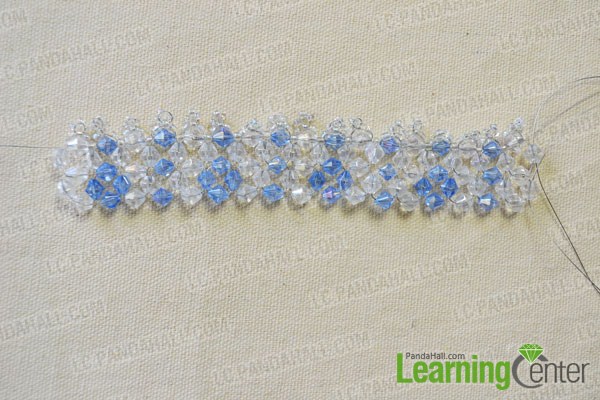
Step 3: Make the third strand
1st, cut another piece of tiger wire and cross it through the left white glass bead (as shown in the picture);

2nd, string 2 white glass beads to the two sides of the added tiger wire. Then, string a blue glass bead and cross the two sides of the added tiger wire (as shown in the picture);
3rd, string a blue glass bead to the two sides of the tiger wire respectively;
4th, string a blue glass bead and cross the two sides of the tiger wire through the blue glass bead (as shown in the picture);
5th, repeat the above steps to make more such patterns until it is the same length as the second strand;
6th, cut off the excess part of the added tiger wire.
Step 4: Make the fourth strand
1st, cut another piece of tiger wire and cross it through the upper left white glass bead (as shown in the picture);
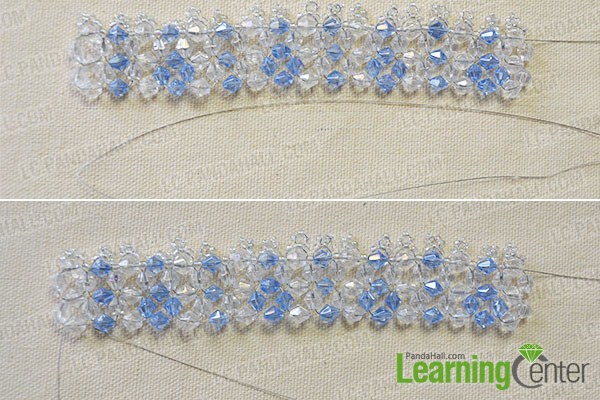
2nd, string 5 seed beads. Then, cross the tiger wire through the second seed bead next to the white glass bead;
3rd, wrap and cross the tiger wire through the white glass bead (as shown in the picture);
4th, string a seed bead, a blue glass bead and 5 seed beads in sequence;
5th, cross the tiger wire through the second seed bead next to the blue glass bead. Then, cross the tiger wire through the blue glass bead (as shown in the picture);
6th, repeat the above steps to make more such patterns until it is the same length as the strands made just now.
Step 5: Connect the two ends of the bracelet
1st, select 2 brass magnetic slide lock clasps and combine them with 3 iron jump rings respectively;
2nd, combine the two brass magnetic slide lock clasps with the two end parts of the bracelet by the iron jump rings;
3rd, connect the two brass magnetic slide lock clasps together.
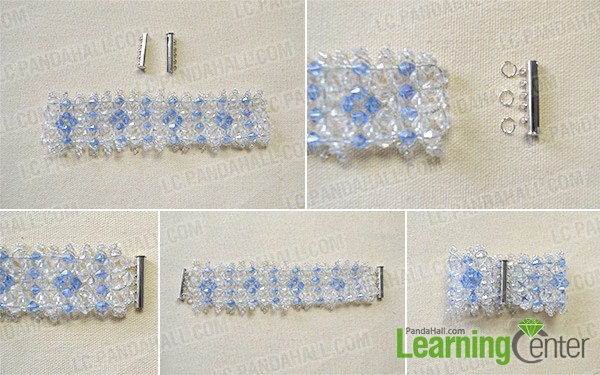
The final look of this DIY crystal beaded weaving bracelet is like this:

Wearing this DIY crystal beaded weaving bracelet, you can draw a lot of attention from others. Following the beaded bracelet tutorial demonstrating how to make this crystal beaded bracelet, you can make a stunning and unique necklace for yourself or friends. Have a try!

Comments (2)
-

-
Jun 17, 2015 at 09:00 PM Mayra Ramos
Awesome bracelet...
-

Jun 21, 2015 at 05:56 PM Hong Cong Mayra Ramos
You can try to make one according to our tutorial.
-


