- Comments (2)
- Oct 30, 2014
Magic Cube Crafts on How to Make 3D Perler Bead Designs
Summary: Would to be sweet to make crafts with kids? Today, this tutorial will be totally about how to make 3D perler bead designs. Come to do this with your children!

This 3D perler bead cube design will be a great decoration for your desk, and an even better gift. I choose the magic cube as the pattern to make this 3D perler bead design. You can also choose dice as the pattern. Now, follow me to learn how to make 3D perler bead designs!
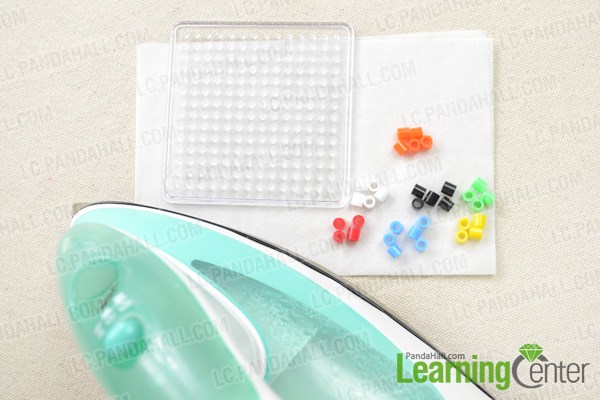
Materials needed in 3D perler bead cube designs:
5MM White Perler Beads
5MM Orange Perler Beads
5MM Yellow Perler Beads
5MM Black Perler Beads
5MM Green Perler Beads
5MM Blue Perler Beads
Square Perler Pegboard
Pressing Paper
Iron
Instructions for 3D perler bead cube designs:
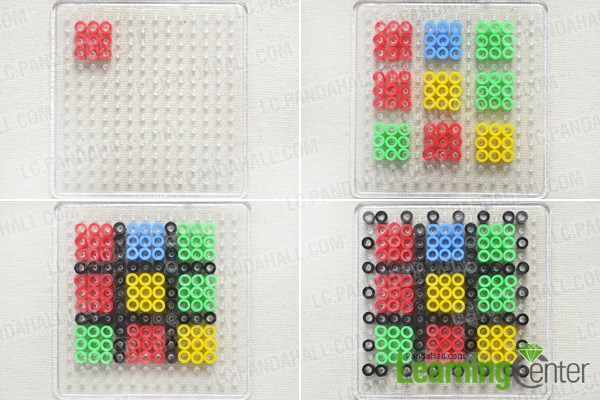
Step 1: Make six sides for the perler bead cube
1st, place nine red perler beads to the square pegboard to form a 3×3 red perler bead square as picture shows;
2nd, place another eight 3×3 perler bead squares to the pegboard to form a 11×11 squares as picture shows;
3rd, fill the rest of the 11×11 square with black perler beads;
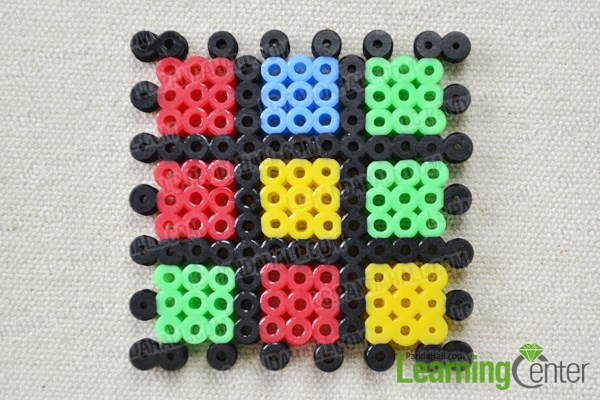
4th, place twenty-six black perler beads around the 11×11 square as picture shows. Now, you get one side of the perler bead cube;
5th, press this perler bead piece with iron on the medium heat about 1 minute, flip the perler bead piece over and press it about 1 minute (Make sure to use the pressing paper that's included with the pegboards or your iron will be ruined. Warning: Parents—the ironing must be done by an adult only. Some irons may emit steam. Please keep children at a safe distance.)
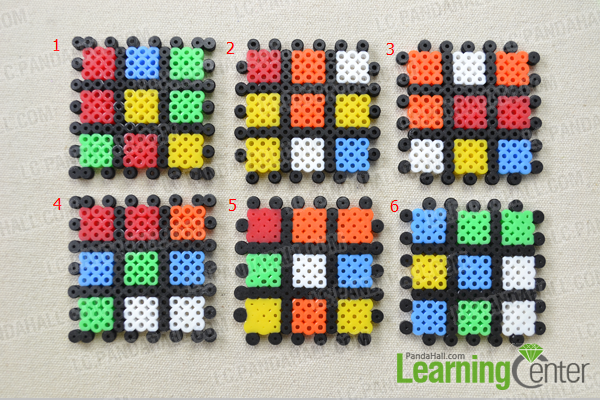
6th, make another five sides in the same method, you should pay attention to the outside black perlers’ place, the specific place of each side as following picture shows.
Step 2: Finish the 3D perler bead cube designs
Connect all sides by joining the fitting beads to each other.

Here is the final look of 3D perler bead cube design:
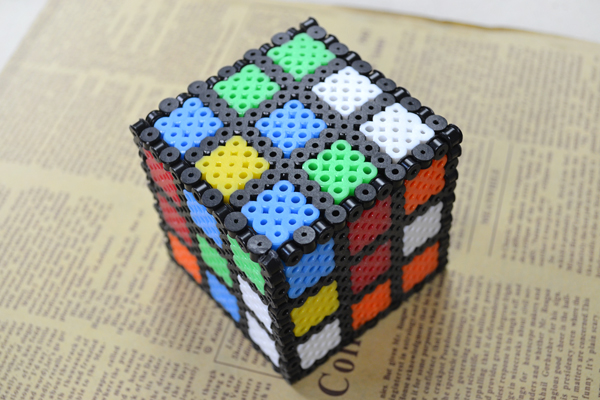
Fantastic! The tutorial on how to make 3D perler bead designs is over! Based on this tutorial, you can design many other perler bead cubes as you like. To do it with your children, you will have much fun!


Comments (2)
-

-
Feb 05, 2019 at 07:54 AM Natacha Aemkapung
Love this idea! Making some for my daughters birthday party
-
-
Feb 10, 2022 at 10:37 AM Ur Mom
j


