- Comments (0)
- Oct 24, 2014
How to Make a Wave Perler Bead Bracelet for Kids
Summary: Look for perler bead tutorial? Well, today I am going to share you how to make a perler bead bracelet.

Perler beads not only can be used in many designs with the help of the iron, but also can be made into many other projects. In the next bracelet tutorial, I choose these beads to make it. Now, follow me to learn how to make a perler bead bracelet!
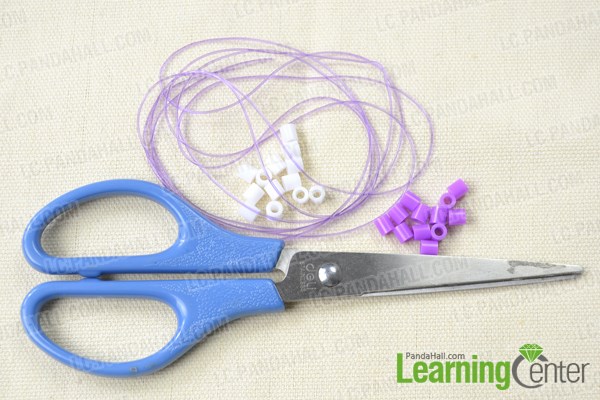
Materials needed in perler bead bracelet tutorial:
Instructions for perler bead bracelet tutorial:
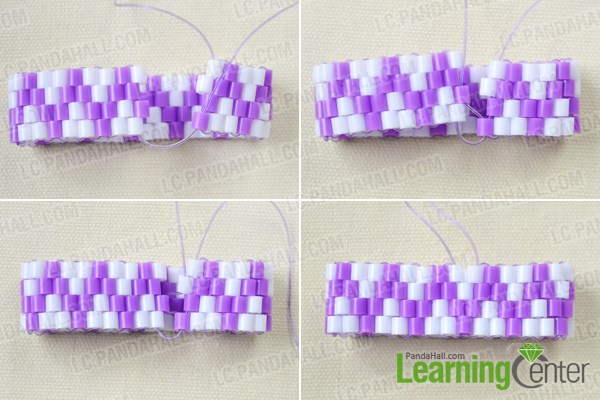
Step 1: Make the basic pattern of the perler bead bracelet tutorial
1st, cut about 80cm elastic thread, slide two purple perler beads and two white perler beads onto the thread as the first row;
2nd, add another white perler bead to start the second row, pass the thread back to the middle white bead in the first row, add a purple perler bead and pass the thread back to the first purple bead in the first row, then tighten the threads;
3rd, add another white perler bead again, pass the thread back to the next purple bead, add a purple perler bead and pass the next white bead, then tighten wires; this is the second row;
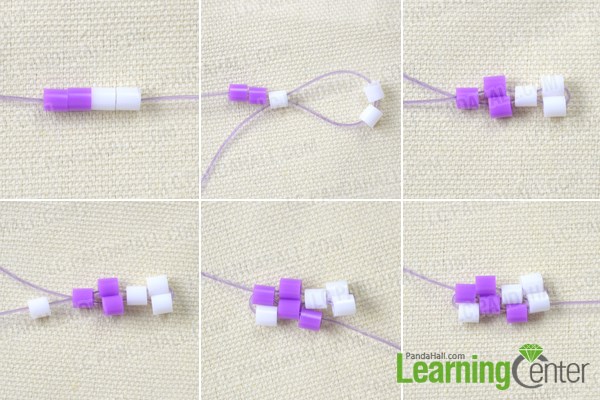
4th, slide a purple bead onto the thread, pass it back to the next purple bead and tighten the threads;
5th, add a white bead again, pass the thread to the next white bead and tighten threads;
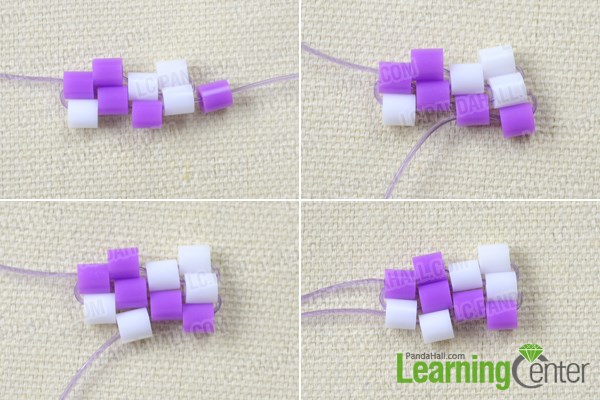
6th, do the rest pattern in the same method until you get the shape as picture shows;

Step 2: Finish perler bead bracelet
1st, continue to string beads by the basic pattern until get your desired length;
2nd, connect both ends by joining the fitting beads to each other, and then tighten the threads;
3rd, tie a knot at the end, and cut the extra threads.

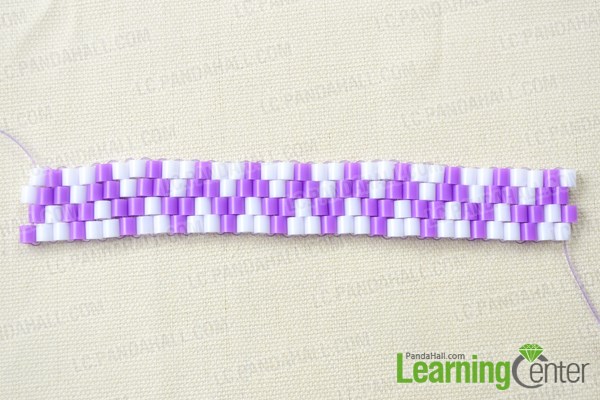
Here is the final look of perler bead bracelet:

Great! This perler bead bracelet tutorial is finished! Based on this tutorial, you have known how to make a perler bead bracelet. So, you can design a unique perler bead bracelet for your kids. I believe they will like it. Just do it!