- Comments (0)
- Mar 26, 2014
How to Make a Braided Keychain in Lucky Clover Leaf Pattern
Summary: This tutorial is to show how to make a braided keychain in clover leaf pattern for the oncoming spring season.

Today I would like to introduce a new braided pattern for you, that is, lucky clover leaf pattern. I do this pattern within two colors of nylon threads and apply it into my keychain project. So in the following you will learn how to make a braided clover leaf keychain.
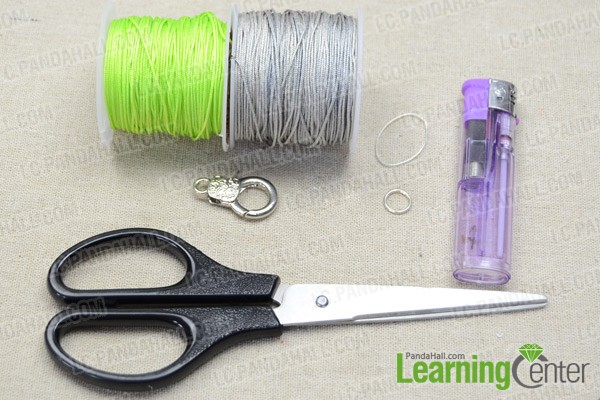
Necessities for this clover leaf keychain:
1mm green nylon thread
1mm grey nylon thread
Oval bead frame
Lobster claw
Jump ring
Scissors
Lighter
How to make a braided keychain in spring style:
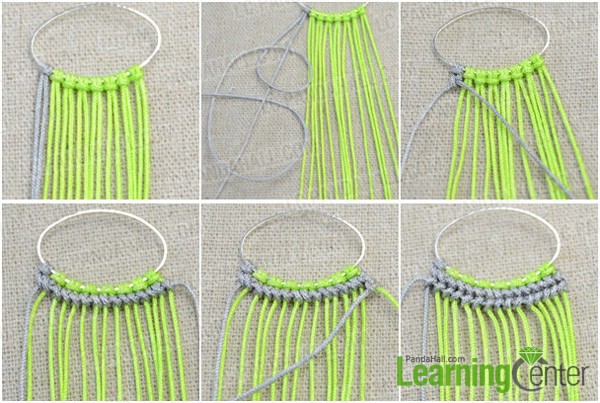
Step 1: Preparation before clover leaf pattern
1st, cut a 2.2m length of grey thread and seven 1.5m green thread;
2nd, fold them in half and tie lark head knots around the bead frame;
3rd, do forward knots around right threads with leftmost grey strand;
4th,so the grey row is done;
5th, do backward knots around left threads with the same grey strand (working strand);
6th, so the second grey row is finished and the preparation is done.
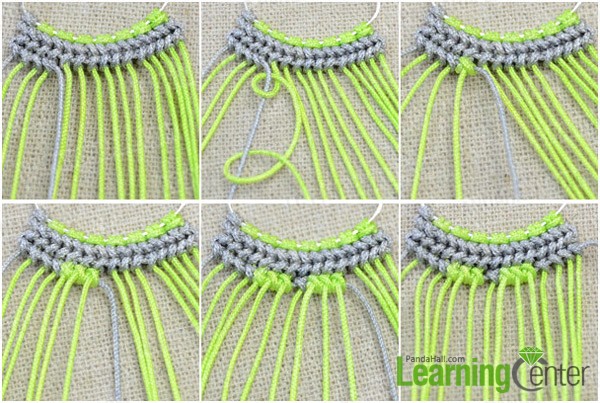
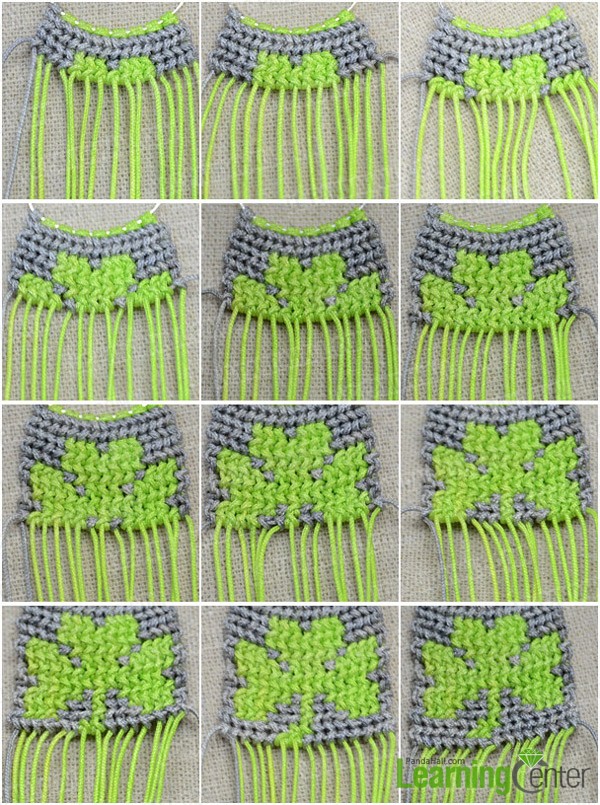
Step 2: Braid the first row of clover leaf
1st, from left to right do 4 forward knots around following 4 strands with the working strand;
2nd, do 3 backward knots around the working strand with following 3 green strands;
3rd, do 1 forward knot around following green thread with the working strand;
4th, continue to do 3 backward knots around the working strand with following 3 green strands;
5th, do last 4 forward knots around following green strands with the working strand;
6th, the first row of clover leaf is done.
Step 3: Finish the clover leaf pattern
1st, second row is 4 backward knots, 7 forward knots and 4 backward knots from right to left;
2nd, third row is the repeat of the second row from left to right;
3rd, fourth row is 1 backward knot, 3 forward knots, 1 backward knot, 5 forward knots, 1 backward knot, 3 forward knots and 1 backward knot from right to left;
4th, fifth row is 1 forward knot, 4 backward knots, 1 forward knot, 3 backward knots, 1 forward knot, 4 backward knots, and 1 forward knot from left to right;
5th, sixth row is 1 backward knot, 13 forward knots, and 1 backward knot from right to left;
6th, seventh row is 2 forward knots, 11 backward knots and 2 forward knots from left to right;
7th, eighth row is 1 backward knot, 5 forward knots, 1 backward knot, 1 forward knot, 1 backward knot, 5 forward knots and a backward knot form right to left;
8th, ninth row, is 1 forward knot, 4 backward knots, 2 forward knots, 1 backward knot, 2 forward knots, 4 backward knots and 1 forward knot from left to right;
9th, tenth row is 1 backward knot, 3 forward knots, 3 backward knots, 1 forward knot, 3 backward knots, 3 forward knots and 1 backward knot from right to left;
10th, eleventh row is 6 forward knots, 2 backward knots and 7 forward knots from left to right;
11th, twelfth row is 8 backward knots, 2 forward knots and 5 backward knots from right to left;
12th, braid another row of grey knots.
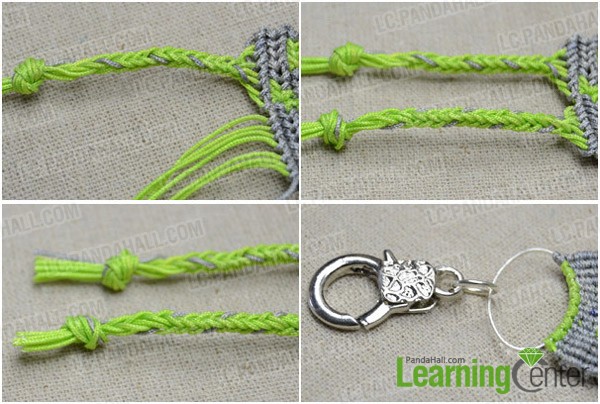
Step 4: braid tails for the keychain
1st, separate 16 strands into 2 groups;
2nd, do 8-strand braiding with each group;
3rd, make overhand knots at ends and trim off excess threads;
4th, attach lobster claw onto the bead frame.
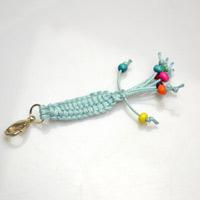
The final look of braided keychain is like this:

Tada! I have finished the braided clover leaf keychain project. If engaged in the braiding work, you will find this project is easy-to-do but time-consuming.