- Comments (0)
- Mar 25, 2014
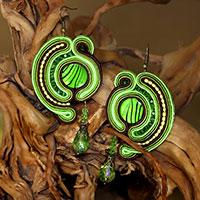
Making Chandelier Earrings with Beads and Rhinestones in Fresh and Cool Style
Summary: How to make chandelier earrings with pearls, polymer clay beads and rhinestone spacers? This tutorial will show you the detailed information of this diy!

Within 3 simple steps a mini pair of chandelier earrings will be finished. I will apply printed polymer clay bead and pearled acrylic beads into this quick tutorial. Next I lead you into “how to make chandelier earrings with beads” project.
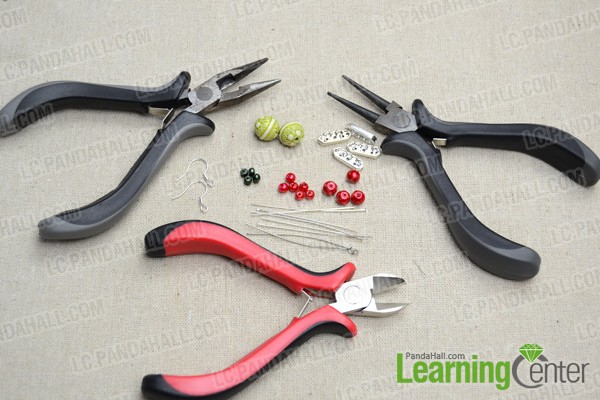
Necessities for the fresh green earrings:
10mm antique acrylic beads
6mm red imitated pearl acrylic beads
4mm red imitated pearl acrylic beads
3mm green imitated pearl acrylic beads
Rhinestone binge spacer
Head pins
Eye pins
Earring hooks
Round nose plier
Wire cutter plier
Side cutting plier
How to make chandelier earrings with beads:
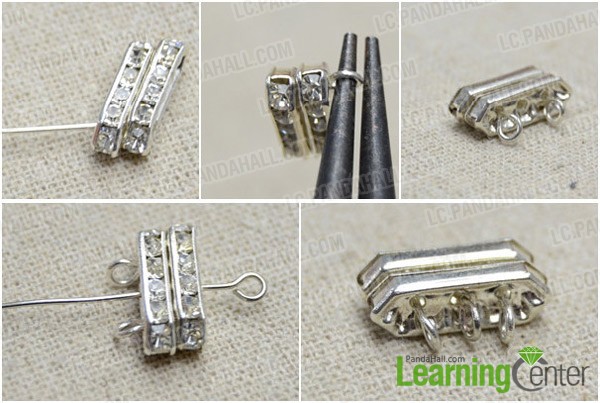
Step 1: Prepare rhinestone connector
1st, slide two rhinestone spacers onto head pin;
2nd, loop the pin’s end with round nose;
3rd, string another head pin through the other side holes of rhinestone spacers;
4th, loop the pin;
5th, string an eye pin through the middle holes and loop the other end.
Step 2: Prepare beaded dangles
1st, slide 2 red beads onto head pin;
2nd, loop the end of the pin;
3rd, similarly make the other beaded dangles;
4th, hook the dangles onto rhinestone connector.

Step 3: finish the chandelier earrings
1st, make a polymer clay bead dangle and attach it onto rhinestone connector;
2nd, attach earring hook onto the polymer clay dangle.

The final look of beaded chandelier earrings:

Excellent! I have finished my mini pair of beaded chandelier earrings. now it’s your time to give it a go. Follow this tutorial you will find it easy to do.