- Comments (1)
- Mar 17, 2014
Making Right Angle Weave Bracelet with Pearl Beads and Seed Beads
Summary: In this handmade design, I would like to show you how to make a right angle weave bracelet using Acrylic beads and seed beads. Hope you have fun here!

It is said that pearls symbolize intelligence, happiness and richness, so pearl bangle bracelet is sure to bring you good luck! With this complete tutorial, you can learn to make an embellished right angle weave bracelet for yourself or your friends!
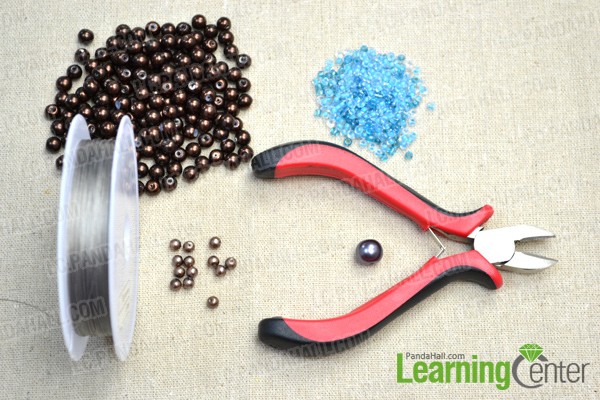
Materials needed in this right angle weave bracelet tutorial:
8mm Acrylic Beads
6mm Acrylic Beads
4mm Round Seed Beads
3mm Round Seed Beads
0.3mm Tiger Tail Wire
Side Cutting Plier
Instructions on making right angle weave bracelet:
Step1: Make the middle line of the pearl bracelet with a button loop
1st,prepare approx 230cm wire, fold it half, slide 9 4mm beads on it, cross wires ends through 1 6mm bead;

2nd,slide 1 4mm seed bead on each wire, cross wires ends through a 4mm seed bead. Do the same as 2nd in step1 to form another 14 circles (according to your wrist);
3rd, thread wire-A across the bead a-b-c, wire-B across bead c;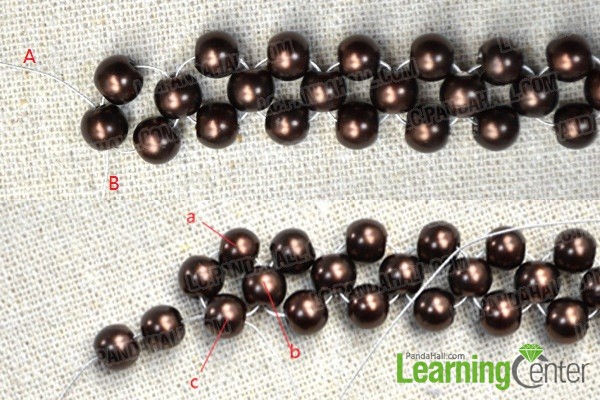
Step2: Make the second line of the beaded pearl bangle bracelet
1st, slide 2 6mm beads on wire-A, cross wires ends through a 6mm bead;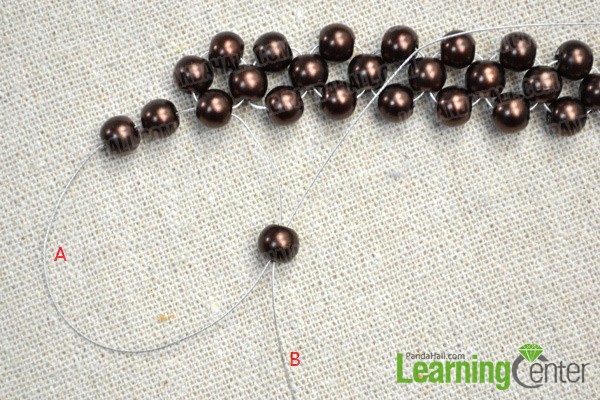
2nd, thread wire-A through bead-w, then do the same as 1st in step2 to finish the second line;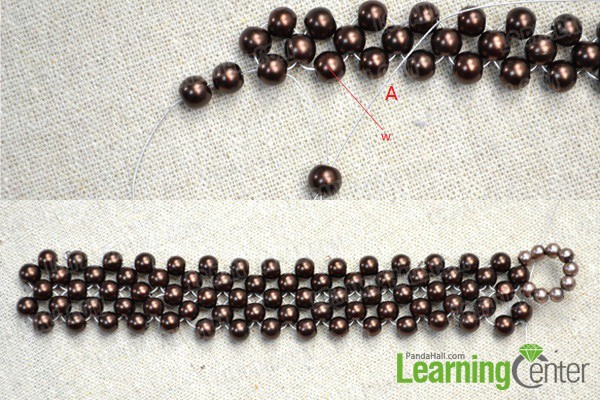
Step3: Make the third line of the beaded pearl bangle bracelet
1st, thread wire -A across bead a-b-c-d-e, wire-B across c-f-e;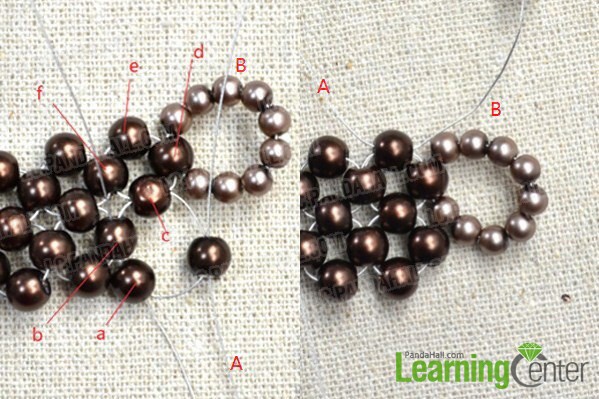
2nd, slide 2 6mm beads on wire-B, cross wires ends through a 6mm bead;
3rd,thread wire-A across bead-g, slide 1 6mm bead on the other wire, cross wires ends through a 6mm bead;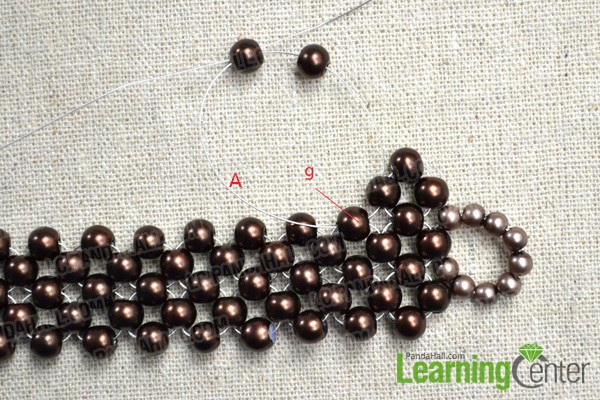
4th, do the same as 3th in step3 to finish the third line;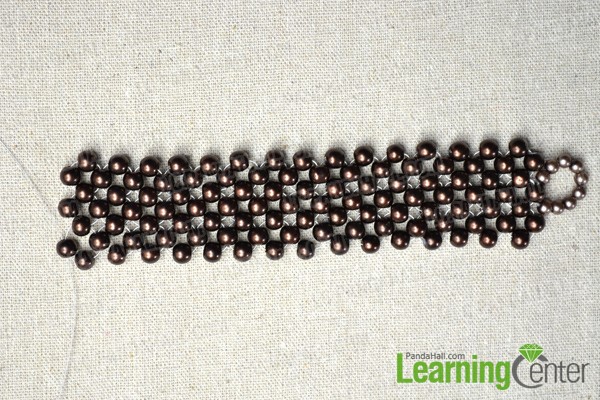
Step4: Make the upper layer
1st,slide 3 seed beads on each wire, cross wires ends through 1 seed bead, again 3 seed beads on each wire. Cross wires ends through bead-s. Do the same to finish the rest 14 “X”-shape;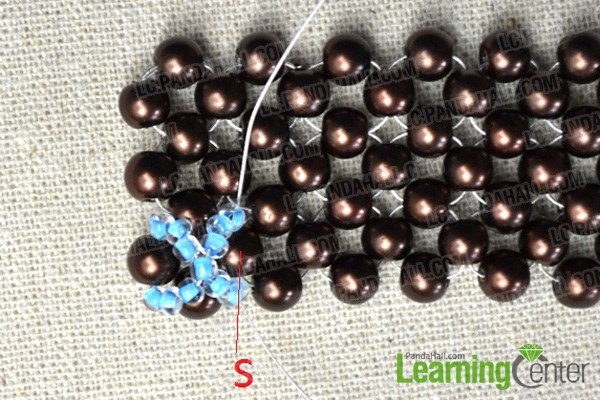
2nd, thread wire-A across bead a-b-c-d, wire-B across bead c-f-e-d;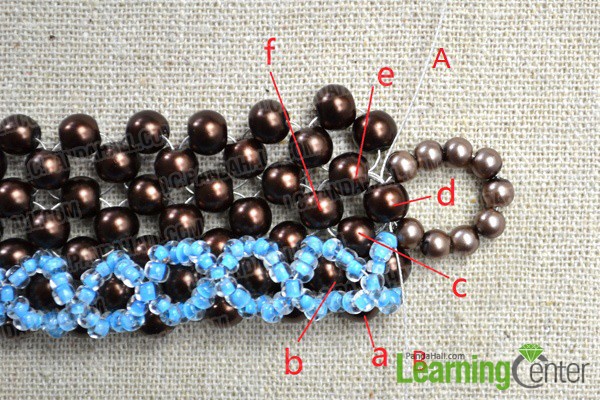
3rd,do the same as 1st in step4,then thread wires across through the next 2 bead, finally cross through the bead-h, do the same as 1st and 2nd in step4 to finish the rest(Attention: there is a little different from 1st in step4);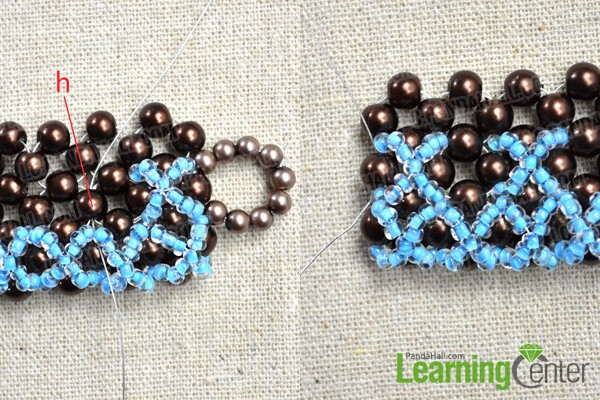
4th,slide 2 seed beads, 1 8mm bead and 1 4mm bead on wire-A, cross back this wire through the 8mm bead, then slide 2 seed beads, thread this wire across bead i-j-k-l-m, the other wire across bead l-p-n-m;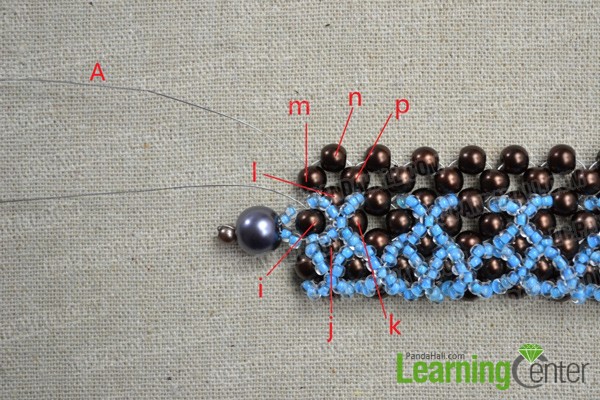
5th, do the same as 1st in step4 to finish the right angle weave bracelet. Thread extra wires back to the first 4 gray beads for tightening the wire. Then cut off the extra wire.
Done!
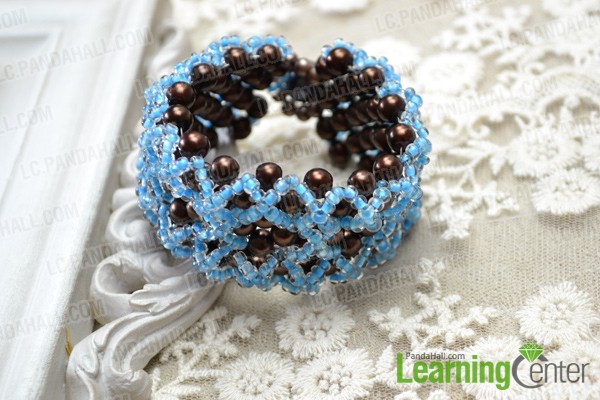
Cheers! We have finished the beautiful right angle weave bracelet with pearl beads. It is really an eye-catching accessory! Hope you like it!

Comments (1)
-

-
Nov 24, 2014 at 09:56 PM Mary LaMartina
I will try but I read through it and it sounds complicated. I will let you know how I do. Thanks. Mary


