- Comments (0)
- Mar 16, 2014
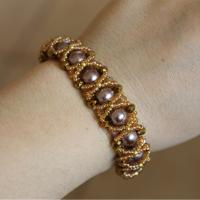
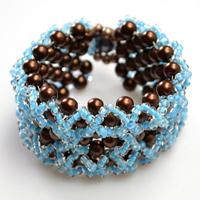
How to Make A Right Angle Weave Bracelet with Multi-Colored Bicones Beads
Summary: Here shows you how to make a right angle weave bracelet with 3 colored bicone beads and pink seed beads and in 4-leaf clovers pattern.

This right angle weave bracelet is just still based on the basic right angle weave stitches I ever mentioned in previous beading projects. Of course, it is a bit time-consuming, as it has three beaded columns as seen by all of you. It truly deserves a go. Later the details of how to make a right angle weave bracelet will be shown.
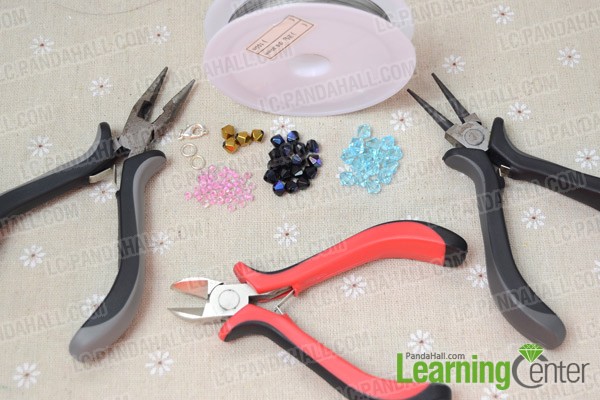
Necessities for 4-leaf clovers right angle weave bracelet:
0.38mm tiger tail wire
3mm pink glass seed beads
6mm golden electroplate bicone beads
6mm purple electroplate bicone beads
6mm sky blue glass bicone beads
Round nose plier
Wire cutter plier
Side cutting plier
How to make a right angle weave bracelet:
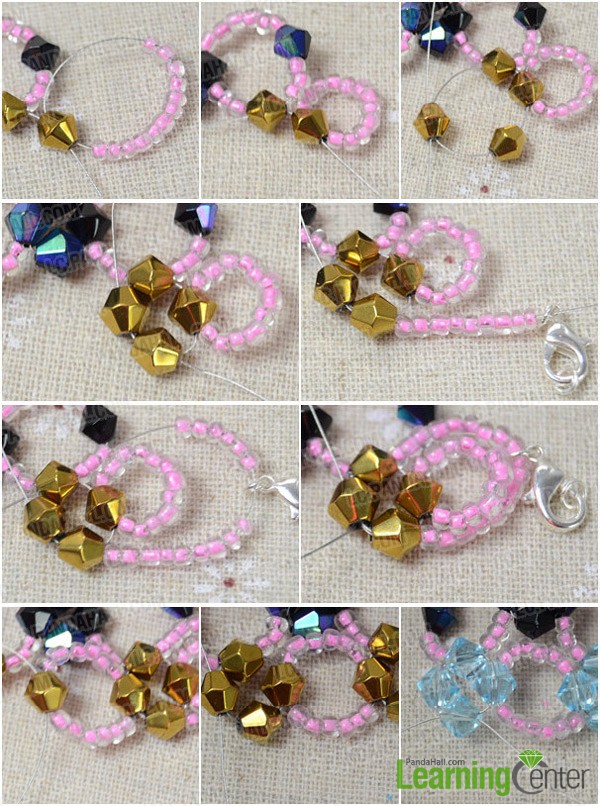
Step 1: Make the top row
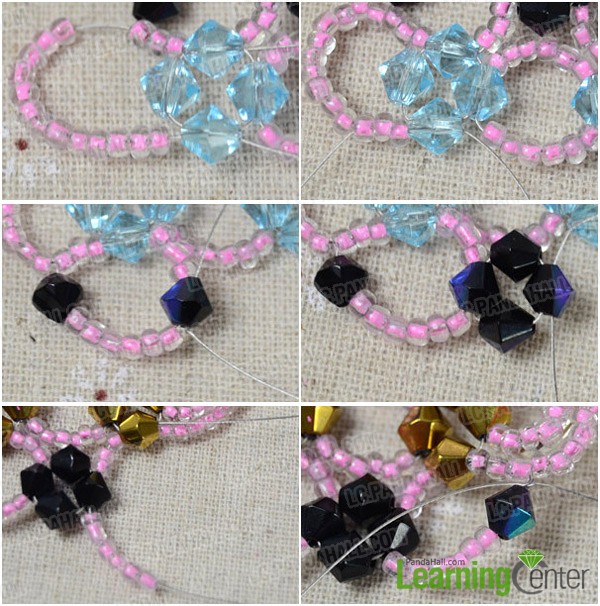
1st, cut a 2m length of tiger tail wire, fold it in half, slide a purple bicone onto center, 6 pink beads onto left strand, and 3 pink beads, 1 blue bicone and another 3 pink beads onto right strand;
2nd, cross both strands through a new purple bicone and tighten the wire;
3rd, add a purple bicone onto each strand and cross both strands through another purple bicone;
4th, repeat from 1st-3rd 4 times;
5th, continue the right angle weave stitches 3 times with the blue bicone replaced by golden bicone;
6th, slide onto upper strand 6 pink beads, 1 purple bicone and 3 pink beads, then onto lower strand 3 pink beads;
7th, cross both strands through a new golden bicone.

Step 2: Make the middle row
1st, slide onto right strand a golden bicone and 12 pink beads and back it through the golden bicone;
2nd, tighten the loop;
3rd, add a golden bicone onto lower strand and cross both strands through a new bicone;
4th, tighten the wire and back lower strand through the right golden bicone;
5th, slide onto the strand 9 pink beads, lobster claw and another 6 pink beads;
6th, guide this strand back through the 3 pink beads of the last set in top column as picture shows;
7th, guide this strand continuously through the 2 adjoining golden bicones;
8th, add 6 pink beads onto each strand and cross both strand through a golden bicone;
9th, repeat process 3rd and 8th;
10th, keep going on until finishing the middle column.
Step 3: Make bottom row
1st, at last set make the bead pattern turn to bottom column;
2nd, slide 13 pink beads onto left strand and lead the strand through the 3 pink beads of first set in top column;
3rd, continue passing the strand through the following 3 blue bicones and 3 pink beads clockwise;
4th, add a purple bicone, 6 pink beads onto left strand and 3 pink beads onto right strand;
5th, cross both strands through a new purple bicone;
6th, add a purple bicone onto each strand and repeat the right angle weave;
7th, at last set tie a firm knot beside the purple bicone.
Step 4: Finish off the beaded bracelet
1st, back both strands through previous beads and trim off excess wire;
2nd, attach a jump ring onto the beaded loop at left side of the bracelet.

Finally the right angle weave bracelet looks like this:

Tada! I have completed the “how to make right angle weave bracelet in 4-leaf clover pattern” tutorial. it really deserves a go and you see such pretty bracelet are worn on my wrist.