- Comments (1)
- Mar 14, 2014
Step by Step Instructions for Making a Stunning Beaded XOXO Bracelet
Summary: This tutorial will guide you how to make a beaded XOXO bracelet. This might look a lot of work, but it can be finished quickly once you get the hang of beading.

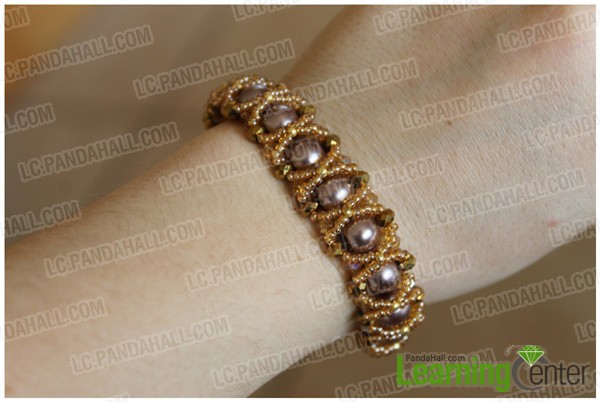
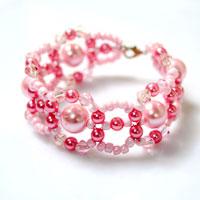
I just can’t wait to share with you another DIY bracelet- beaded XOXO bracelet, which looks similar with the previous one, but totally different in beading. And I even added a chain pendant with one pearl bead at one end to make the bracelet a little more sophisticated. You will absolutely love how this xoxo bracelet pattern turns out!
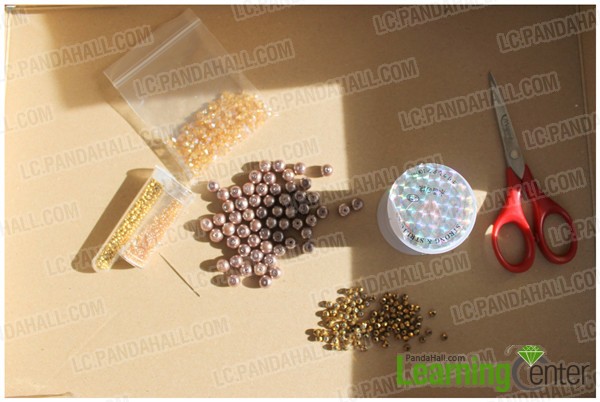
Materials needed for making this beaded XOXO bracelet:
2 Jump Rings (I used a chain of a vintage broken necklace)
A clasp
Glass Pearl Beads
Glass Bicone Beads
Nylon Thread
Smaller Seed beeds (I used 11/0 seedbeeds)
Bigger Seed beads (I used 8/0 seedbeads)
2 Needles
A pair of Scissors
Some Crystal Faceted Rondelles (I’ve got from my vintage necklace)
Instructions on how to make this beaded XOXO bracelet:
Step 1: Make the bracelet base
1st, cut thread 4 to 5 times the length of your wrist;
2nd, put a glass pearl bead in the center of the thread and attach the needles to each side of the thread;
3rd, then pick up on each needle a small seed bead, a bicone and a small seed bead and cross your both needles in a 8mm glass pearl;
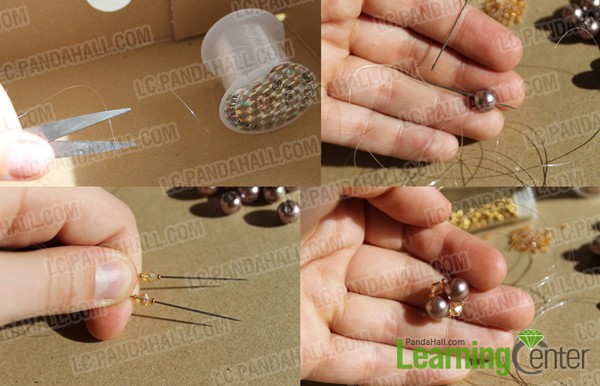
4th, repeat step 3 until you’ve reached the required length according your wrist.
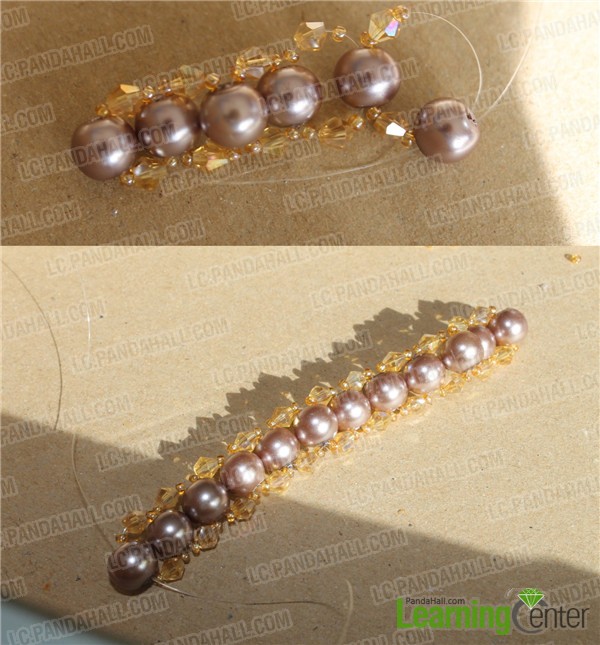
Step 2: Add rondelles on both side of your bracelet
1st, coming out of the last glass pearl bead , go through the small seed bead, bicone bead and small seed bead on one side of your pearl. Then add a rondelle to your needle and go through the next small seed bead, bicone and small seed bead. Repeat this until you reach to the other side of your bracelet;
2nd, now take the other side of the thread and repeat the 1st step on the other side of your bracelet.
Step 3: Finish one end of your bracelet
1st. coming again from a 8mm glass pearl bead, now add to each needle 6 small seed beads and cross both of your needles through 1 big seed bead;
2nd, then add to 1 of the needles 10 small seed beads and a jump ring or a chain (I used a chain from an old vintage necklace);
3rd, go with your needle through the big seed bead again in the same direction.

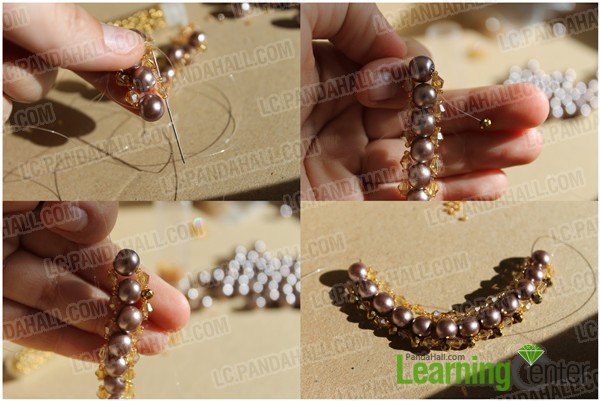
Step4: Make beaded “X”
1st, now reach the 8mm glass pearl by going through the small seed beads on both sides of the pearl and cross both threads in the glass pearl;
2nd, now add to each needle 5 small seed beads and cross through a big seed bead;
3rd, then again add 5 small seed beads to each needle and go through the rondelles on the opposite side of your project, forming an ‘X’;
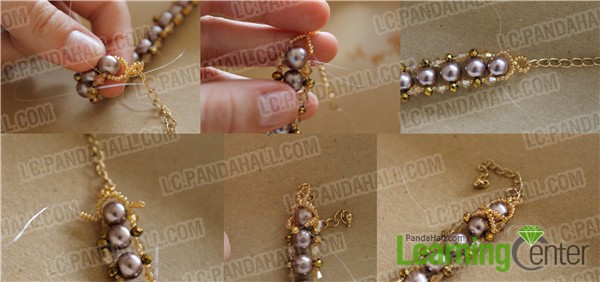
4th, repeat step 1st, 2nd and 3rd until you reach the end of your project.
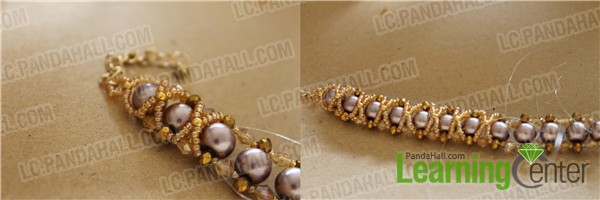
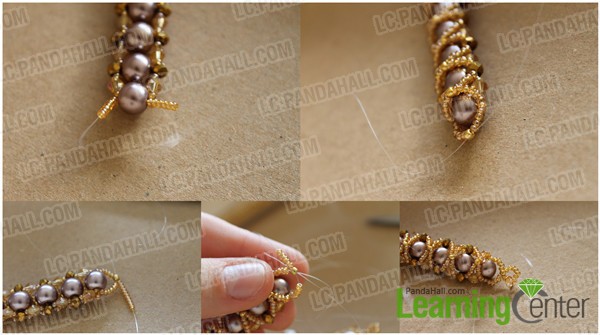
Step5: Finish the other end of your bracelet
1st, at the end, again coming from a glass pearl bead, add to each needle six small seed beads and then cross them through a big seed bead;
2nd, now add to 1 of the needles 10 small seed beads and a jump ring (on which you can attach a clasp) and go in the same direction through the big seed bead again;
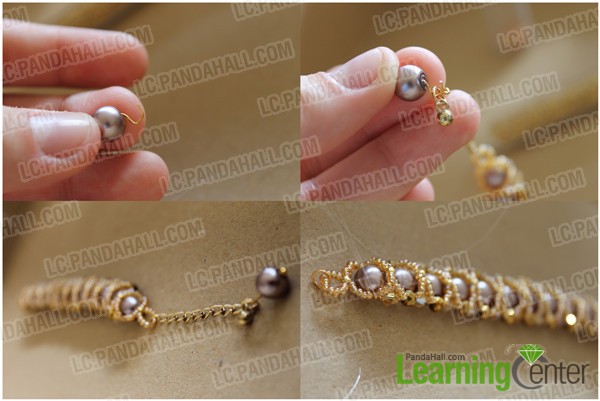
Step 6: Add one a glass pearl bead on the chain (optional step)
1st, put a pearl on a pin and attach it to the chain end (or to your jump ring);
2nd, now the two sides of your bracelet look like this. You can add to the one side jump ring a clasp and then your bracelet is ready to wear!
Done!
Now, this beaded XOXO bracelet is ready to wear. Just shine and enjoy your Gossip Girl inspired XOXO bracelet. I’m sure you will win lots of compliments~ hah!

Comments (1)
-

-
Dec 08, 2017 at 03:05 AM Kathy Kee
What are the bead sizes?


