- Comments (0)
- Mar 14, 2014
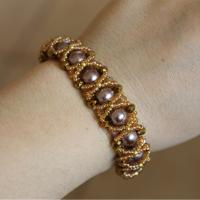
Easy Tutorial on Making a Cute Pink Pearl Bead Bracelet for Spring Season
Summary: Here shows one easy way to make cute bracelets with beads and wire. All selected beads are pink to give any outfit a fabulously sweet spring look and feel.

Excited for the upcoming season of flowers and bees? Longed for a way to spruce yourself up instantly? Here, by following this easy method and then make your own cute pink bracelets with adorable pink pearl beads. All the tricks and tips are included in the tutorial!
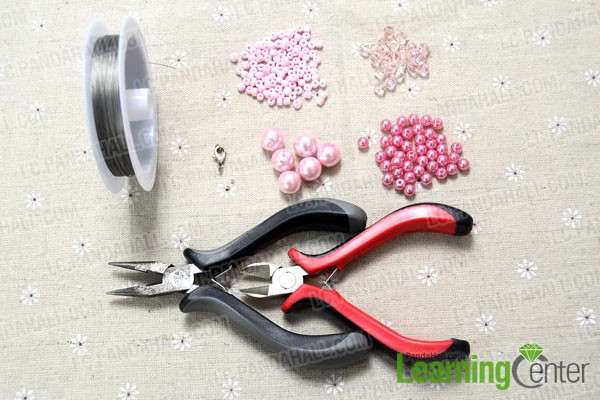
Supplies needed for the pink beaded bracelet:
12mm Glass Pearl Beads
6mm Glass Pearl Beads
6mm Bicone Glass Beads
4mm Round Seed Beads
Lobster Clasp
0.38mm Tiger Tail Wire
Wire Cutter Pliers
Side Cutting Pliers
How to start the cute bracelet with beads and wire?
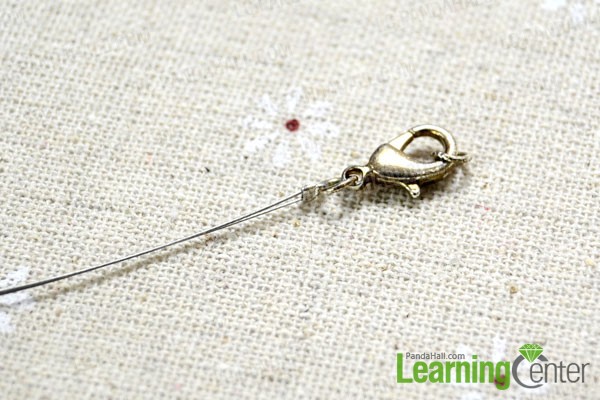
Step 1: Cut a length of 0.38mm tiger tail wire to approximately 120mm. Thread the wire through one jumpring on clasp, make the clasp stay at center and then fix by using a crimp bead.
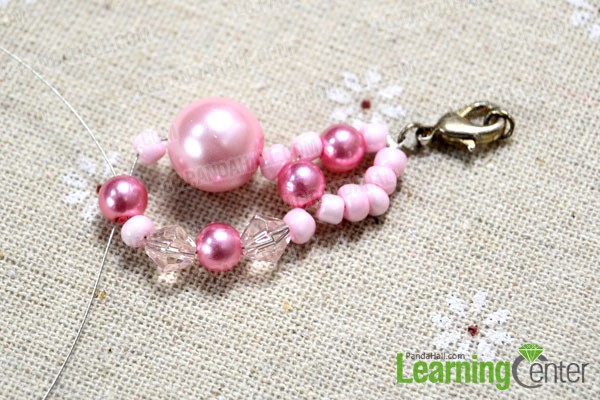
Step 2: String five 4mm seed bead on the left wire end. At the same time, add one 4mm seed bead, one 6mm glass pearl and one 4mm seed bead on the right wire end. Finally, cross two ends through another 6mm glass pearl bead to complete the loop 1.

Step 3: String one 4mm seed bead, one 6mm bicone glass bead, one 6mm glass pearl bead, one 6mm bicone glass bead and one 4mm seed bead on the left wire end. Then, add one 4mm seed bead, one 12mm glass pearl and one 4mm seed bead on the right one. Finally, cross two ends through another 6mm glass pearl bead to complete the loop 2.
Step 4: Keep making the beaded loop 1 and loop 2 until getting a desired length for your bracelet.
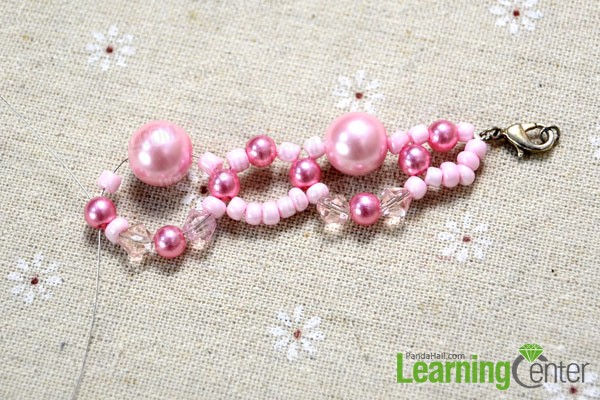
Step 5: Fix another jumpring of clasp on two wire ends by using crimp bead.
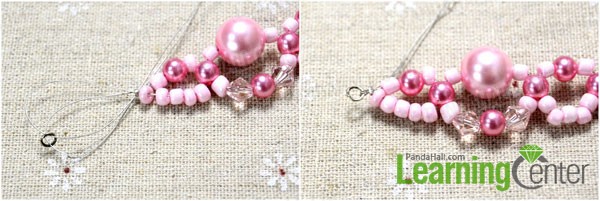
Step 6: Bring the two wire ends back and repeat the loop 1 and loop 2. Pay attention that there is no need to add any beads on left wire end this time.
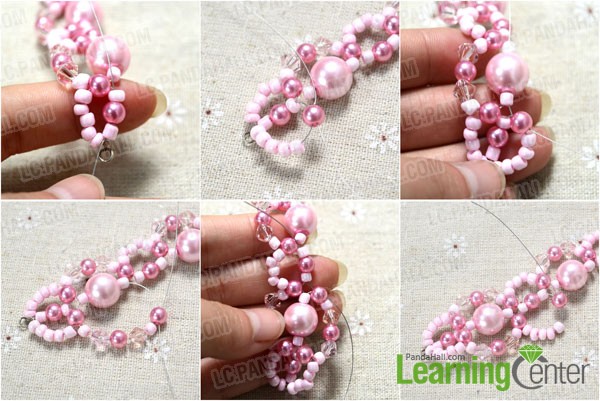
Step 7: After finished the last bead loop, weave the leftover wires backwards through the beaded loop to get them stuck.

Done!

Here you’ve finished your cute bracelets with beads! All though it's not quite elaborate, I think this tutorial on easy beaded bracelets will cheer you up in the spring season! Besides, you may use the green or rainbow color combination for a brighter pattern. Just do what you like!