- Comments (0)
- Mar 13, 2014
How to Make Beaded Earrings with Wire in Bowler Hat Pattern
Summary: This tutorial is to show you how to make beaded earrings with wire and pearls step by step. Take your time and enjoy the hat pattern earrings.

A wire wrapped bowler hat pattern is a new idea for earrings making. Isn’t it an interesting project? Dose it deserve your time and effort for trying? Later I will decrypt the tutorial about how to make beaded earrings with wire in bowler hat pattern.
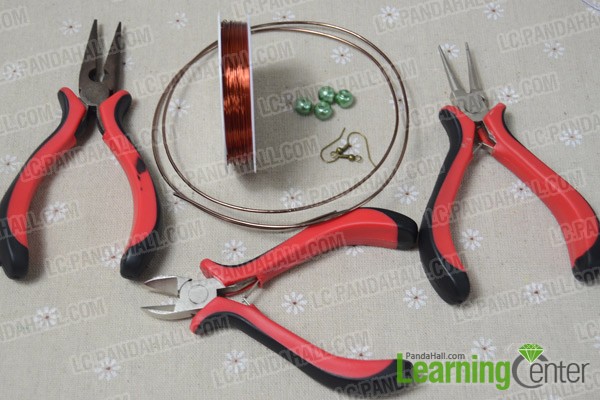
Necessities for the wire bead earrings:
1.5mm brown aluminum wire
0.5mm brown copper wire
6mm green glass pearls
Bronze earring hooks
Round nose plier
Wire cutter plier
Side cutting plier
How to make beaded earrings with wire and pearls:
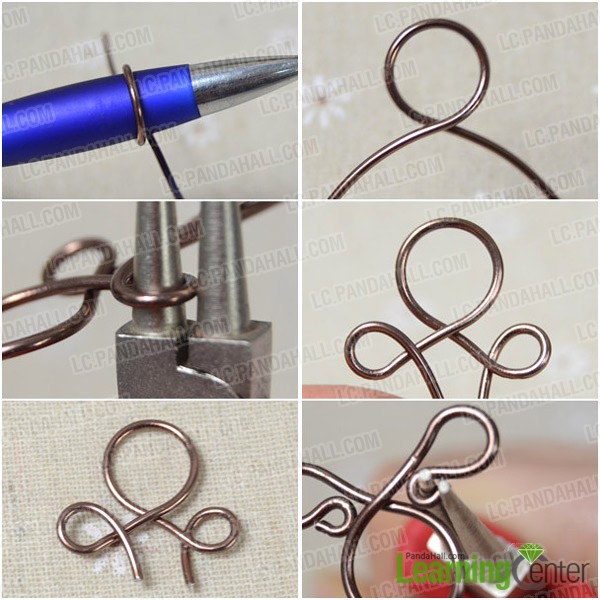
Step 1: Wire wrap hat pattern
1st, cut a 25cm length of brown aluminum wire and wrap it around a ball pen;
2nd, the top loop is formed and wire ends are crossed;
3rd, loop both end with large round nose;
4th, leave 1cm tails and cut off excess wire ends;
5th, reversely loop the tails with small round nose and brim is done;
6th, repeat above process and make another hat pattern.
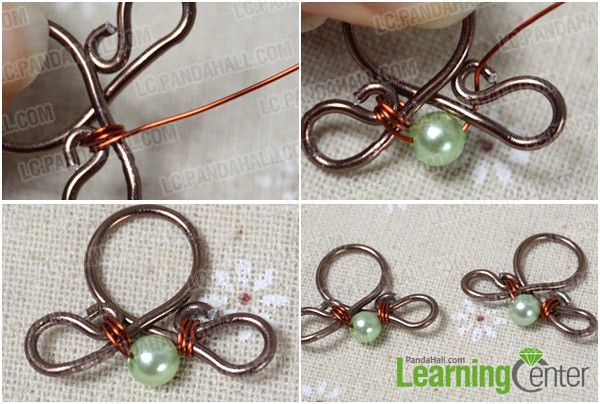
Step 2: attach pearl onto pattern
1st, cut a 30cm length of brown copper wire and coil one end around the brim;
2nd, slide a green pearl onto copper wire;
3rd, coil the other end around the other brim;
4th, repeat to handle the other one.
Step 3: Finish off wire bead earrings
Open a bronze earring hook and attach it onto the hat pattern dangle.
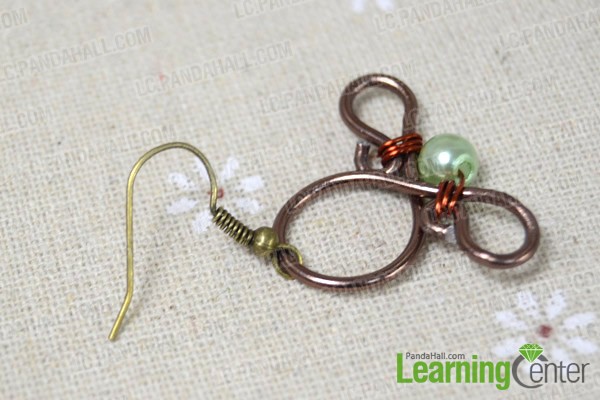
Finally the earrings look like this:
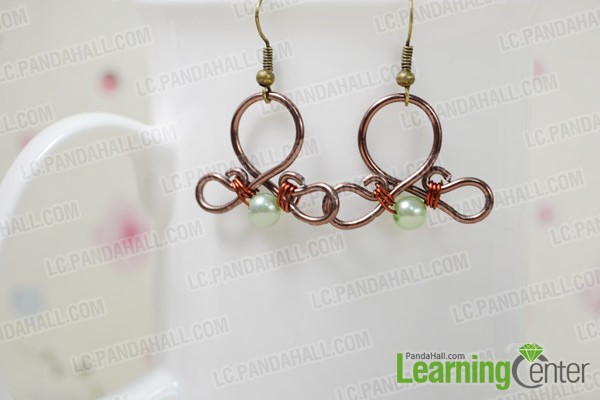
Cheers! The wire bead earrings are done. My tutorial is a simple and typical way to make beaded earrings with wire. Hope everyone of you enjoy this craft idea