- Comments (2)
- Feb 17, 2014
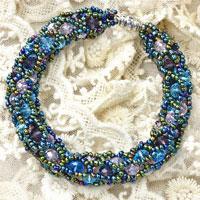
How to Make a Beaded Chevron Bracelet
Summary: In this jewelry making video, we will teach you how to make a beaded chevron bracelet. It is very beautiful and fashion. We are sure you will like it.

Music credits: Deborah Gan, “All Day”
Materials for making beaded chevron bracelet:
--8 grams 3mm Beads in Iris Peacock Blue
--8 grams 2mm Beads in Iris Peacock Blue
--8 grams 2mm Beads in Silver
--A clasp
--Beading needle and thread (0.3mm in diameter)
--Scissors
--A ruler
Chevron bracelet instructions
1. Measure and cut 4 yards of thread. Thread your needle and string on a single bead. Bring the bead down to about 10” away from the thread end. Pass the needle back through the bead on the opposite side. This bead will be used as a stopper.
2. The ladder bead stitch: String on six 3mm beads. Slide the needle up through the first three beads. Now pass the needle through the second set of three beads. You will have what looks like two “columns” or “ladder steps.” To make another column, string on three beads. Then pass the needle through the previous column and then back through the three beads you just strung on. You will have three columns now. Continue making this stitch until you reach your desired length. Mine was 52 columns, which was about 7 inches in length.
3. To attach one half of the clasp --- String on the following (all in iris blue): (2) 2mm beads, (1) 3mm bead, (1) 2mm bead, one half of the clasp, and (1) 2mm bead. Slide the needle back through the 3mm bead. Now string on two more 2mm beads. Pass the needle through the last column of beads. Go back through all the beads your just strung near the clasp in order to stabilize the clasp a little better.
4. The chevron bead stitch --- String on five 2mm beads in iris blue. Pass the needle through the middle bead, two columns down from where you are now. String on five 2mm beads in iris blue. Pass the needle through your original column of beads. You have made your first “V” chevron! To begin work on the next “V”, pass the needle through the next column of beads. It helps if you flip your work over to see the columns better and then flip it around again. Now string on five 2mm beads in iris blue. Pass the needle through the middle bead, two columns down from the column you are current at. String on five more 2mm beads in iris blue. Pass the needle back through your original column (this time it’s the second column from the top of your work). You now have two “V” chevrons! Follow the pattern shown in the video and continue making V’s until you reach the end of your columns. The pattern is as follows: two V’s in iris blue, three in silver, two in iris blue, one in silver, one in iris blue, one in silver, one in iris blue, two in silver, three in iris blue, and one in silver.
5. To attach the other half of the clasp --- When you reach the last column of beads, pass through it. String on the following in order (all in iris blue): (2) 2mm beads, (1) 3mm bead, (1) 2mm bead, the other half of the clasp, and (1) 2mm bead. Pass the needle back through the 3mm bead. Now string on two more 2mm beads. Pass the needle through the last column. Now pass the needle back through all the beads you just added in order to stabilize the clasp. Exit through the last column. Tie the two ends of string together. Take each end and go back through some of the columns and tie them off. Trim the excess string close to your work. The bracelet is now complete!
Comments (2)
-

-
Feb 19, 2014 at 07:40 AM Abdul Khadar
Superb......I like this
-
-
Mar 25, 2014 at 02:13 PM dennis siple
Very nice.


