- Comments (0)
- Jan 17, 2014
Making an Adjustable Turquoise and Pearl Bracelet Within 2 Steps
Summary: Here is displayed a 2-step project about making an adjustable bracelet with turquoise and pearl beads. Hope you like it!

The core of this turquoise and pearl bracelet lies on the making of an adjustable closure. In order to make the bracelet neat-looking, I make a double sliding knot that can be utilized as an “Invisible” closure in this tutorial.
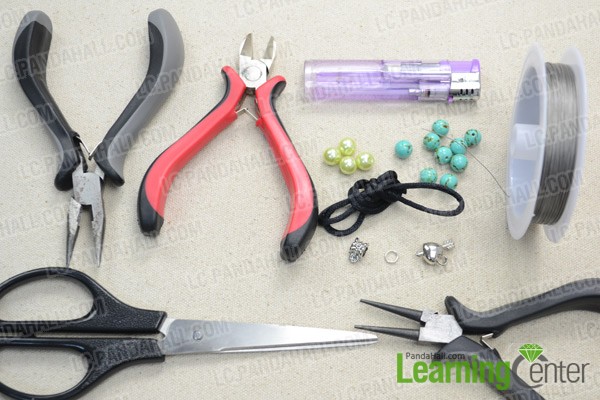
Necessities for turquoise and pearl bracelet:
8mm ivory glass pearls
8mm synthetic turquoise beads
0.3mm tiger tail wire
2mm black nylon thread
Tibetan style hanger
Heart arrow pendant
Jump ring
Crimp beads&covers
Round nose plier
Flat nose plier
Wire cutter
Scissors
Lighter
Instructions on how to make adjustable turquoise and pearl bracelet:
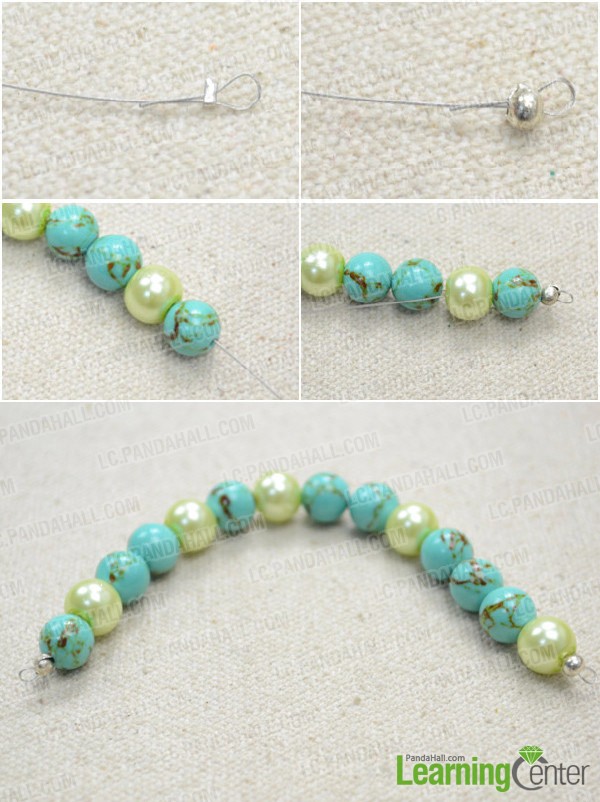
Step 1: Make beaded part
1st, cut a 25cm length of tiger tail, loop one end and secure the loop with a crimp bead;
2nd, crimp down the bead and hide it with a silvery cover;
3rd, string turquoise and pearls onto wire in your favorite pattern;
4th, loop the other end of tiger tail and secure the loop with another crimp bead;
5th, add crimp bead cover again, back both ends through adjoining beads and trim off excess wire.
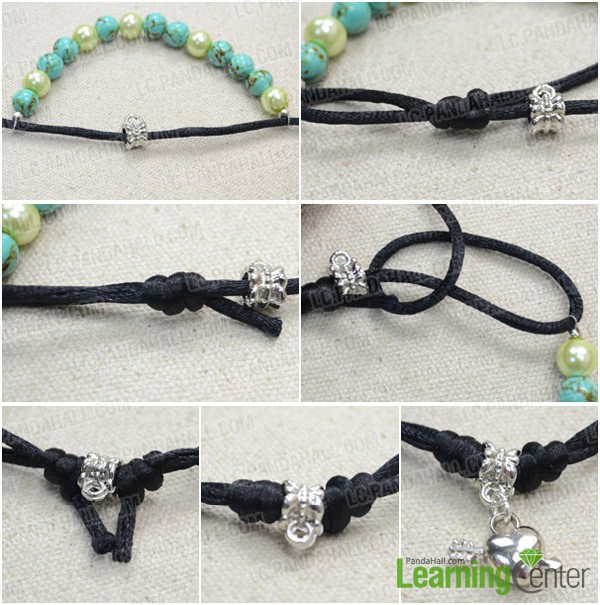
Step 2: Make adjustable closure
1st, cut a 30cm length of black thread and slide a hanger onto it;
2nd, thread both ends of black thread through above loops;
3rd, make a 2cm loop at left side and tie a sliding knot rightward;
4th, cut off excess left end and leave a 1cm tail;
5th, make a 2cm loop at right side and tie a sliding knot leftward, and then trim off excess right end with leaving 1cm tail;
6th, the loop size all depends on your wrist size; generally loop size =1/2 (wrist circumstance – beaded part – hanger size);
7th, melt the thread ends; because the melt ends face inward to hanger, therefore the closure become “invisible”;
8th, attach pendant to the hanger.
The bracelet finally looks like this:
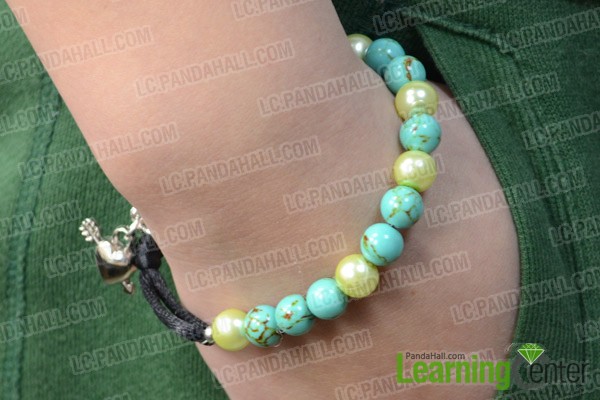
So the DIY turquoise and pearl bracelet is done! Notice that the cord closure plus beaded part is the whole length of your bracelet, which should be snuggly suitable for your wrist. While you wear this bracelet, you need to slowly slide the sliding knots to let hand in and adjust them back to the hanger after. So the bracelet on your wrist is always unified and looks like no-closure.


