- Comments (1)
- Jan 16, 2014
How to Make a Two Color Woven Fishtail Friendship Bracelet Step by Step
Summary: Throughout this instruction, I will show you how to make a fishtail friendship bracelet step by step, a stunning pattern that is very similar to the 8-strand fishtail one!

Learn to make a fishtail friendship bracelet, you can choose a braided pattern, or today's design consists of 4 strands only. At first, select two rubber cord wristband as a base. And in the following, you only need to weave the two cords through them for creating an alternating chevron of two colors. Getting interested? Just check it out.
Supplies needed for making your own wristband:
1mm Waxed Cord
Rubber Band Bracelet
Scissors
Lighter (optional)
Hot Melt Glue Gun
Tiger Tail Wire (assistive)

How to start the woven fishtail friendship bracelet?
Step 1: Prepare the cord
1st, cut two lengths of waxed cord, about 150cm for each color;
2nd, tie the blue cord up to one end of rubber band bracelet by tying a sliding knot. Tighten the knot as tautly as possible;
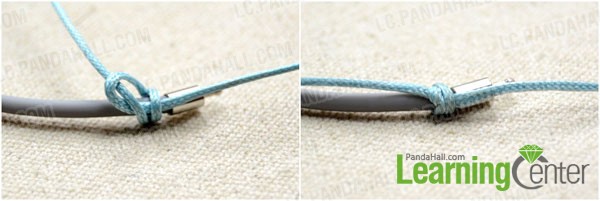
3rd, repeat the same process with orange cord and another rubber bracelet.

Step 2: Start to make your own wristband
1st, hold the two parts with fingers;
2nd, loop the blue cord against the right rubber band in a clockwise direction;
3rd, loop the orange cord against the blue cord and left rubber band in a counterclockwise direction;
4th, fasten two loops with fingers;
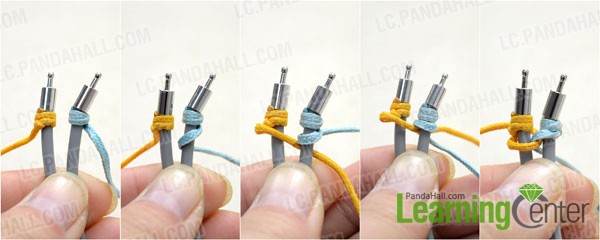
5th, make a clockwise loop against the right rubber band with the blue cord;
6th, counterclockwise wrap the blue cord and left rubber band by using the orange;
7th, tighten the cords with fingers;

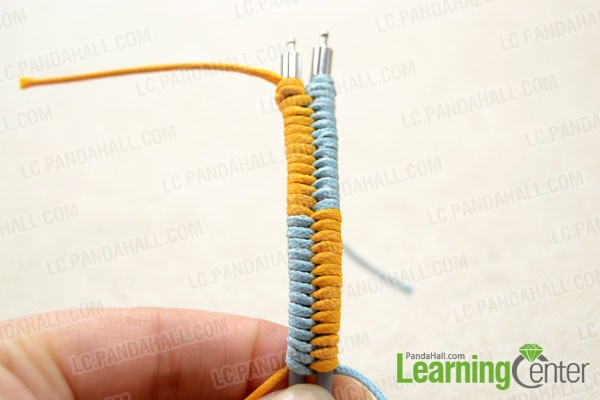
8th, making loops with the blue and orange cords alternately for 10~13times.
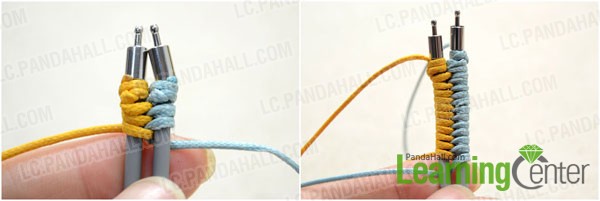
Step 3: Replace the positions of two colors
1st, in the last segment, direct the blue cord leftwards after making a loop with it;
2nd, similarly, pull the orange cord rightwards after making loop with it;
3rd, making loops with the blue and orange cords alternately for 10~13times, as you did in step 1.
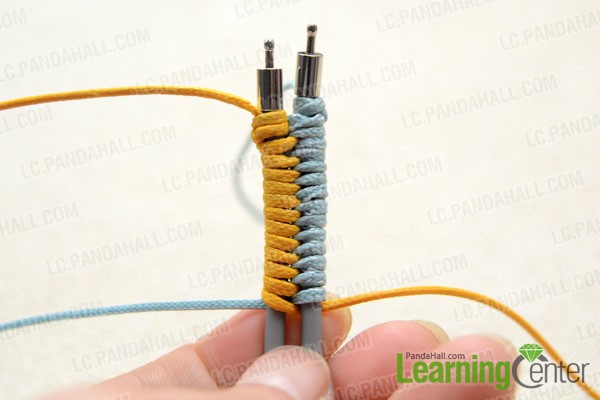
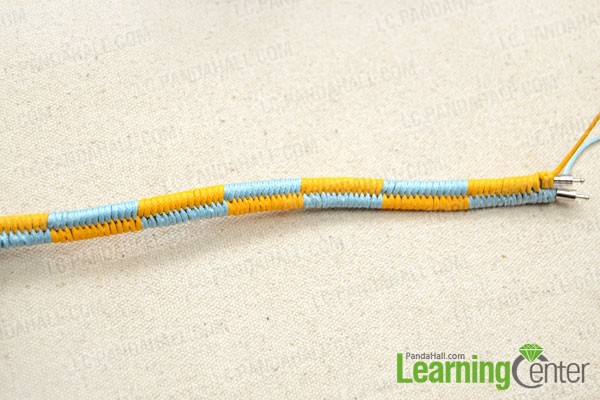
Step 4: Make the rest parts for woven friendship bracelets
1st, replace the positions of blue and orange cords;
2nd, make the two color fishtail patterns in order.
Step 5: Deal with the ending of bracelet
1st, take the excess blue (or orange) cord. Wrap about 3~5 times around the rest cord and two rubber bands;
2nd, fold a short length of tiger tail wire and pass it through the wraps from end;
3rd, pass the blue cord through the folded wire loop;
4th, pull the wire hard to bring the blue cord pass through the wraps;
5th, secure the cord tail with drops of glue;

6th, back to the starting, remove the excess cord and then seal by using lighter.
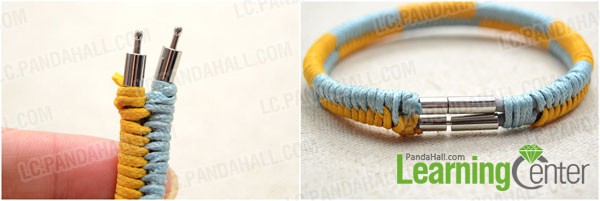
Done!

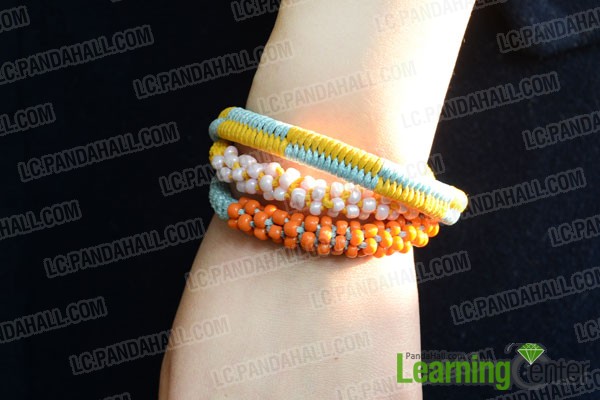
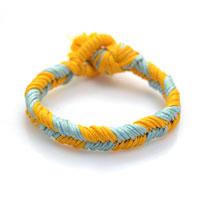
Here is a photo of how it looks like when stacking with my previous Chinese Crown Knot Bracelet Using Waxed Cord.
Whatever pattern you are going to make, my step-by-step instruction makes it a cinch for you to make such type of woven fishtail friendship bracelet. And, with the right color choice, it can work on a guy or girl perfectly!
Comments (1)
-

-
Feb 14, 2014 at 05:23 AM Cathleen Reese
I just love this and love to weave! TY1


