- Comments (0)
- Jan 04, 2014
How to Make a Lovely Santa Claus with Ribbon for Christmas
Summary: This tutorial is for making santa claus crafts for kids. Santa Claus must be the most popular person at Christmas festival. Let’s how to make a santa claus now!

When at Christmas eve, kids must be expecting santa claus to send gifts to them. If you DIY such a lovely santa claus craft for your kid, she/he will definitely love it. Just get some ribbons and four buttons, follow our instructions on making santa claus.
Materials needed for making santa claus:
Red ribbon (2.5” of 7/8” width)
Pink ribbon (1.5” of 7/8” width)
Light brown ribbon (3/8” width)
korker ribbon (3/8” wide)
White ribbon

How to make a lovely santa claus for Christmas?
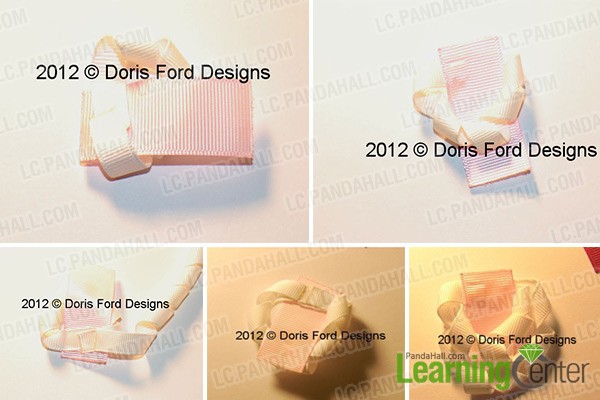
Step 1: Make beard for santa claus
1st, heat seal both ends of the pink ribbon and one end of the korker ribbon. Glue this end of the korker ribbon to the side of the pink ribbon;
2nd, swing the white ribbon around to match it up to the other side, with the middle of it being 1/2” up from the bottom edge. Cut the ribbon off so you have a small end to glue to the back;
3rd, heat seal the end and glue it down on the other side across from the first one. At this point, you can put a small spot of glue under the front loop to keep it from shifting;
4th, heat seal the end of the ribbon again and glue it down over the first end you glued down, loop it around like you did the first time, cut it off and heat seal and glue this end down.
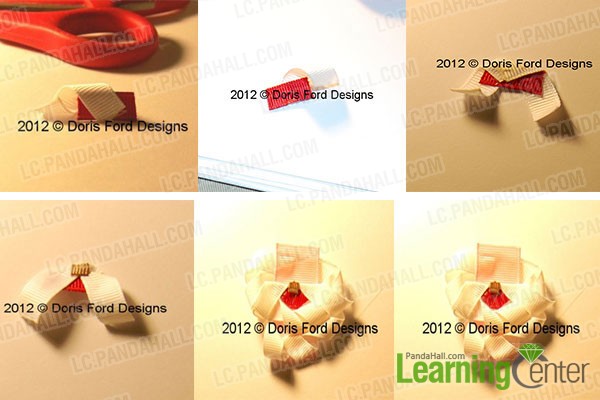
Step2 : Shape the face for santa claus
1st,now start on the mustache and mouth for his face: cut a 1/2” piece of red ribbon and a small piece of the korker ribbon, heat seal both ends of each ribbon and glue the white onto the red at an angle;
2nd, cut another piece of the white, heat seal both ends and glue to the other side, like showed. cut a small square from the light brown ribbon and heat seal the edges and glue to the front of the mustache;
3rd, glue the mustache piece to the face above the 2 rows of the beard ribbon, then glue two 7mm eyes above this;
4th, heat seal both ends of the red 7/8” ribbon and fold over as shown.
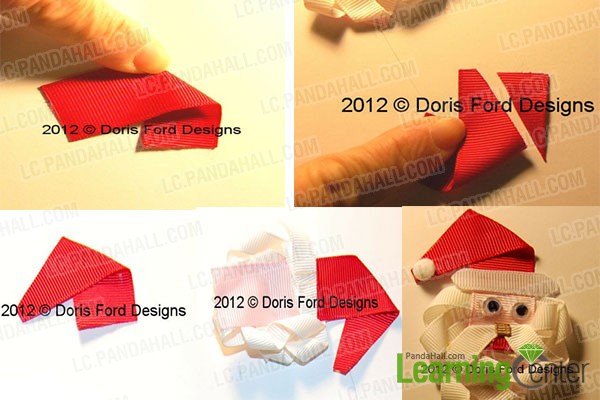
Step3: Add red hat for santa claus
1st, cut the ribbon at an angle starting at the fold and going toward the end that will be the top of the hat, heat seal this cut edge;
2nd, inside the fold put a small spot of glue and fold it back over the glue to keep it folded;
3rd, glue the bottom edge of the hat to the back of the head, right above the glued ends of the beard, glue a white pom pom on the tip of the hat on the front;
4th, cut a piece of flat white ribbon and round both ends and heat seal that, glue to the front right where the hat and face are joined, cover a clip and glue it to the back.
If the face feels a little flimsy and wants to bend, before you add the clip, clue a few more layers of pink ribbon on the back, to reinforce it. If any of the pink shows below the bottom of the beard you can trim away those small corners and heat seal. Just be very careful not to cut or heat seal the back of the beard ribbon.
Tada!
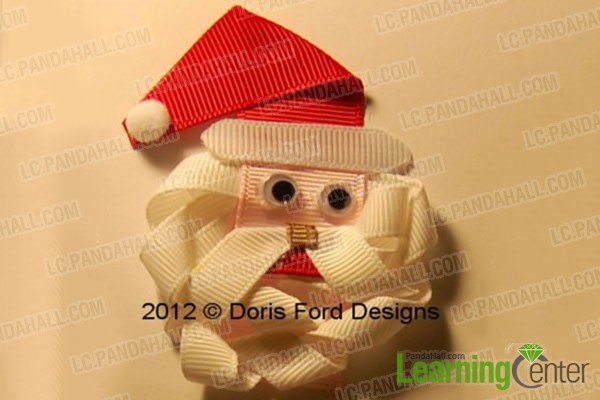
Here is the finished santa claus craft! It can be a satisfied decoration on your kid’s bag. Or make it a brooch to wear on the clothes of your kids. Just imagine how proud you will feel when your friends ask your kid, “where did you get a lovely santa claus?” and she said, “ my mom!”