- Comments (0)
- Nov 24, 2013
Instructions for a Right Angle Weave Bead Bracelet Pattern
Summary: This tutorial will show you a step-by-step right angle weave instructions for a red statement bead bracelet pattern. Click to know the details.

Our learning center has a variety of free bead bracelet patterns which are always available for all visitors. Many patterns are created with right angle weave stitches; and this time I would like to add a right angle weave statement bracelet to the collection.
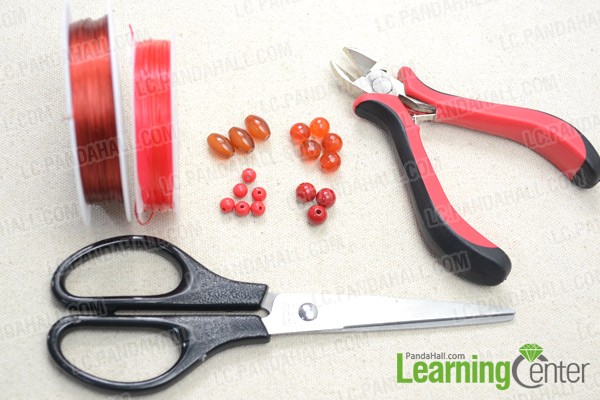
The necessities for the right angle weave bead bracelet pattern:
0.38mm red tiger tail wire
0.8mm red crystal thread
Orange oval glass beads
8mm Red glass faceted beads
8mm red acrylic beads
6mm red acrylic beads
Wire cutter
Scissors
Right angle weave instructions for the bead bracelet pattern:
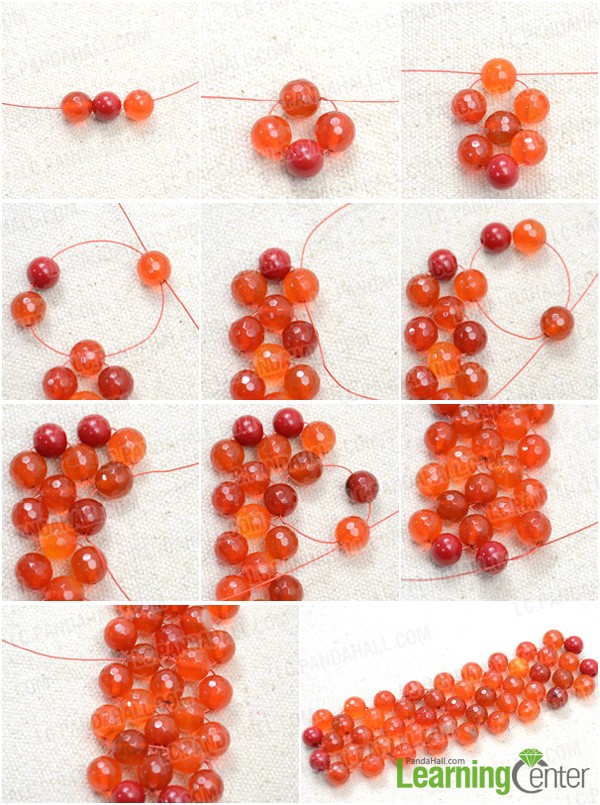
Step 1: Make the front side of bead bracelet
1st, cut 1m length of tiger tail wire and string a red glass bead, a red acrylic bead and another red glass beads on;
2nd, cross both ends through a red glass bead;
3rd, tighten the wire and repeat such right angle weave stitch 8 or 9 times;
4th, at the last stitch string a red glass and a red acrylic bead to left end, and then cross both ends through another red glass bead, so the wire ends turn to right side;
5th, the first row is done;
6th, string a red acrylic bead and a glass beads onto upper end;
7th, cross both ends through a new glass bead and tighten the wire;
8th, thread left end through the adjoining bead, add a symmetrical glass bead onto right end and cross both ends through another glass bead;
9th, repeat such right angle weave stitch to finish the second row;
10th, tie a firm knot at last stitch and back both ends through the woven beads;
11th, cut off excess wire.
Step 2: Make the back side of bead bracelet
1st, cut a 40cm length of elastic wire, combine it to one end of above beaded pattern and string an oval glass bead to each end;
2nd, make two sets of right angle stitch with small acrylic beads;
3rd, combine the last stitch to the other end of above beaded pattern;
4th, similarly make two rows, so the back side is done.

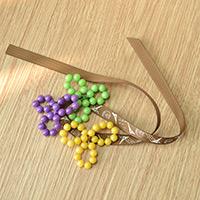
The right angle weave bead bracelet looks like:

Tada! I have done this red glass bead bracelet! As you can see, right angle weave stitch is quite simple to do; now it’s your turn to try your own version. Don’t you want to wear the sparkly beaded bracelet?