- Comments (0)
- Nov 14, 2013
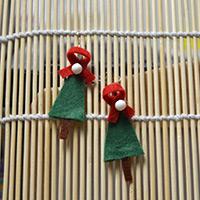
How to Make a Christmas Tree Angel Topper with 1mm Nylon Thread
Summary: This project will show you how to make a Christmas angel by using 13 strands 1mm nylon thread. Only the Double Half Hitch tying technique is required!

Traditionally, there are two most popular kinds of Christmas tree toppers: the angels and the star. Therefore, for a mini Christmas tree such as my previous ribbon Christmas tree, how to make a topper for it? Here, I will show you how I make a simple Christmas angel that only consists of one 10mm pearl bead, one jumpring and 13 strands 1mm nylon thread.
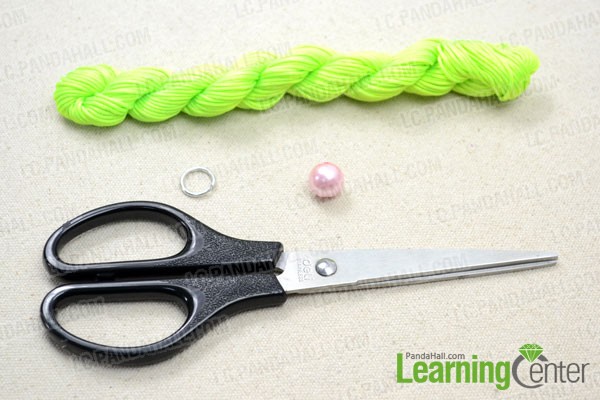
Supplies needed for making the Christmas angel:
1mm Nylon Thread
10mm Acrylic Pearl Bead
Jumpring
Scissors
Lighter (not shown)
Tape or Clip (not shown)
Instructions on making the string Christmas angel topper:
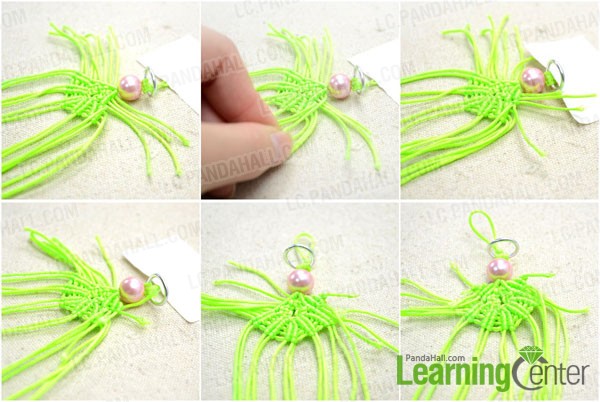
Step 1: Prepare the strings and make the head of angel
1st, cut a 40cm piece of 1mm nylon thread;
2nd, fold the thread to get two segments measuring 30cm (left) and 10cm (right);
3rd, form a loop by tying an overhand knot with two ends;
4th, take the jumpring and then thread the thread through;
5th, tie a Double Half Hitch knot with each thread;
6th, thread the ends downwards through the jumpring and you’ll get the angel's halo;
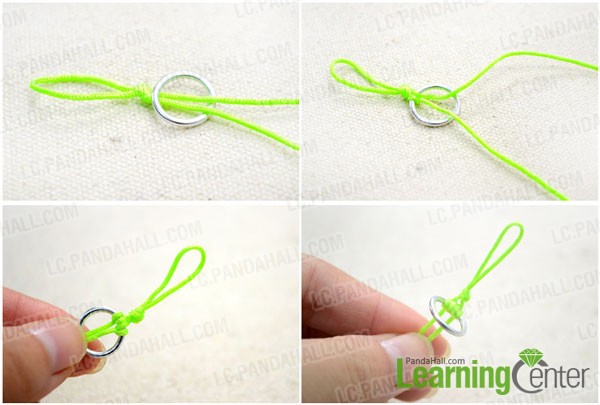
7th, string the 10mm pearl bead for the angel’s head. Push the bead upwards to the halo and then secure with a half hitch knot.

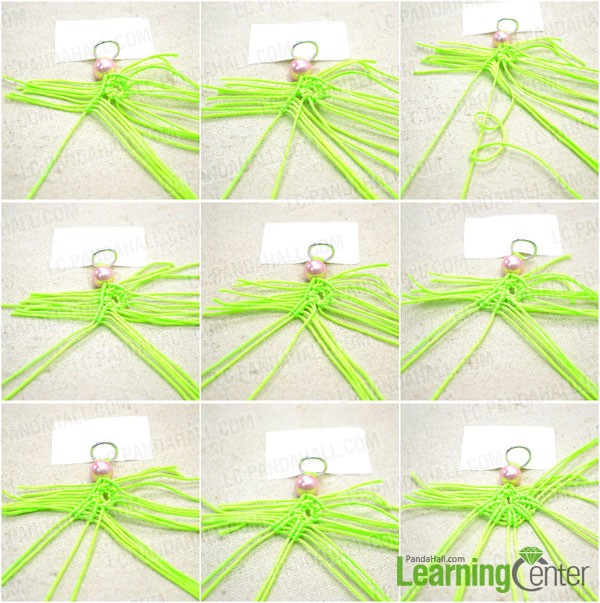
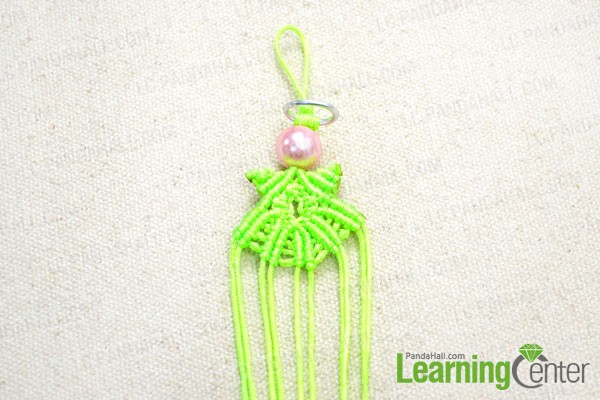
Step 2: Knot the body of string angel
1st, prepare 8 strands of 20cm threads;
2nd, add 4 strings per holding end by using Double Half Hitch knot; (Tips: when add the strings, leave about 2 times longer than the length shows in the photo at the other end of string. They will be used to create the wings of angel later. )

3rd, pick out the central 4 of newly added 8 strings, then regard the central 2 of 4 stringd as holding end and tie a square knot;
3rd, divide the 8 strings into left and right parts again. Tie 2 square knots with the 4 strings;
4th, repeat the 3rd procedure again;

5th, on the left end, add another 4 strands of 20cm thread. Now, we will get 14 threads in total. Regard the newly added 4 string as main working ends and the rest 10 strings as holding ends, and then do the Double Half Hitch for the body of angel.
Step 3: Make the wings for angel
1st, we’ll back to the 4 leftover tails on the right side. Take the first string downwards to work as holding end, and then do Double Half Hitch knot with rest 3 strings;
2nd, regard the second string as holding end and do Double Half Hitch knot with rest 2 strings;
3rd, regard the third string as holding end and do Double Half Hitch knot with rest 1 string;
4th, repeat the same process on left side;
5th, keep the 10 vertical strings at bottom and then trim off the excess. Seal the cuts with lighter.
Step 4: Finish the project
Regard the left-most string as holding end, do 1 or 2 Double Half Hitch knots with rest 9 strings.
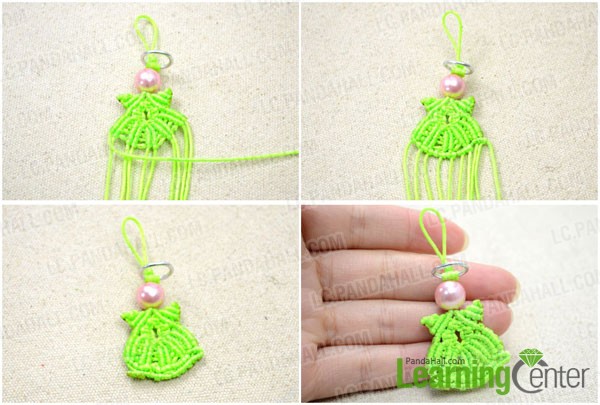
Trim off the excess wire and there you'll finish the Christmas angel craft!

Just let this cute string angel set the atmosphere for a homespun Christmas that filled with small delights. Though the mistake brings a little trouble while making the wings of my Christmas angel, yet I overcame all obstacles. Practice makes perfect!