- Comments (0)
- Nov 13, 2013
How to Make Named Cord Loop Phone Charms with Acrylic Alphabet Beads
Summary: Wanna do something meaningful for your beloved? DIY a special cell phone charm with her/his name on it is a great idea. Follow this tutorial on how to make phone charms with acrylic alphabet beads!

This tutorial aims at showing you how I made a cute named cell phone charm. For me Cretu (last name) Maria (name) has a special significance as the grandmother who raised me. So I made such a letter charm filled with my gratitude and love to her! This phone charm is definitely easy and with a very low cost. In addition, the required time is only 10 minutes.
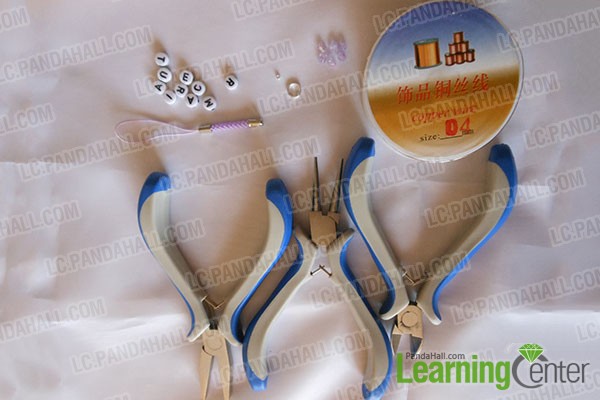
Materials needed for making the named phone charm:
purple heart loop
ab color acrylic beads
jumpring and double jumpring iron loop mix
pliers set
How to start the special named phone charm?
Step 1: Prepare the wire and slide beads onto it
1st, cut a fairly long piece of brass wire, about 30 cm, bend it properly for sliding beads onto it;
2nd, put half an ab color acrylic beads acrylic alphabet beads and two ( for us M and C) on each side of the wire, then slide another acrylic beads ab color but normally get a line and the other, stuffing it in the opposite direction;
3rd, shoot some wires to let no space with the help of pliers set. Put the thread properly! Please kindly note that letter M is now at the bottom. So slide letter A on the same wire of letter C, so does letter R because they changed their position;
4th, repeat sliding letter beads and acrylic beads ab color onto the wire as the same referred until the full name is finished. Tuck it in a straight line properly.

Step 2: Add the purple heart loop to finish the phone charms
1st, get both wires in a brass crimp beads so that they come to an end;
2nd, take a jumpring double loop and to make a loop, then put them again in brass crimp beads and jump well;
3rd, wires plus introduce them again in a straight line in acrylic alphabet beads, shoot well and then turtle brass crimp beads to be stable and not fall apart;
4th, Cut excess thread and adjust it well by pliers. Take care of your fingers when using the tools!

The personalized cord loop letter charm is ready as showed:
Wow! The phone charm with my grandmother’s name is finished here. If you are looking for a distinctive gift for your family, or finding ways to ingratiate yourself with she/him, then DIY a named phone charm now. It really works. You must have already got the hang of this tutorial, right?