- Comments (0)
- Nov 13, 2013
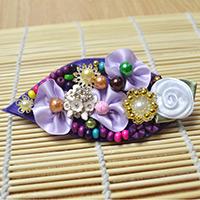
How to Make Hair Band - Instructions on DIY Hair Band for Girls
Summary: This is the instructions on how to make a simple and chic hair band for girls; after this tutorial, you will find it a great fun to make a DIY hair band by yourself.

This DIY hair band is great because it is easy to make and merely requires a few of materials; the golden beaded chain and navy satin ribbon look very beautiful. I think this hair band tutorial is quite suitable for those girls who loves handmade hair accessory very much.
Materials and tools for the hair band:
Black hair tie
2mm pink suede cord
4mm golden metal beads
6mm navy satin ribbon
0.3mm tiger tail wire
Crimp beads
Crimp bead covers
Flat nose plier
Glue gun
Scissors

Instructions on making hair band for girls:
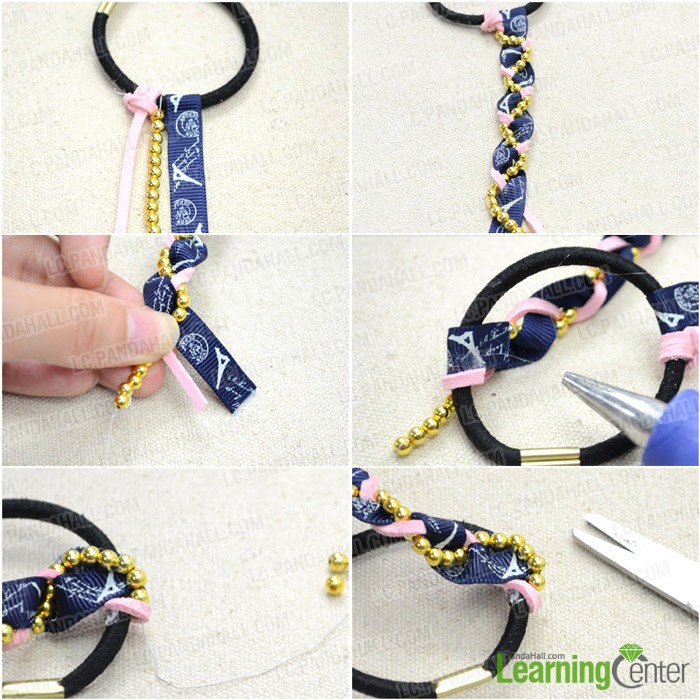
Step 1: Prepare bead chain, suede cord and ribbon
1st, cut a 60cm length of tiger tail, fold one end over hair tie and crimp this end with flat nose plier;
2nd, add a crimp bead cover and string golden beads to wire;
3rd, when the beaded length reaches about 50cm, back wire through the bead last strung to secure the beads from falling off
4th, cut a 60cm length of suede cord and a 60cm length of ribbon;
5th, knot them over hair tie beside the bead chain, and stick them to where they are with glue gun.

Step 2: Braid the hair band
1st, make triple strand braiding all along the way;
2nd, when reaching end, glue ribbon and suede cord to the position which is opposite to the previous end;
3rd, remove excess beads from bead chain if necessary, fold the wire tail over hair tie and crimp this end.
The final look is like this:
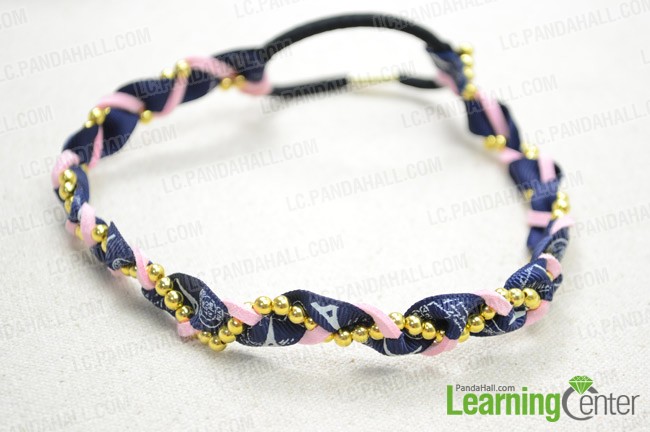
Tada! You have finished this DIY braided hair band; as you can see, making hair band is such a fun; so why not making your own hair band to top off a casual outfit. I believe it is a great addition to your daily make-up.