- Comments (0)
- Oct 28, 2013
Tutorial - How to Make a Rainbow Chainmail Necklace with Jumprings
Summary: This chainmail jewelry tutorial will teach you how to make a chainmail necklace that features a rainbow pattern. All techniques required are basic and may fit learners at all levels!

Here are instructions for how to make a chainmail necklace that as simple as how it gets. Despite its weird name, this chainmail necklace features a rainbow pattern may make you a wearable and artistic accessory. Here, let’s get started how the chainmail necklace tutorial.
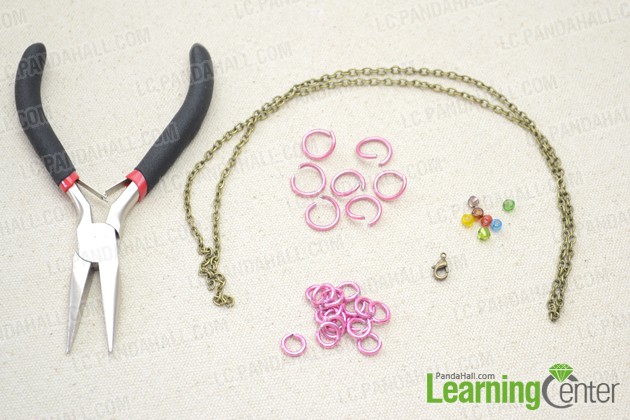
Supplies needed in the chainmail necklace tutorial:
Medium-sized Jumpring
Small-sized Jumpring
4mm Round Seed Bead
Lobster Claw Clasp
Chain
Flat Nose Pliers
How to start the rainbow chainmail necklace?
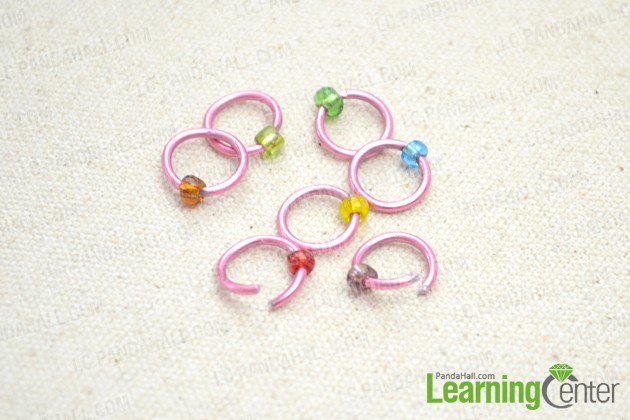
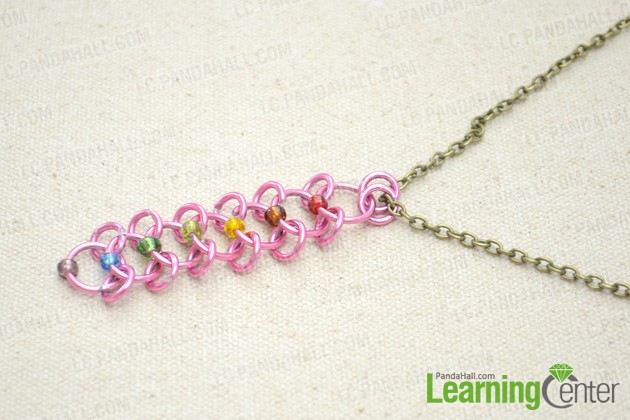
Step1: Slide the colorful seed bead onto medium-sized jumpring respectively. Here I pick them 7 colors in a rainbow.
Step2: Stack the seven beaded jumprings as picture shows. Each time keep the ensuing one go under the previous one.
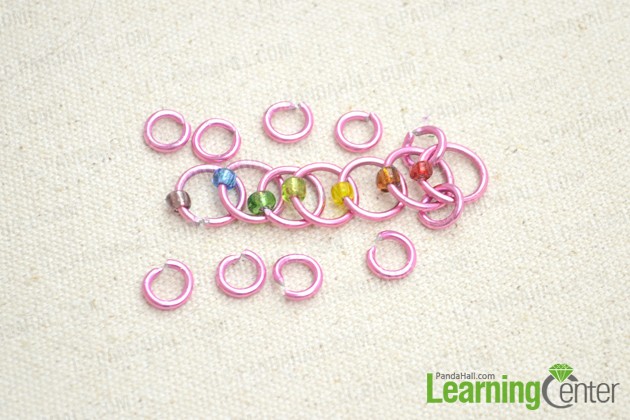
Step3: Connect each two medium-sized jumprings using two small-sized jumprings. During this make sure that each jumpring stays in place.
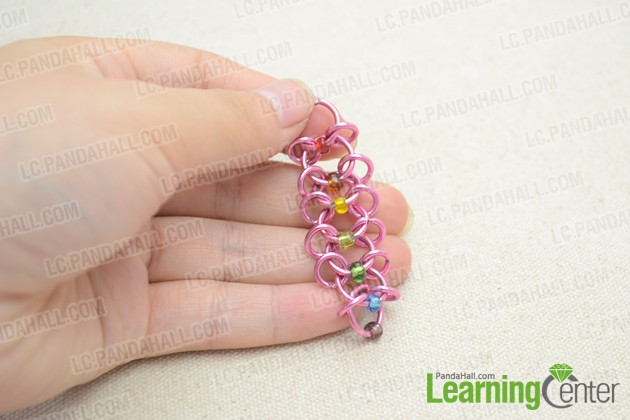
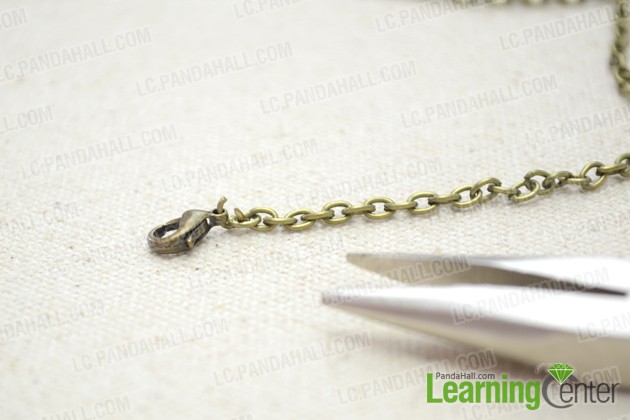
Step4: After finishing the step 3 above, Attach another two small-sized jumprings on the first jumpring. Then, cut a length of chain and thread through the two small-sized jumprings.
Step5: On either chain end, attach a lobster claw clasp if necessary.
Done!
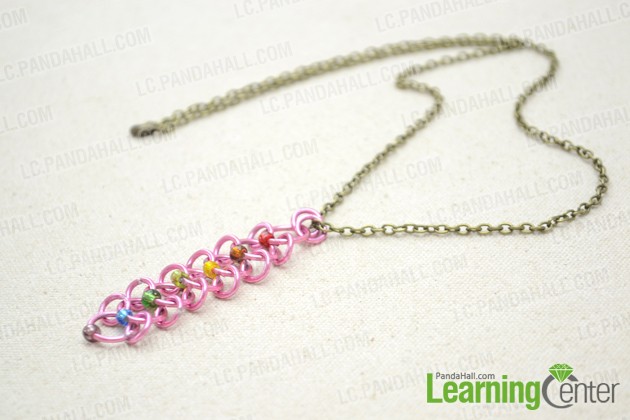
So, you’ve finished all things about today’s chainmail jewelry tutorial. Will you regard it as an opening to your chainmail projects? Take your jumprings, add them together and build necklaces, bracelets and earrings. Just be fun and creative!