- Comments (0)
- Oct 14, 2013
How to Make a Beaded Cuff Bracelet – An Elegant Bracelet Design
Summary: Perfect combination of clear bicone beads and golden round beads in this “how to make a beaded cuff bracelet” tutorial; you will like this beaded bracelet design.
Have you ever wondered how to make a pretty beaded cuff bracelet out of simple glass and metal beads? If so, I recommend you to read this tutorial about making a blingy cuff bracelet with basic right angle stitch technique.

Materials and tools for how to make a beaded cuff bracelet:
6mm clear electroplate glass beads AB color
0.3mm tiger tail wire
Crimp beads
Lobster clasp
Wire cutter

Instructions on making a beaded cuff bracelet:
Step 1: Make first layer of beaded cuff
1st, pick a piece of tiger tail wire fold it in half and attach one bead tip to the fold;
2nd, cross both ends through a bicone bead, tighten the wire, add 1 bead to each end and cross both ends through another bead;
3rd, repeat above right angle stitch till the length is suitable for your wrist;
4th, add another bead tip to the last right angle stitch.

Step 2: Finish the beaded cuff
1st, thread lower end through another 2 beads, upper end back through the sided bead in first layer, and cross both ends through a new bead;
2nd, continue this stitch till you finish the whole length;
3rd, make both ends back through the sided beads in two layers, and between each two beads, add a golden aluminum bead;

Step 3: attach clasp onto cuff
1st, while finish the whole bracelet, cut off excess tiger tail wire;
2nd, attach your clasp and jump ring onto both ends.
.jpg)
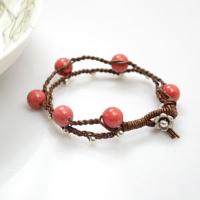
The final look is like this:

Tada! This beaded cuff bracelet design is finished here. Although making this kind of beaded cuff bracelet is a little time-consuming, the result will prove every minute you spend is worthwhile.