- Comments (0)
- Dec 22, 2013
Step-by-step Instructions on Making a Sailor Knot Bracelet with 2mm Wire
Summary: Wondered how to make an extraordinary sailor knot bracelet? With this sailor knot bracelet tutorial and inches of 2mm aluminum wire, you're good to go!

As a useful decorative knot, sailors knot is a great technique while making most bracelets, particularly with leather and rope. However, in today’s tutorial, I will show you the way making a sailor knot bracelet by using 2mm aluminum wire. The processes are easy yet the result is really fabulous!
Supplies needed for making the wire sailor knot bracelet:
2mm Aluminum Wire
Marker Pen (optional)
Side Cutting Pliers
Wire Cutter Pliers
Round Nose Pliers

How to start the sailor knot bracelet?
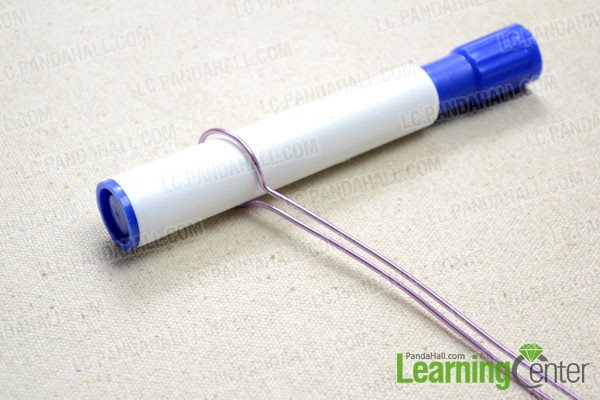
Step 1: Cut two pieces of 2mm aluminum wire to approximately 30cm long. Take the marker pen and curve the center of wires around it.
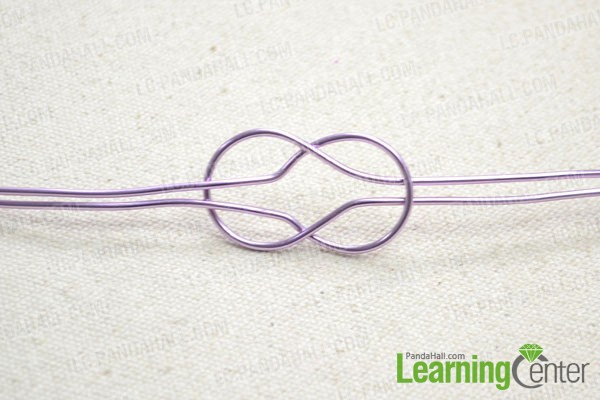
Step 2: Create the sailor knot pattern. Place the two wire components on a flat as picture show. Then, insert the right looped part into the left one. Finally, upwards thread the tails of left part through the right looped part.

Pull until the two looped parts get stuck.
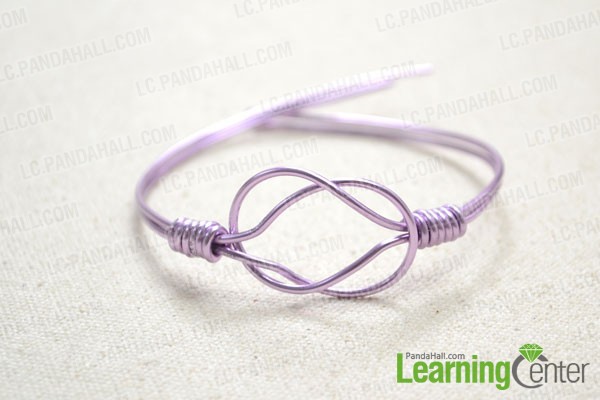
Step 3: Take another two short pieces of wire and wrap the part next to the looped part.

Step 4: Shape the bracelet against a round object, such as a beads container.
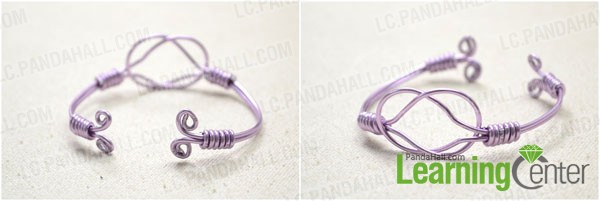
Step 5: Roll the tails outwards by using the round nose pliers.

Step 6: Make some wraps nearby as did in step 3.
Done!

Now, you’ve had your wire knot bracelet finished! As you may have noticed, one of the favorite craft materials is the wire, and so do i. You can customize it to transform it into any type of accessory, such as a 5-Strand Woven Wire Ring or a Handcrafted wire necklace.